Wi-Fi 802.1x Configuration
Enterprise Wi-Fi is currently only supported on gateways running our generic profiles. The following is a list of currently supported 802.1x authentication methods.
TTLS-MSCHAPv2
-
Set up gateway Wi-Fi as described in the Wi-Fi configuration guide.
-
Ensure Wireless Security is set to
WPA2/WPA3-Enterprise

-
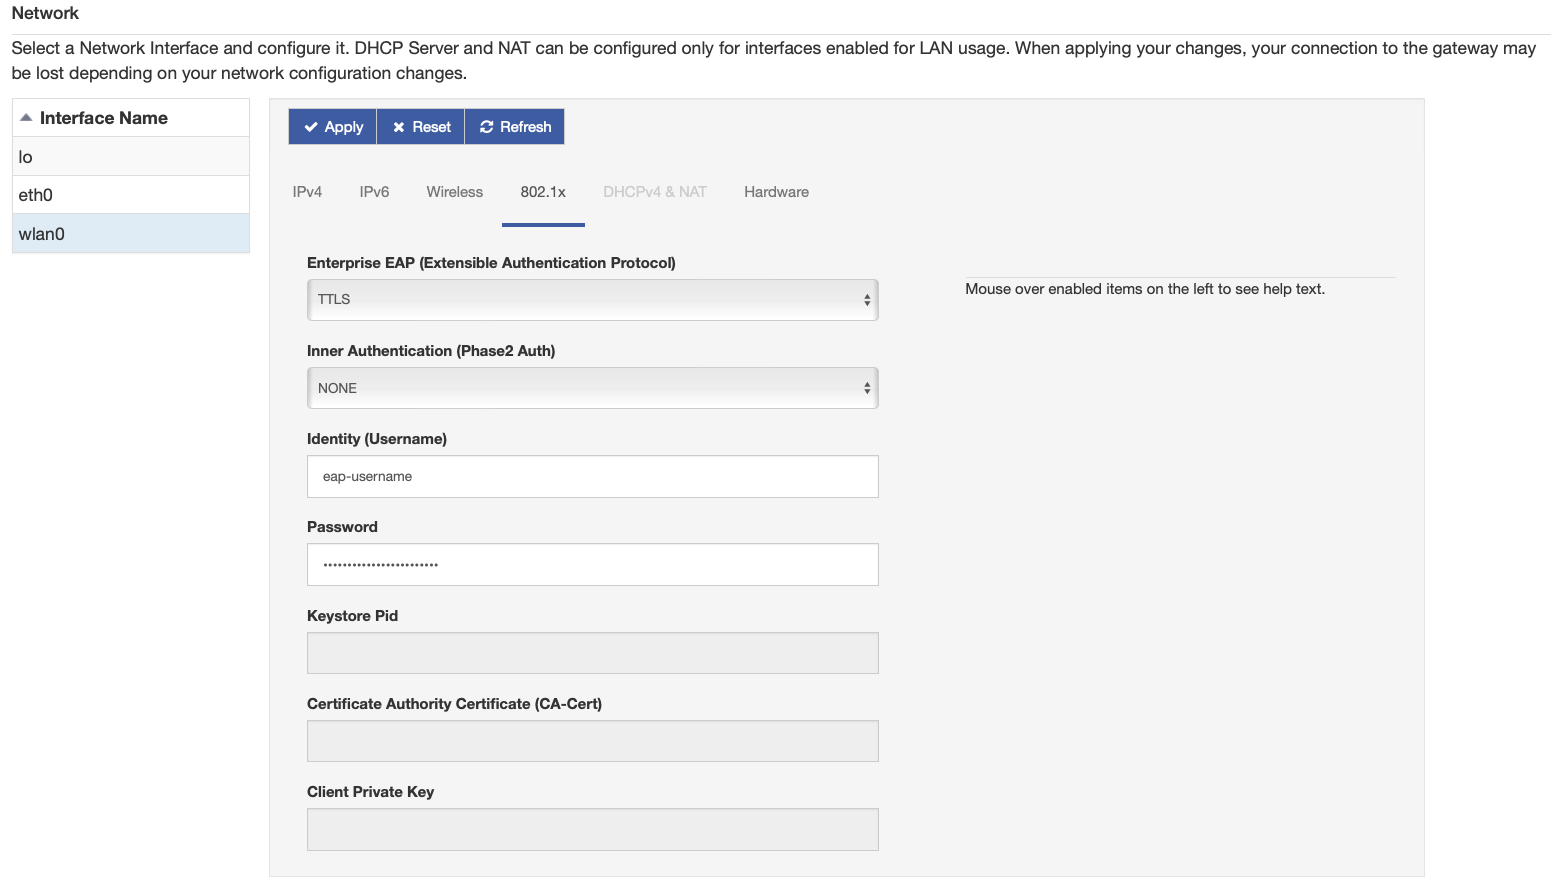
Select the 802.1x tab
-
Set Enteprise EAP ->
TTLS -
Set Inner Authentication ->
MSCHAPV2 -
Set
Identity (Username) -
Set
Password -
Press 'Apply'
The configuration should look like the following:
PEAP-MSCHAPv2
- Set up gateway Wi-Fi as described in the Wi-Fi configuration guide.
- Ensure Wireless Security is set to
WPA2/WPA3-Enterprise

- select the 802.1x tab
- Set Enteprise EAP ->
PEAP - Set Inner Authentication ->
MSCHAPV2 - Set
Identity (Username) - Set
Password - Press 'Apply'
The configuration should look like the following:

EAP-TLS
To connect via EAP-TLS you will need the following items in unencrypted PEM format:
- Certificate Authority (CA) Certificate
- Client Certificate + Private Key (PKCS8)
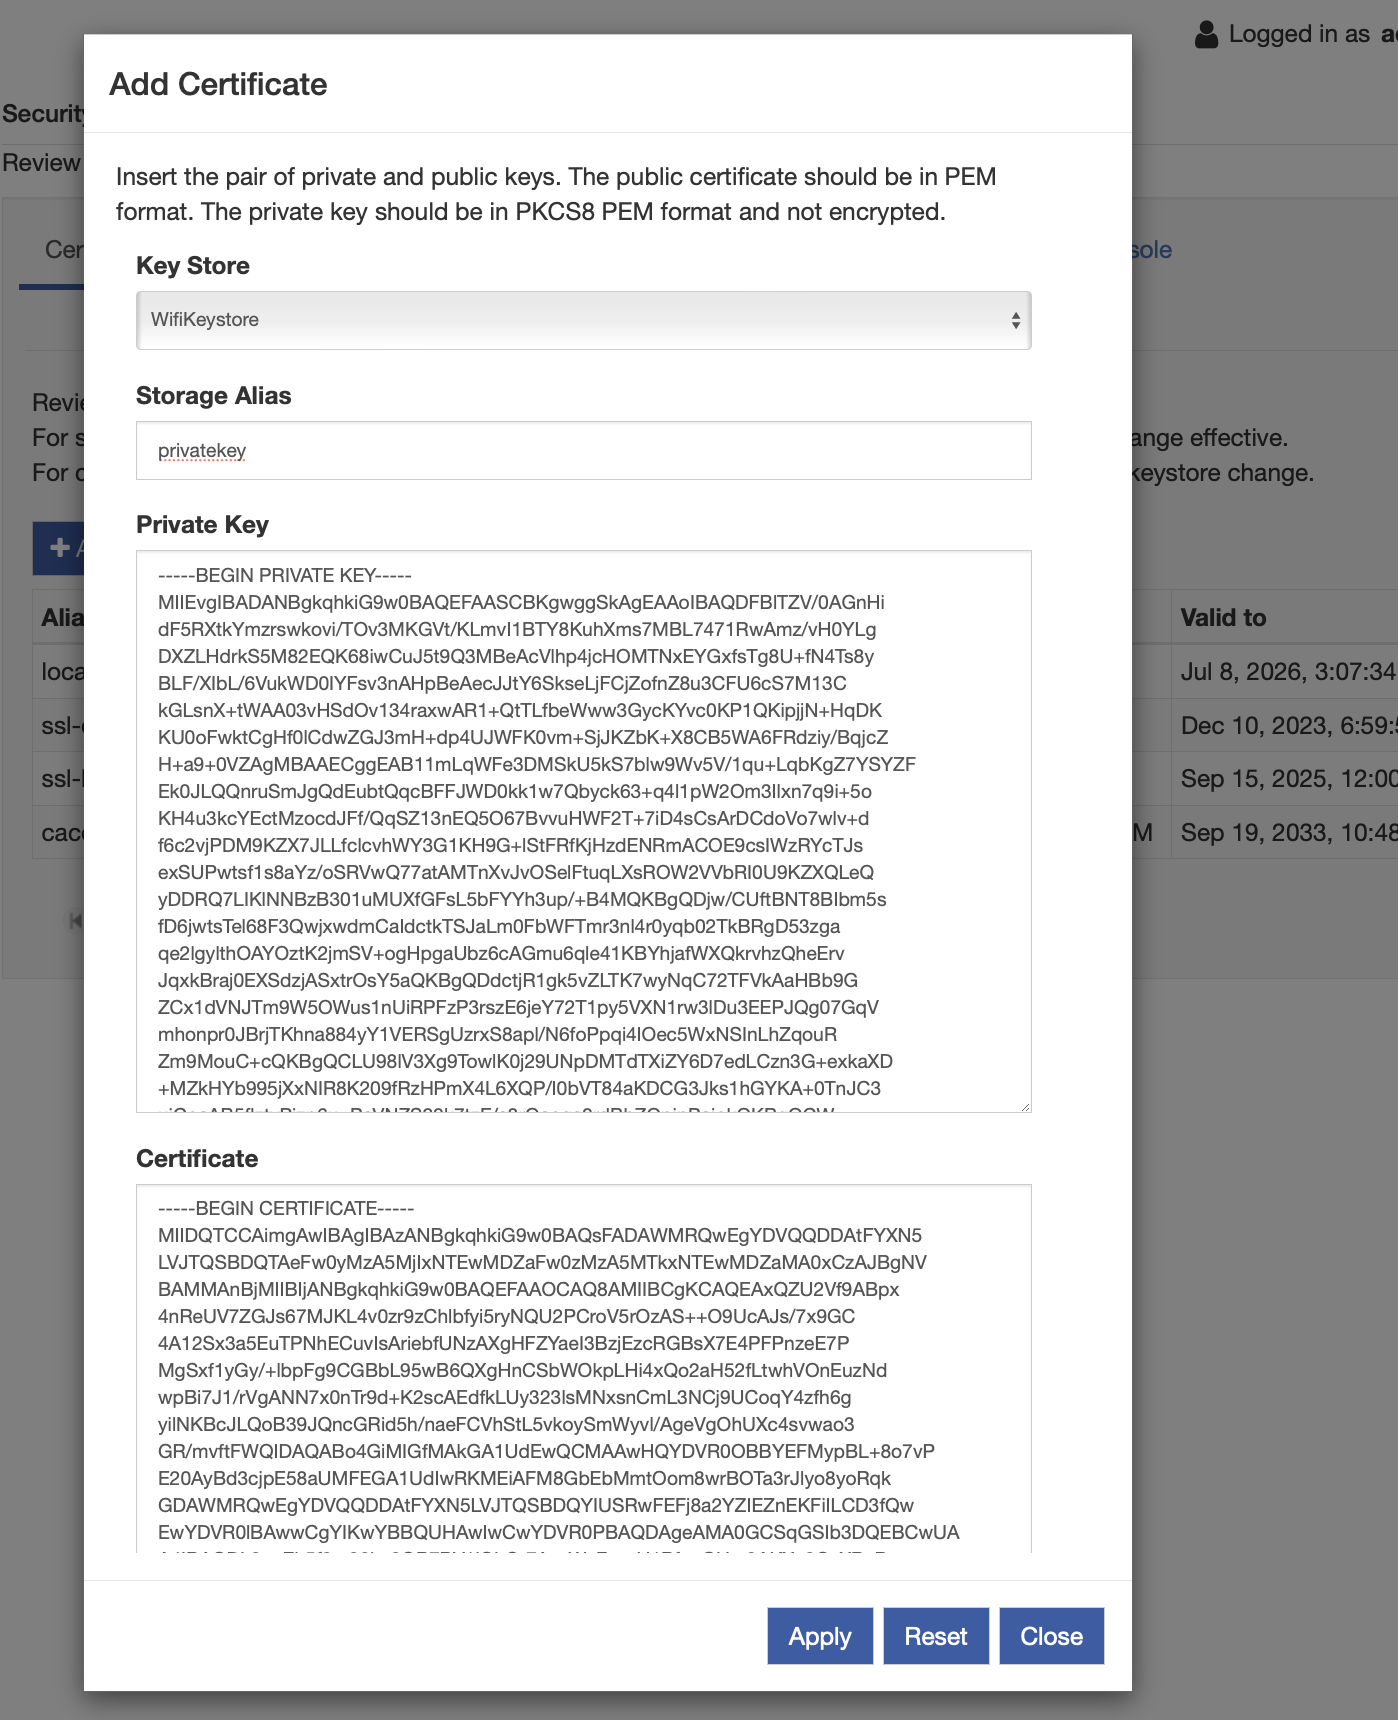
Enrolling secrets in the Keystore service.
- Navigate to
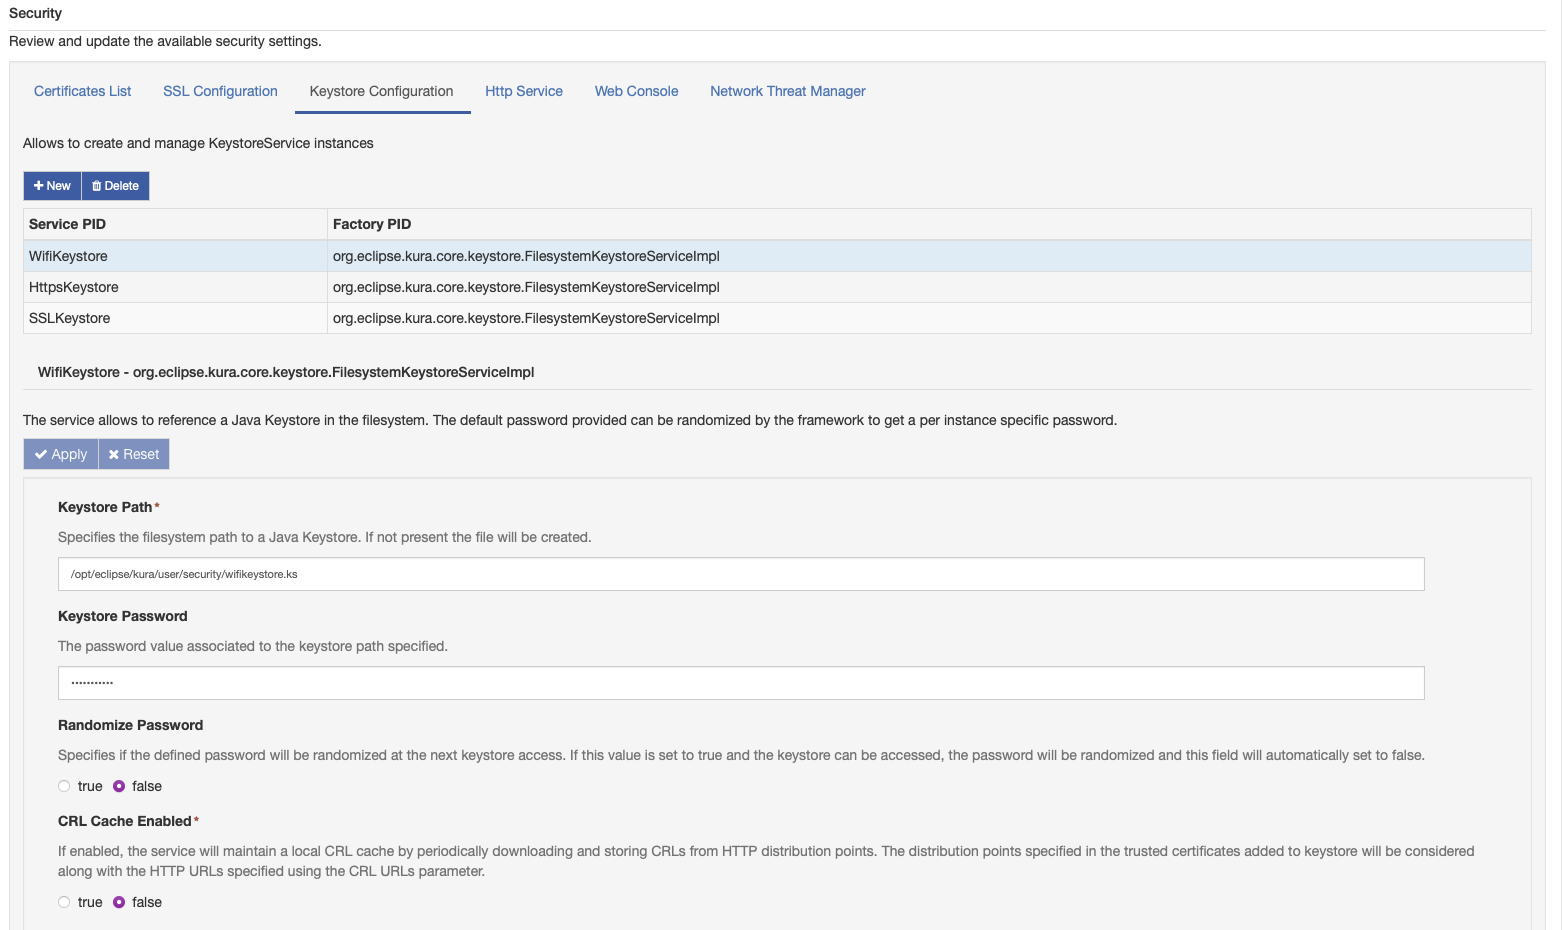
Securityunder theSystemtab. - Under the
Keystore Configurationadd a new Keystore, and keep note of the name.
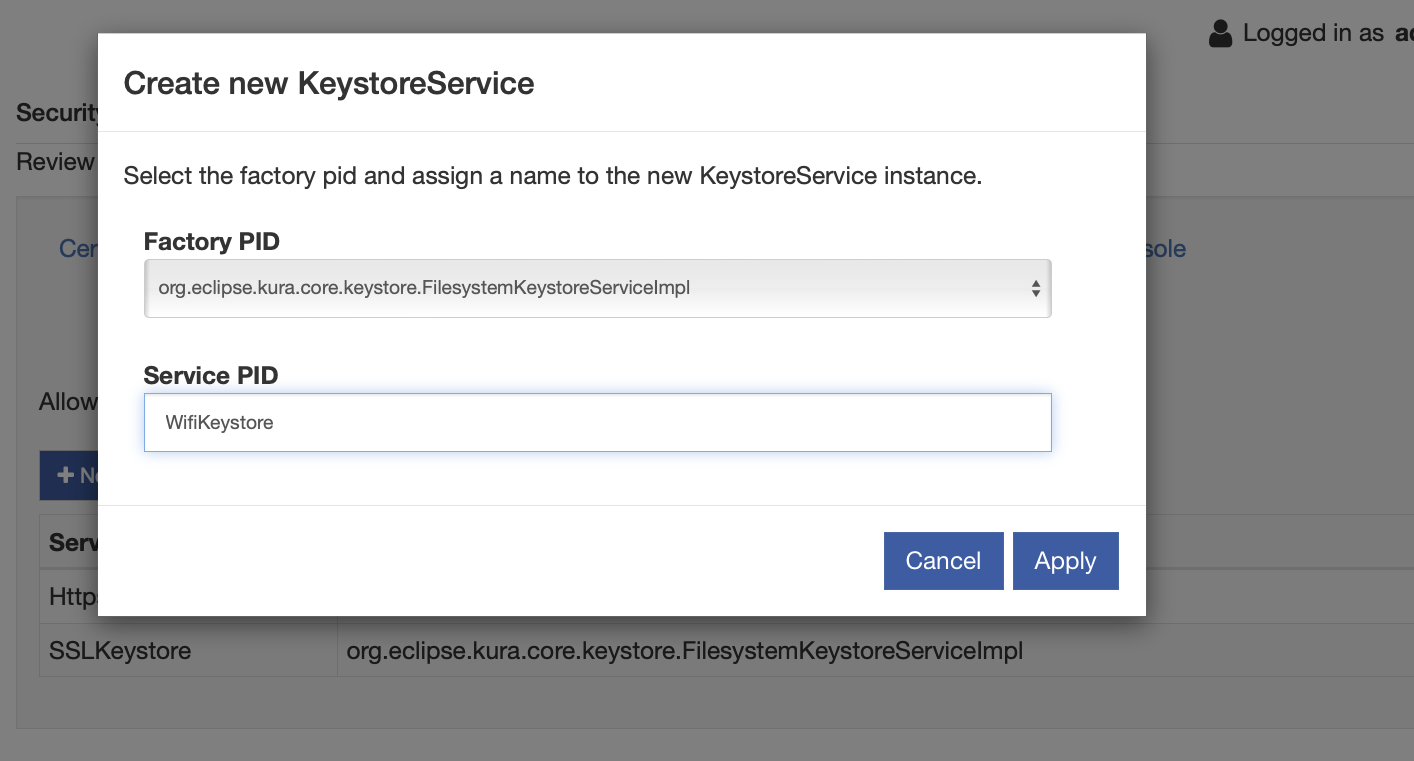
- After the Keystore is created, be sure to change the path to a persistent directory.
- Navigate to the
Certificate Listand create a new Certificate. Insert the PEM and Apply, and keep note of the name.
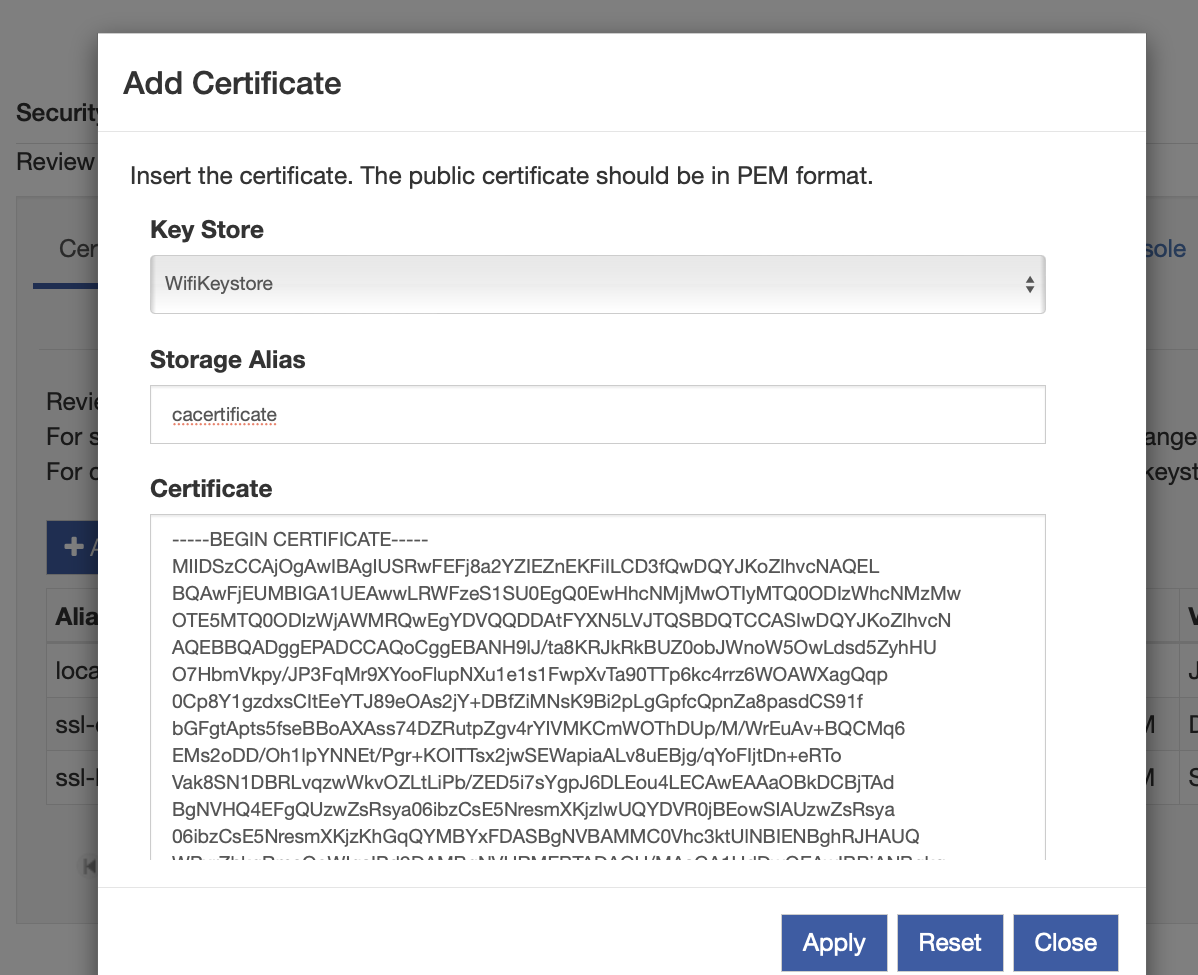
- Now press
addand create a new Private Key. Insert both the certificates in the PEM in the dialogue and press apply. keep note of the name.
Wifi Setup
- Set up gateway Wi-Fi as described in the Wi-Fi configuration guide.
- Ensure Wireless Security is set to
WPA2/WPA3-Enterprise.
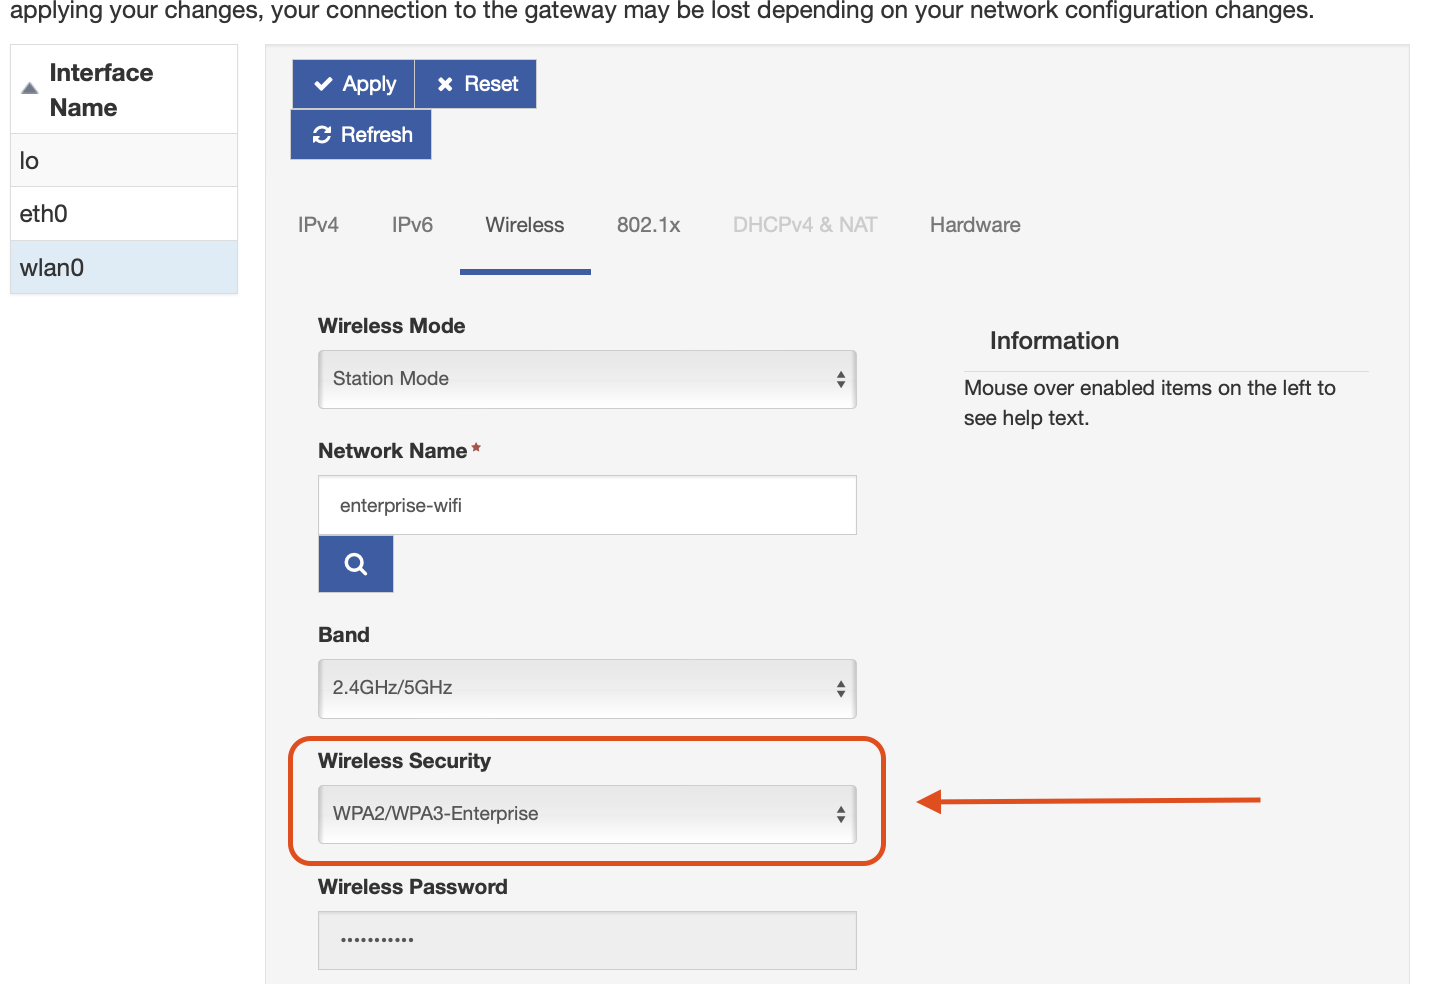
- Select the 802.1x tab.
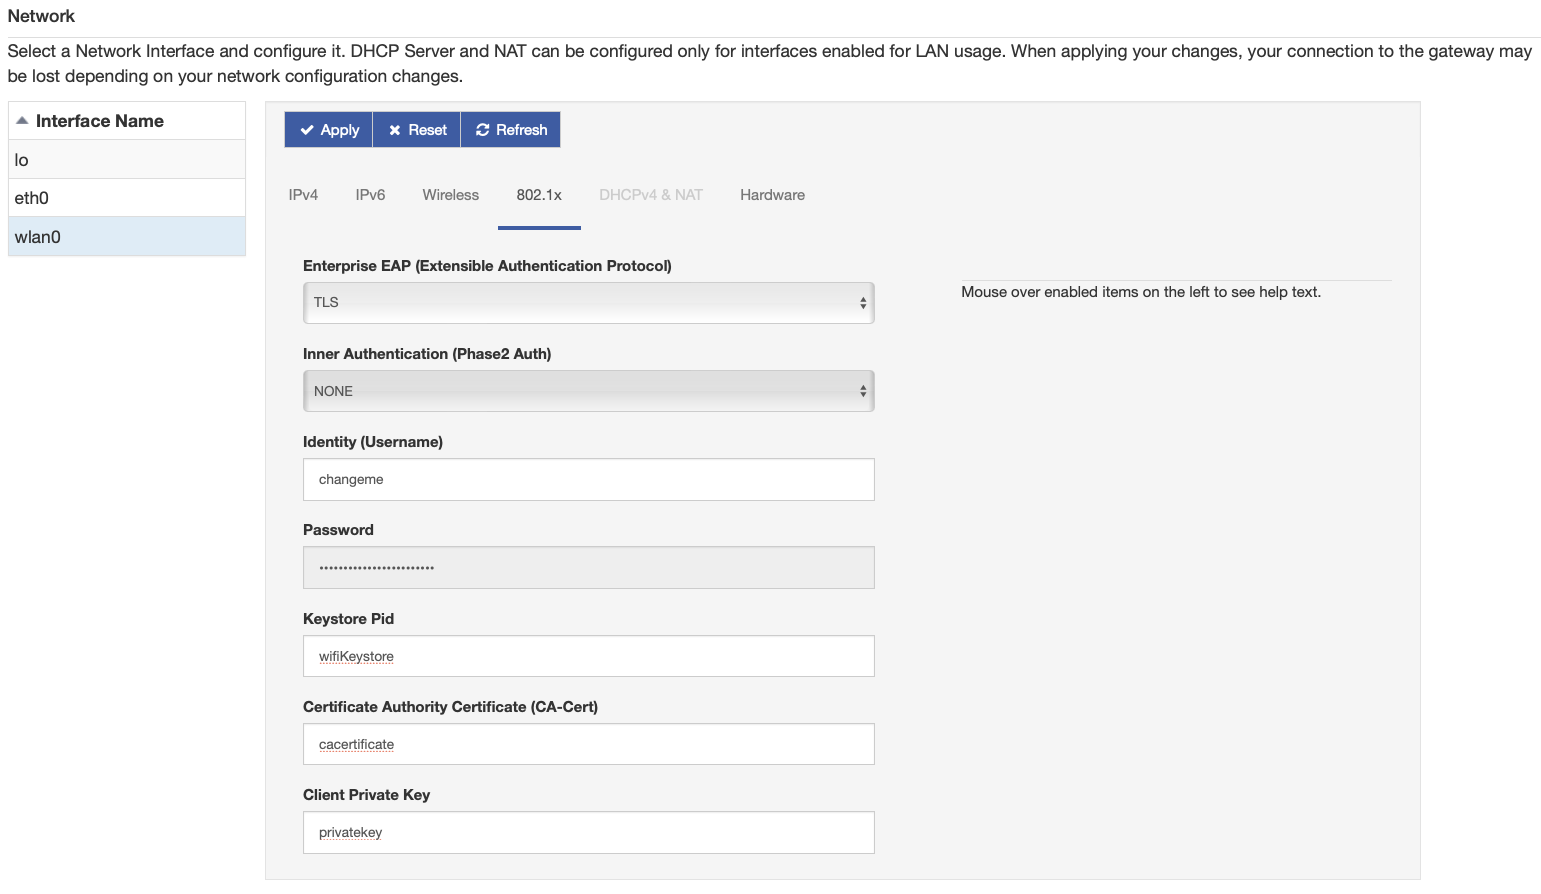
- Set Enteprise EAP ->
TLS. - Set
Identity (Username). - Set
Keystore Pidto the name of the keystore created above. - Set
Certificate Authority Certificate (CA-Cert)to the name of the certificate created above. - Set the
Client Private Keyto the name of the Private Key created above.
When completed the Wi-Fi configuration should look like the following:
Updated 9 months ago