Usage - Container Orchestration Provider
Before Starting
For this bundle to function appropriately, the gateway must have a supported container engine installed and running. Currently, the only officially supported engine is Docker.
Starting the Service
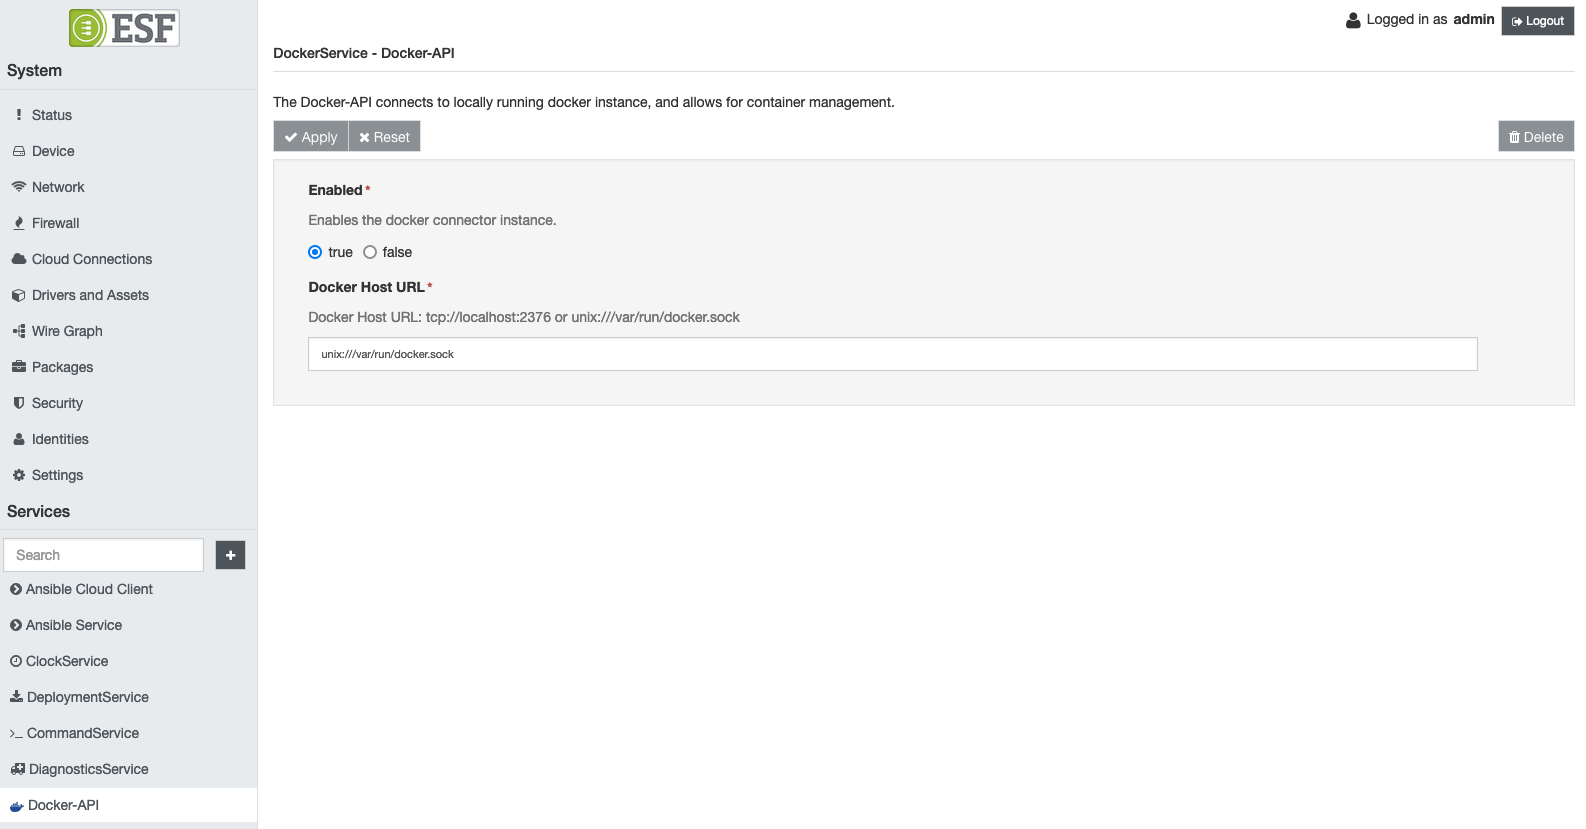
To use this service select the ContainerOrchestrationService option located in the Services area. The ContainerOrchestrationService provides the following parameters:
- Enabled--activates the service when set to true
- Container Engine Host URL--provides a string that tells the service where to find the container engine (best left to the default value).

Creating your first container.
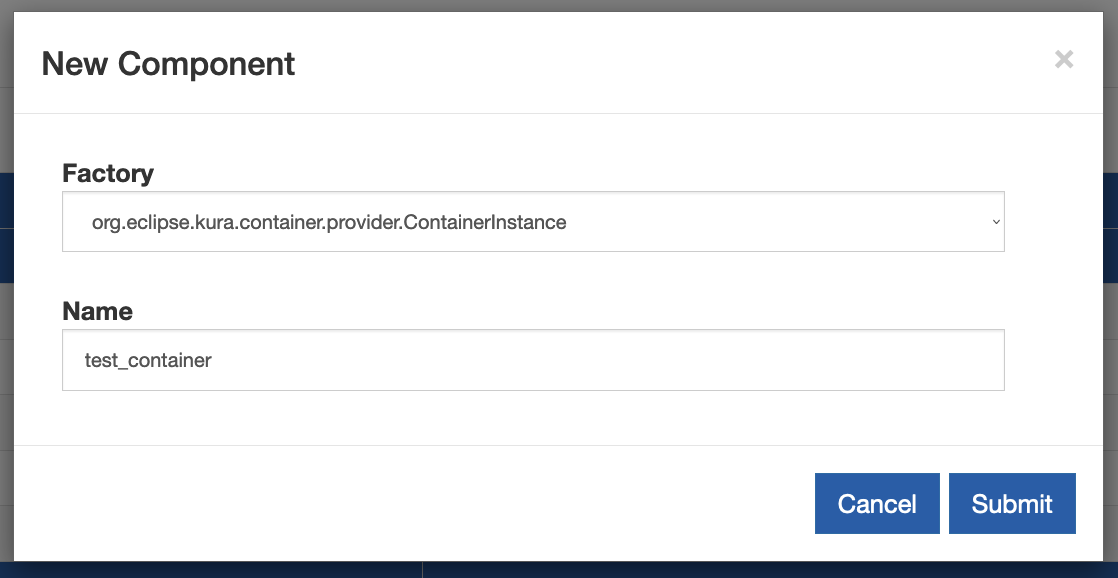
To create a container, select the + icon (Create a new component) under services. A popup dialogue box will appear. In the field Factory select org.eclipse.kura.container.provider.ContainerInstance from the drop-down. Then use the Name field to specify a name for the container.
Note on the 'Name' feild.The name specified in this field will also be the name of the container when it is spun up by the orchestrator.

After pressing submit, a new component will be added under the services tab, with the name that was selected in the dialogue. Select this component to finish configuring the container.
Configuring the container
To begin configuring the container, look under Services and select the item which has the name set in the previous step.
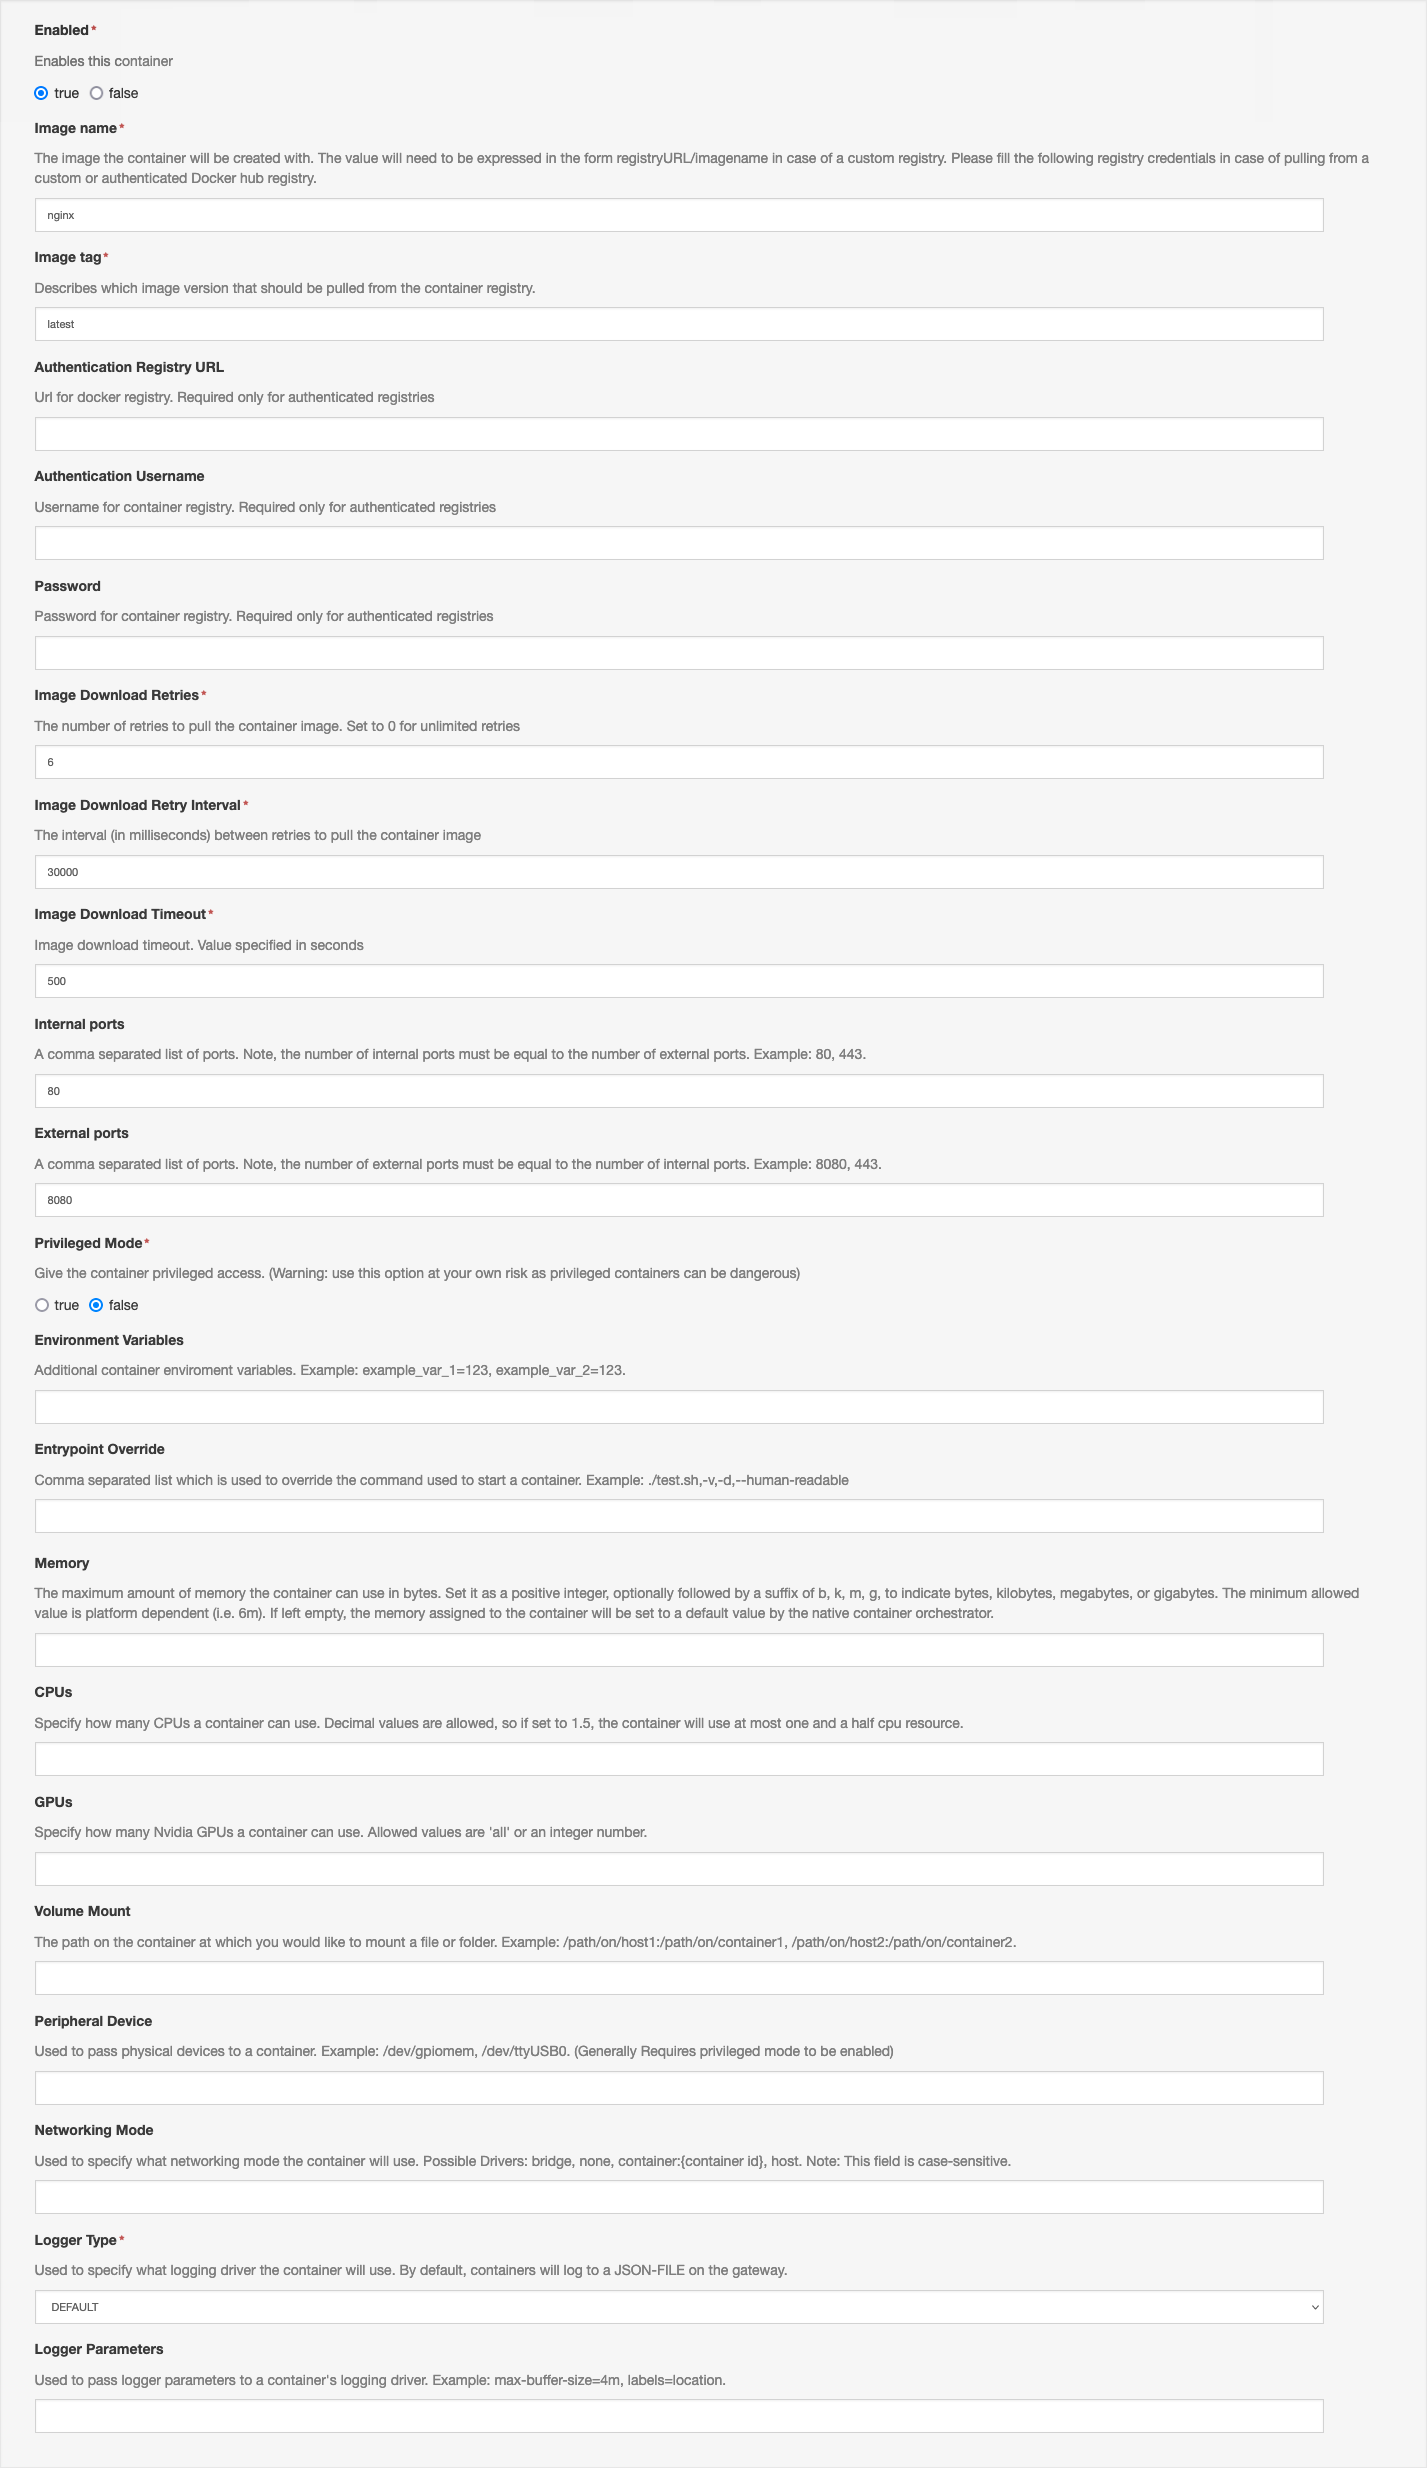
Containers may be configured using the following fields:
-
Enabled - When true, the service will create the defined container. When false the API will not create the container or will destroy the container if already running.
-
Image Name - Describes the image that will be used to create the container. Remember to ensure that the selected image supports the architecture of the host machine, or else the container will not be able to start.
-
Image Tag - Describes the version of the container image that will be used to create the container.
-
Authentication Registry URL - URL for an alternative registry to pull images from. (If the field is left blank, credentials will be applied to Docker-Hub). Please see the Authenticated Registries document for more information about connecting to different popular registries.
-
Authentication Username - Describes the username to access the container registry entered above.
-
Password - Describes the password to access the alternative container registry.
-
Image Download Retries - Describes the number of retries the framework will attempt to pull the image before giving up.
-
Image Download Retry Interval - Describes the amount of time the framework will wait before attempting to pull the image again.
-
Image Download Timeout - Describes the amount of time the framework will let the image download before timeout.
-
Internal Ports - This field accepts a comma-separated list of ports that will be internally exposed on the spun-up container.
-
External Ports - This field accepts a comma-separated list of ports that will be externally exposed on the host machine.
-
Privileged Mode - This flag if enabled will give the container root capabilities to all devices on the host system. Please be aware that setting this flag can be dangerous, and must only be used in exceptional situations.
-
Environment Variables (optional) - This field accepts a comma-separated list of environment variables, which will be set inside the container when spun up.
-
Entrypoint Override (optional) - This field accepts a comma-separated list which is used to override the command used to start a container. Example:
./test.sh,-v,-d,--human-readable. -
Memory (optional) - This field allows the configuration of the maximum amount of memory the container can use in bytes. The value is a positive integer, optionally followed by a suffix of b, k, m, g, to indicate bytes, kilobytes, megabytes, or gigabytes. The minimum and default values depends by the native container orchestrator. If left empty, the memory assigned to the container will be set to a default value.
-
CPUs (optional) - This value specifies how many CPUs a container can use. Decimal values are allowed, so if set to 1.5, the container will use at most one and a half cpu resource.
-
GPUs (optional) - This field configures how many Nvidia GPUs a container can use. Allowed values are 'all' or an integer number. If there's no Nvidia GPU installed, leave it empty. The Nvidia Container Toolkit must be installed on the system to correctly configure the service, otherwise the container will not start.
-
Volume Mount (optional) - This field accepts a comma-separated list of system-to-container file mounts. This allows for the container to access files on the host machine.
-
Peripheral Device (optional) - This field accepts a comma-separated list of device paths. This parameter allows devices to be passed through from the host to the container.
-
Networking Mode (optional) - Use this field to specify what networking mode the container will use. Possible Drivers include: bridge, none, container:{container id}, host. Please note that this field is case-sensitive. This field can also be used to connect to any of the networks listed by the cli command
docker network ls. -
Logger Type - This field provides a drop-down selection of supported container logging drivers.
-
Logger Parameters (optional) - This field accepts a comma-separated list of logging parameters. More information can be found in the container-engine logger documentation, for instance here.
After specifying container parameters, ensure to set Enabled to true and press Apply. The container engine will then pull the respective image, spin up and start the container. If the gateway or the framework is power cycled, and the container and Container Orchestration Service are set to enabled, the framework will automatically start the container again upon startup.

Stopping the container
Stopping a container will delete it in an irreversible way. Please be sure to only use stateless containers and/or save their data in external volumes
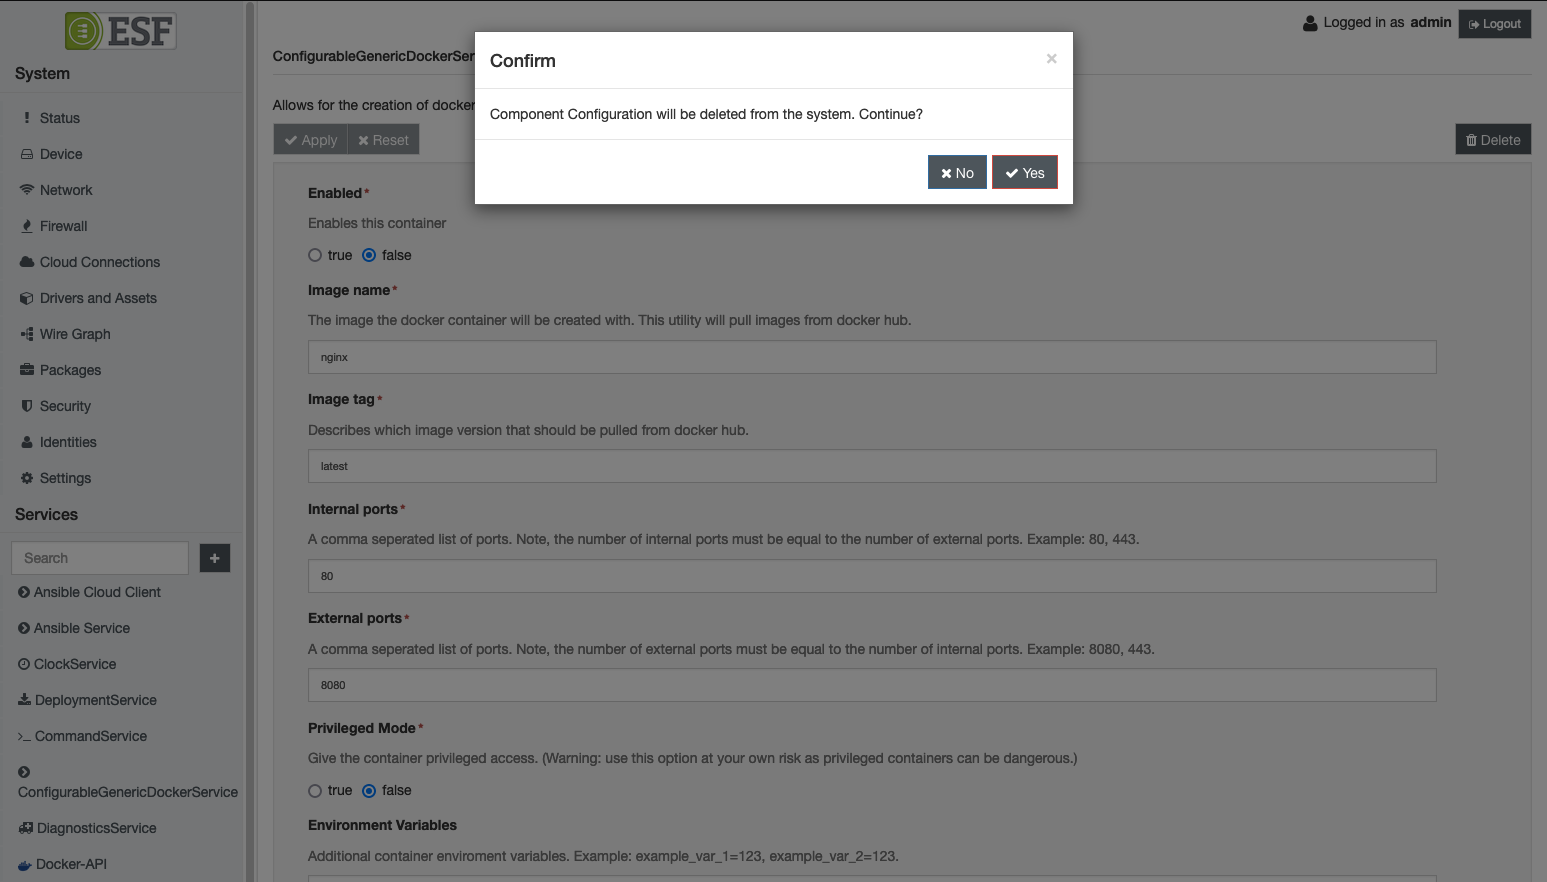
To stop the container without deleting the component, set the Enabled field to false, and then press Apply. This will delete the running container, but leave this component available for running the container again in the future. If you want to completely remove the container and component, press the Delete button to the top right of the screen, and press Yes on the confirmation dialogue.

Container Management Dashboard
The Container Orchestration service also provides the user with an intuitive container dashboard. This dashboard shows all containers running on a gateway, including containers created with the framework and those created manually through the command-line interface. To utilize this dashboard the org.eclipse.container.orchestration.provider (ContainerOrchestrationService) must be enabled, and the dashboard can be opened by navigating to Device > Containers

Updated 3 months ago
