OPC-UA Application
This tutorial will describe how to collect data from an OPC-UA device and publish them on a cloud platform using Wires. The OPC-UA server device will be emulated using a bundle running on ESF.
Configure OPC-UA server simulator
- Download the OPC-UA server simulator bundle and install it on ESF. It will create a simulated OPC-UA server that exposes some sensors (light, temperature and water sensor) and some actuators (buzzer, led and fan).
- On the Kura web interface, select OPCUA Server demo in Services and set server.port to 1234. Click the Apply button. This will start an OPC-UA server on port 1234.
Configure Wires OPC-UA application
- Install the OPC-UA driver from Eclipse Kura Marketplace
- Use the local ESF Administrative Web Interface to create a new OPC-UA driver instance:
- Select Drivers and Assets, click the New Driver button
- Select org.eclipse.kura.driver.opcua, type in a name, and click Apply: a new service will show up under Services.
- Configure the new service as follows:
- endpoint.ip: localhost
- endpoint.port: 1234
- server.name: leave blank
- Click on Wires under System
- Add a new Timer component and configure the interval at which the OPC-UA server will be sampled
- Add a new Asset with the previously added OPC-UA driver
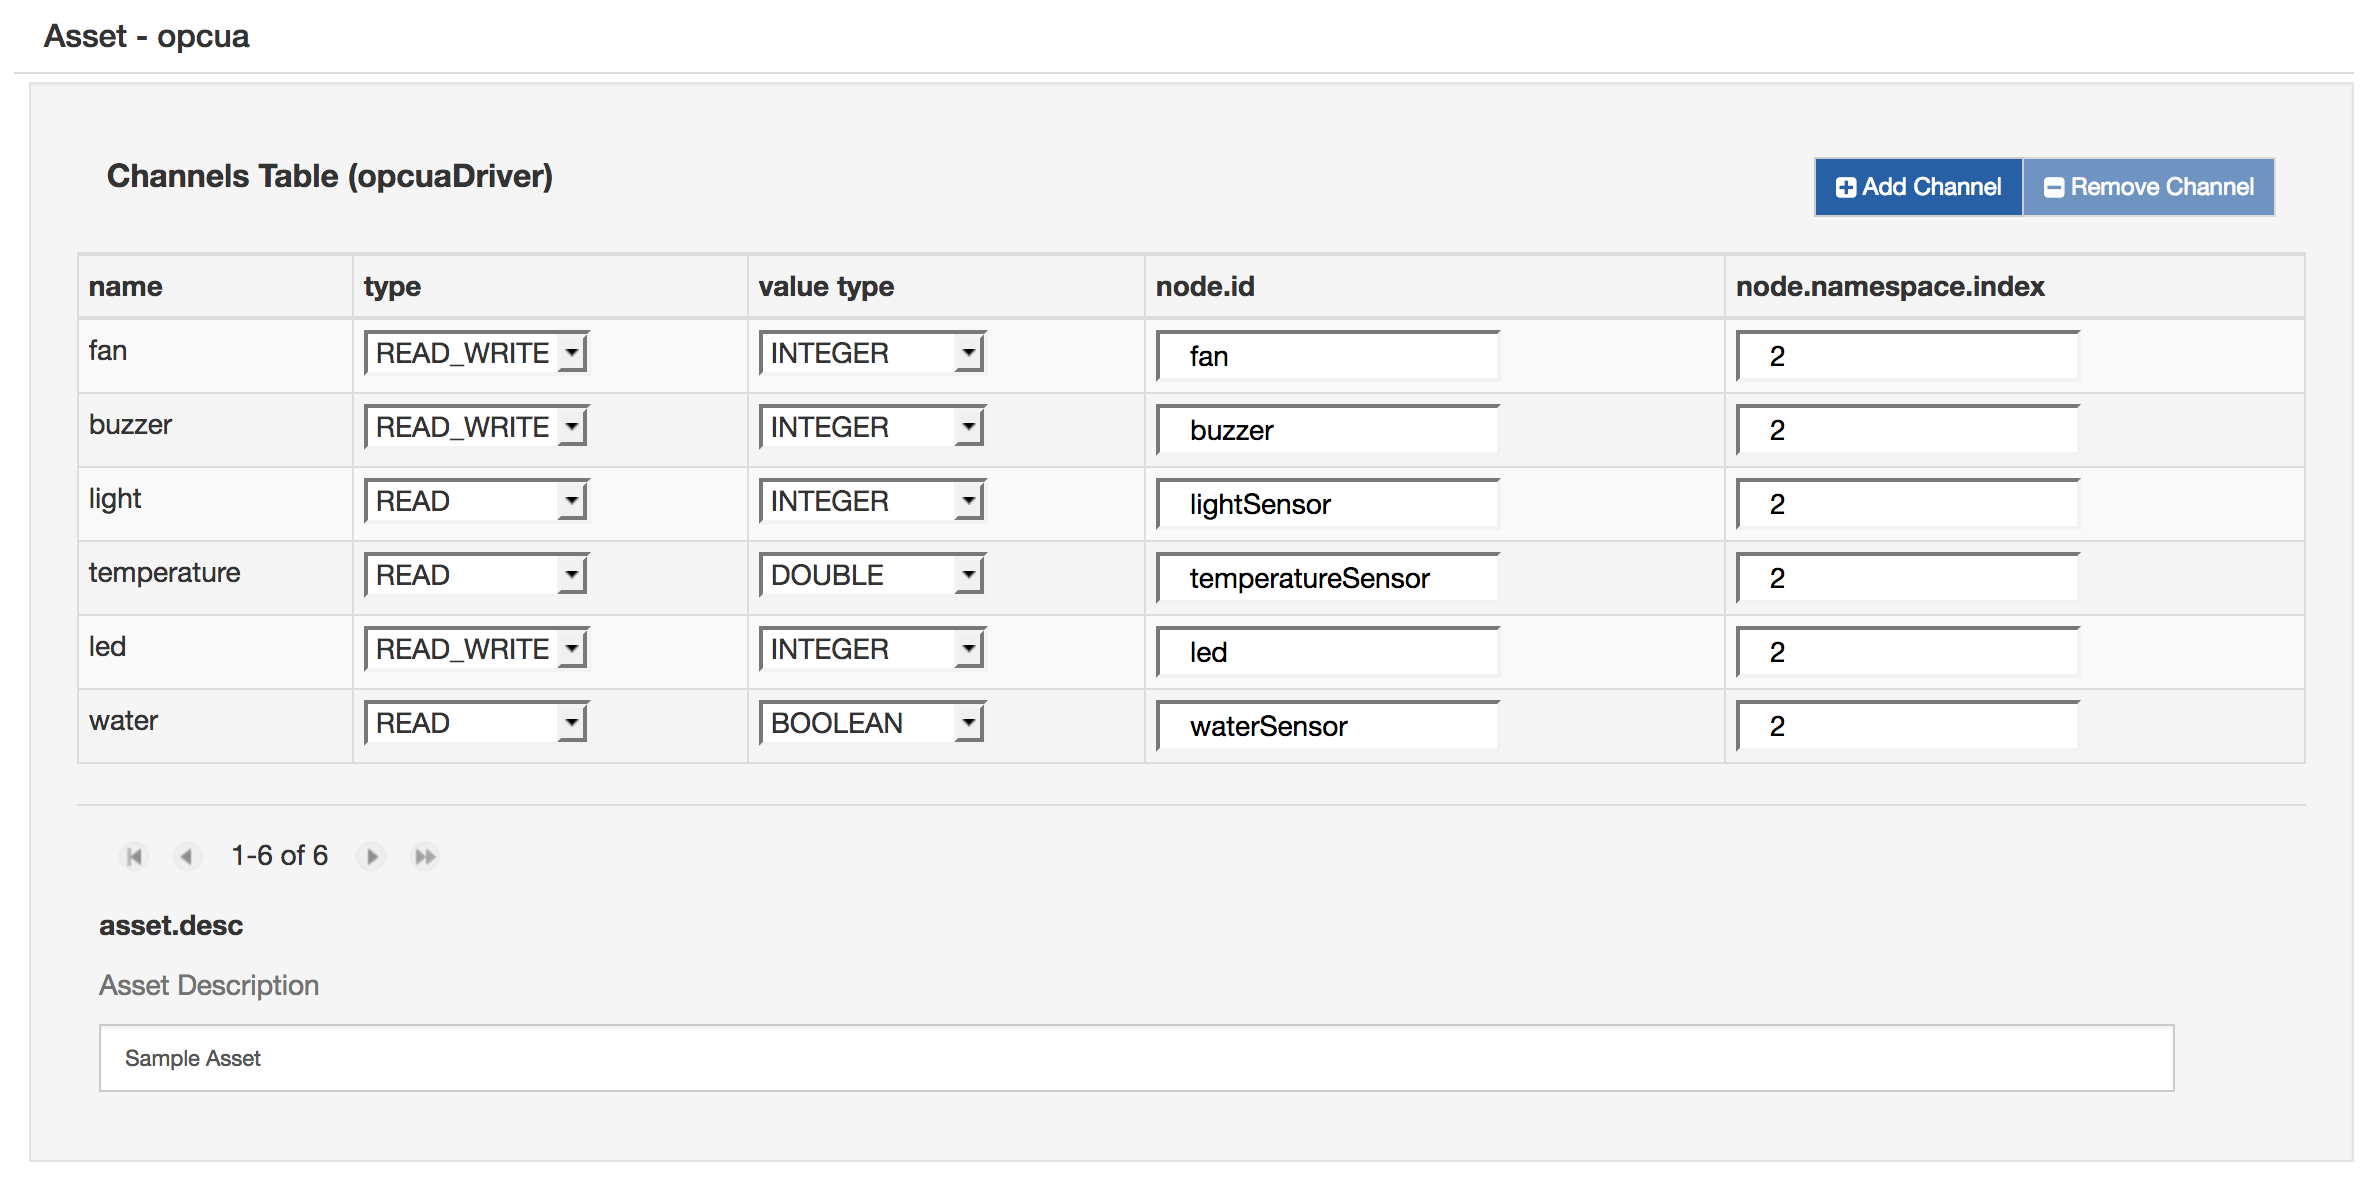
- Configure the new OPC-UA asset, adding new Channels as shown in the following image.

- Add a new Publisher component and configure the chosen cloud platform stack in cloud.service.pid option
- Add a Logger component
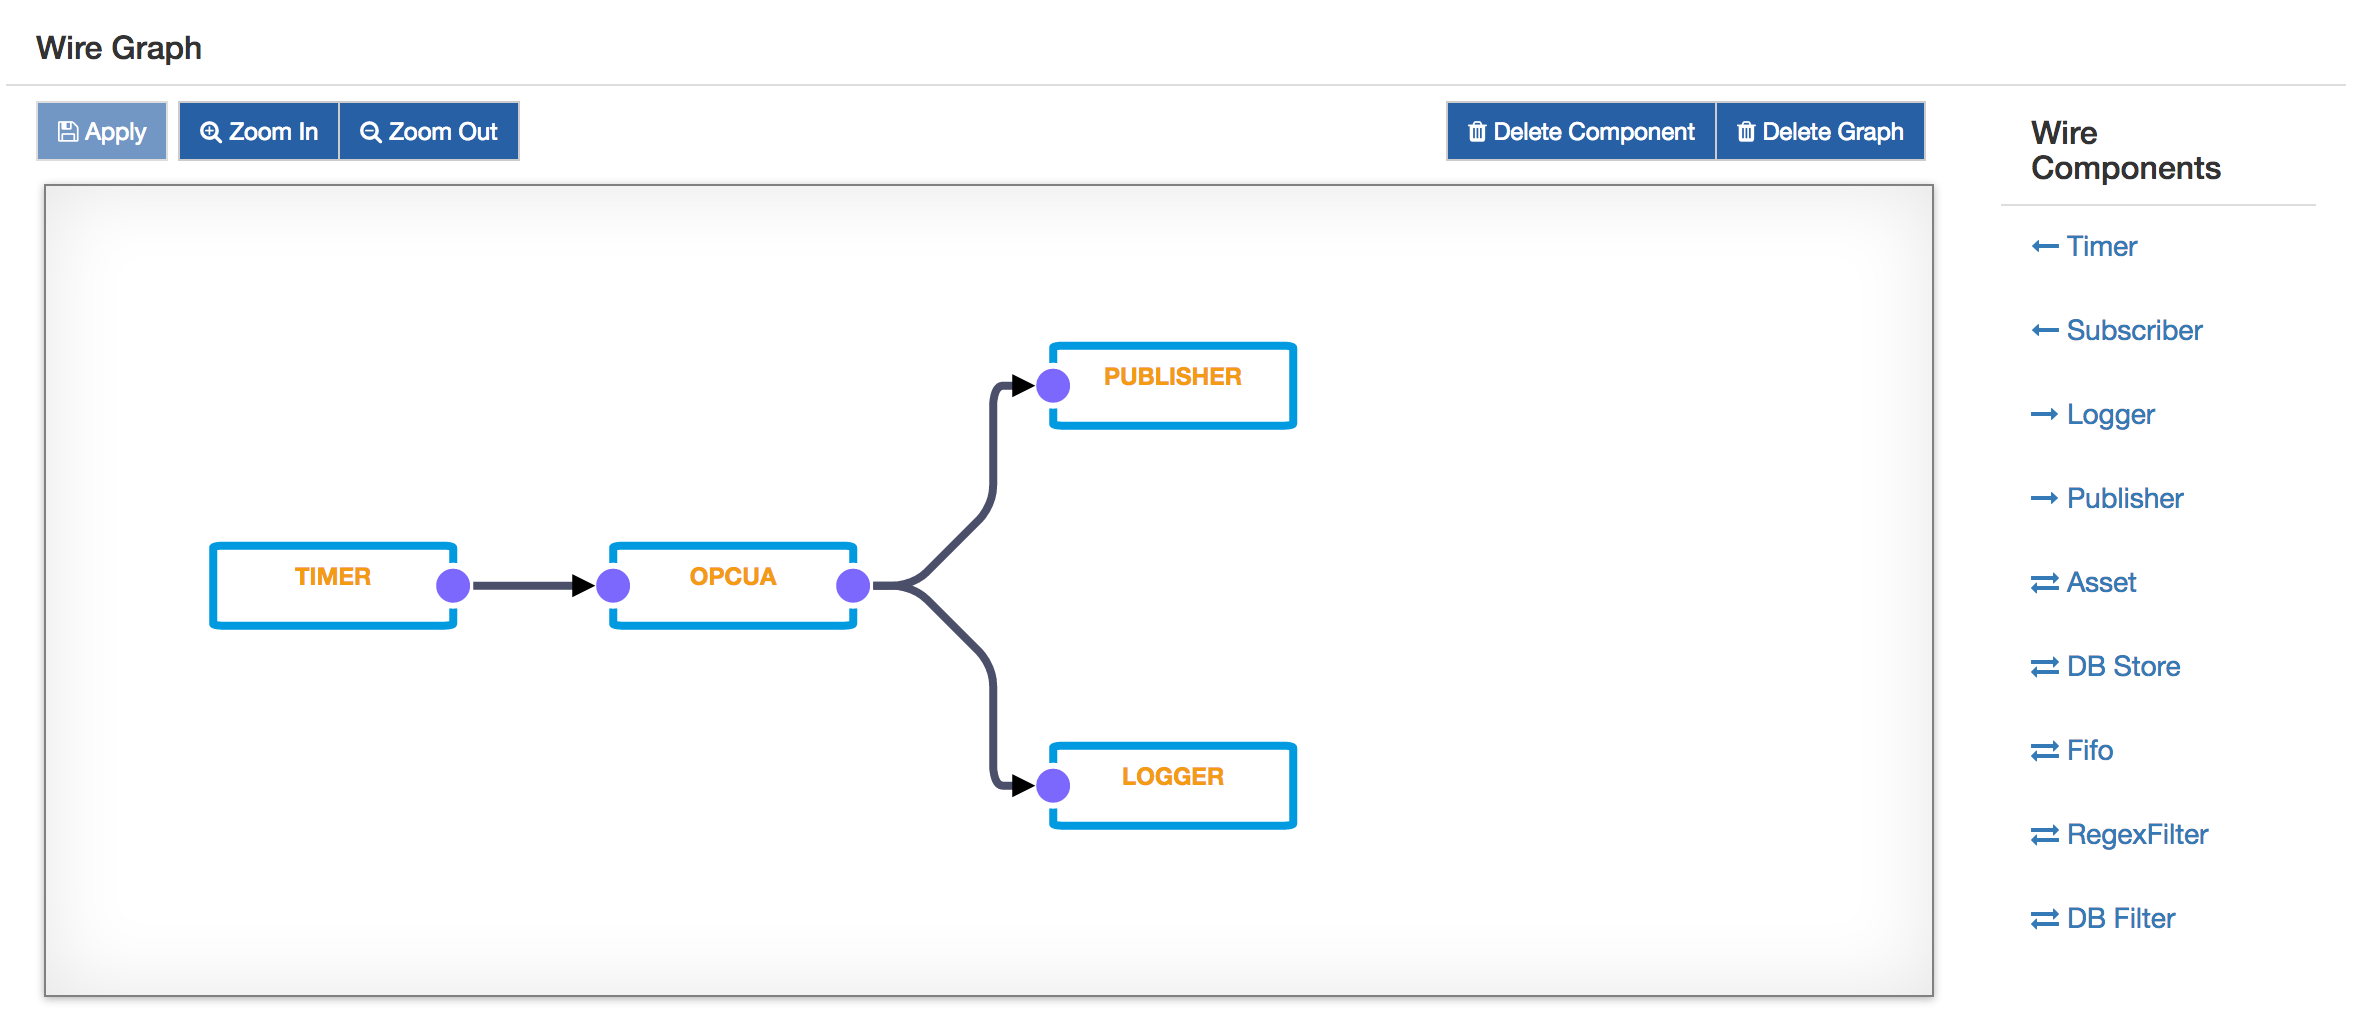
- Connect the Timer to the Asset, and the Asset to the Publisher and Logger as shown in the image below.
- Click on Apply and check the logs and the cloud platform in order to verify that the data is correctly published.

Updated 4 months ago
