TPM Provisioning and Connection
Overview
This section explains how to provision a gateway and how to connect to the Azure IoT Services using a TPM-enabled gateway. This connection method can only be used with IoT Hub DPS Individual Enrollment or IoT Central Individual Enrollment.
ESF Cloud Connector for Azure IoT, Version 2.0.0 and Above OnlyThese instructions apply to the ESF Cloud Connector for Azure IoT, Version 2.0.0 and above. See Legacy v2 Azure IoT Connection if you are using any version under 2.0.0.
Prerequisites
TPM Parameters
The Azure cloud connection provider has created a new service: TPMInfoService, containing the parameters of the TPM detected on the gateway. This information will be needed in the instructions below to provision your device.

Copy the Entire Endorsement KeyThe Endorsement Key is very long. When you copy this information into the Azure Portal (below), make sure you copy the entire key.
Provisioning
TPM Provisioning can be accomplished in two ways:
- Start at Provision Device Using IoT Hub DPS Individual Enrollment for IoT Hub DPS Individual Enrollment
- Start at Provision Device Using IoT Central Individual Enrollment for IoT Central Individual Enrollment
Provision Device Using IoT Hub DPS Individual Enrollment
Go to the Manage Enrollments page of your DPS in your Azure Portal and click + Add individual enrollment.
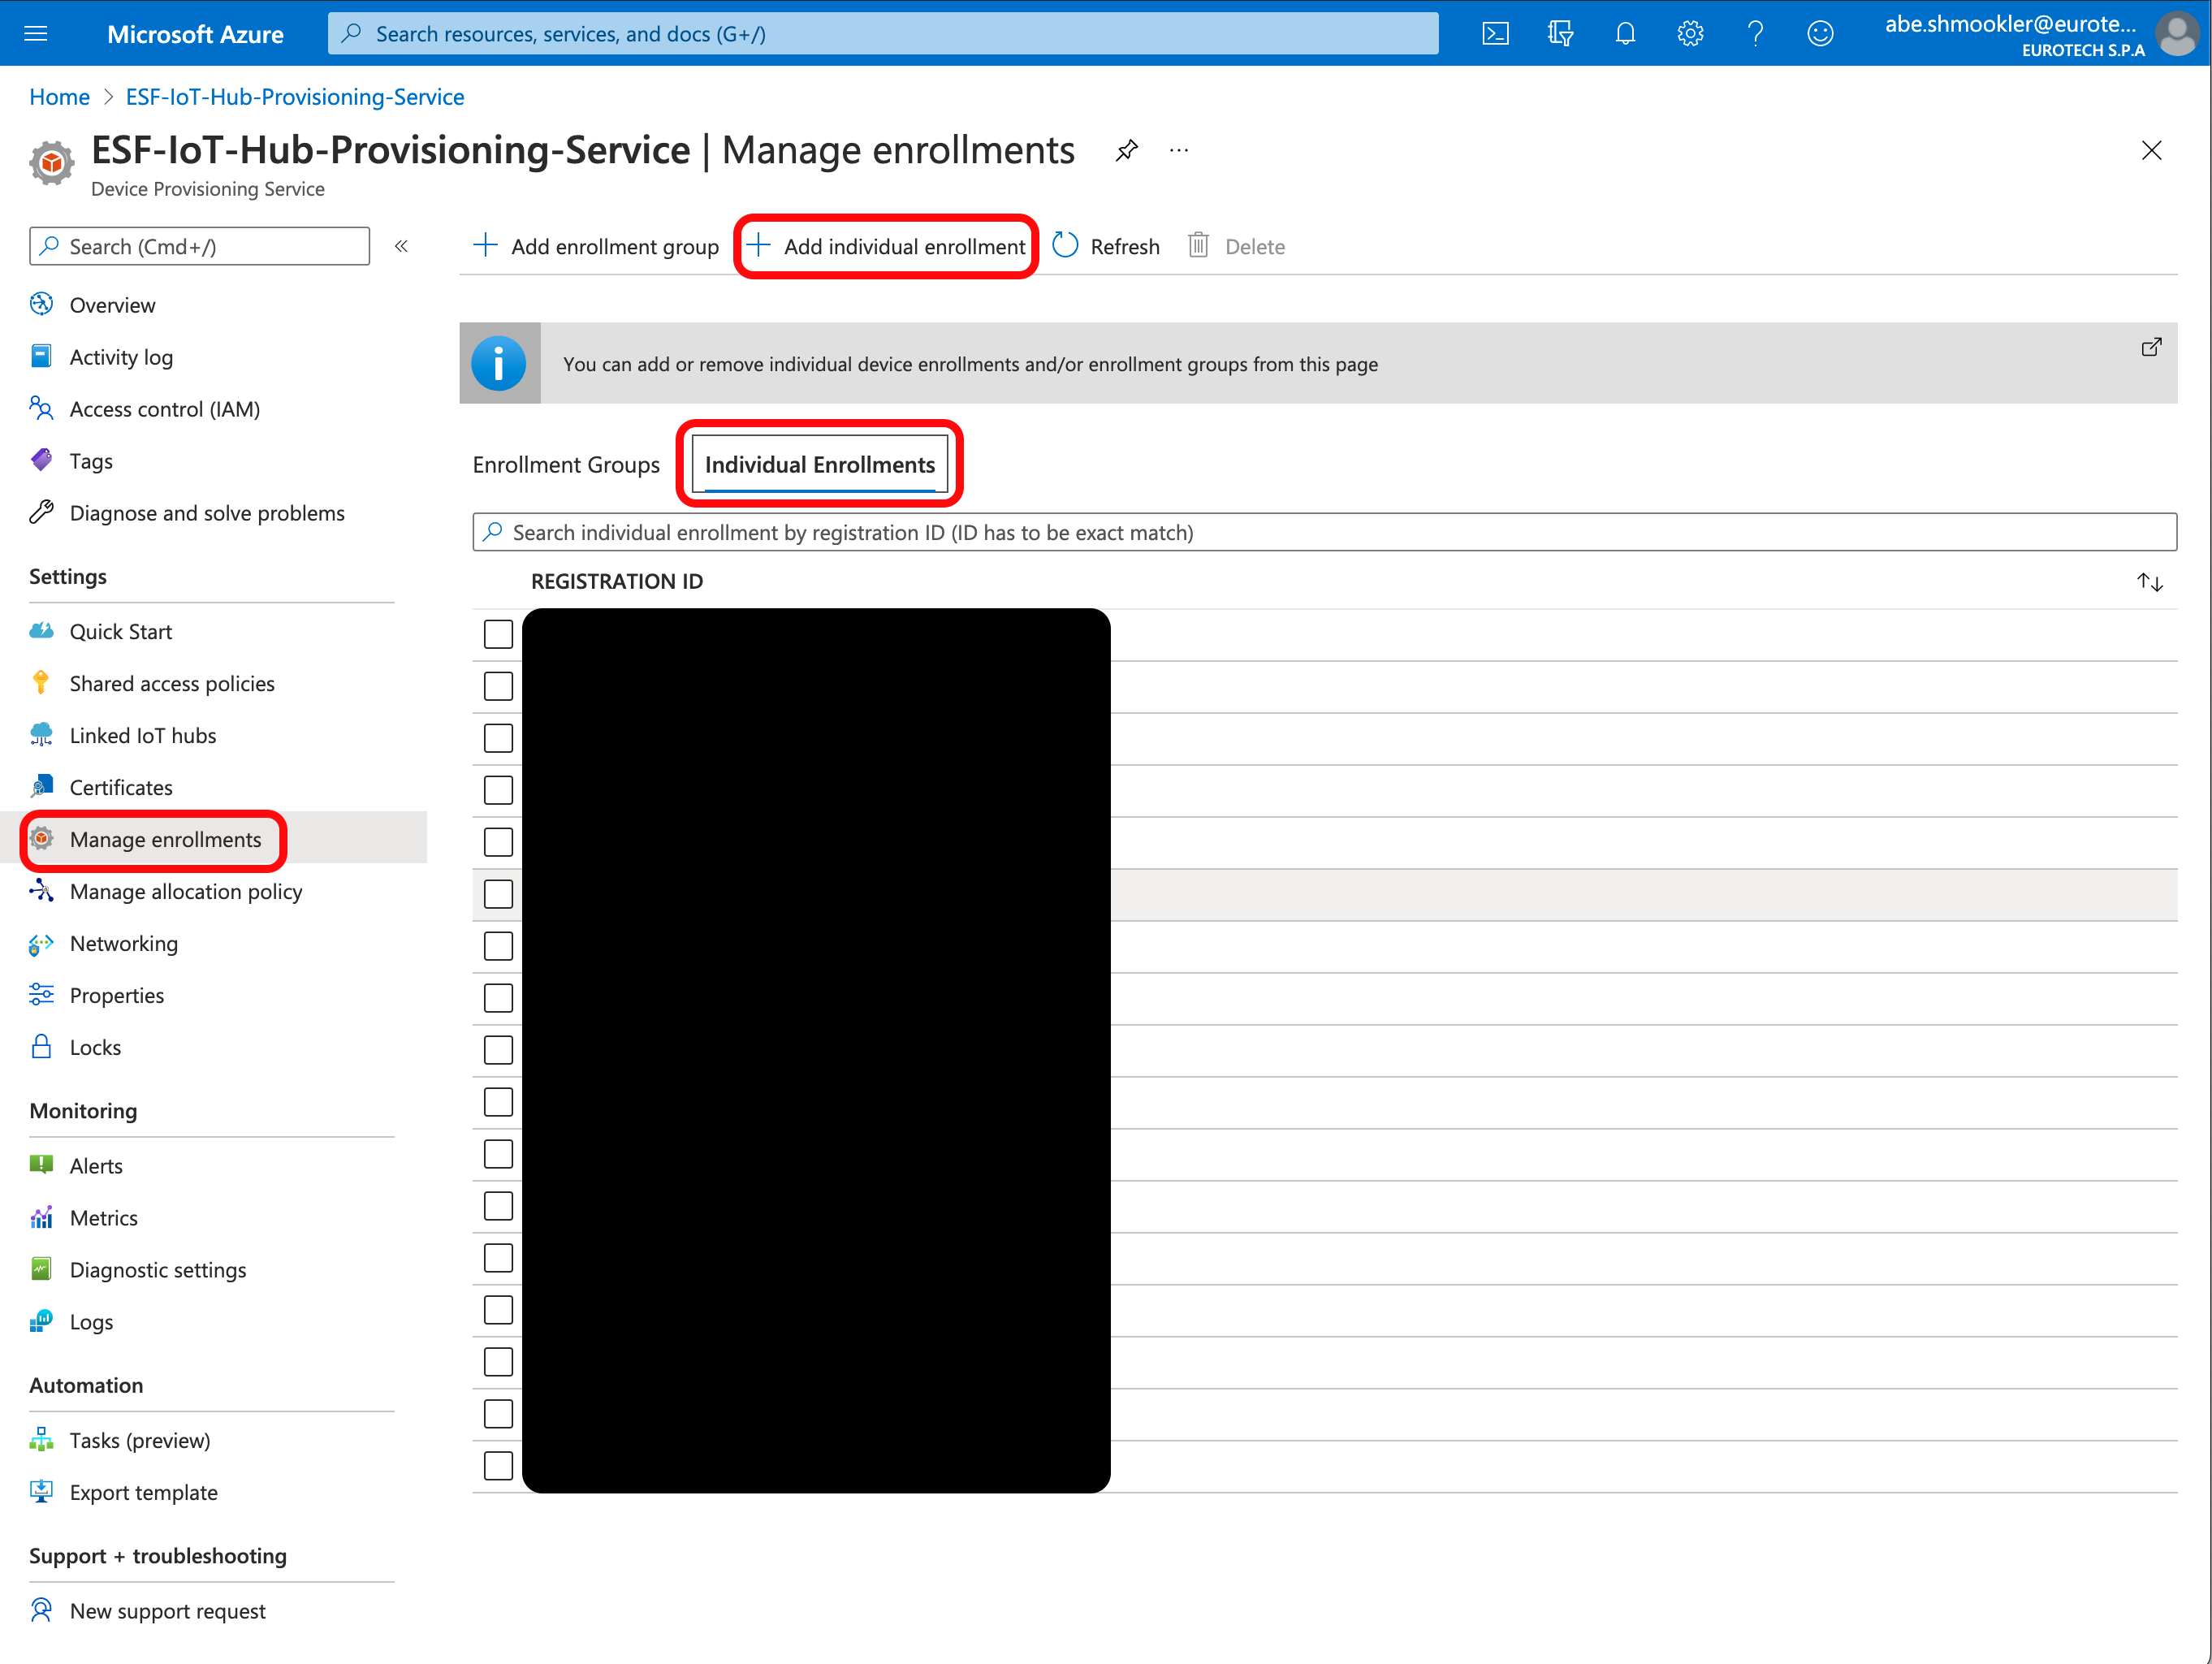
On the Add Enrollment page, enter the following information:
- Mechanism: TPM
- Endorsement Key: Copy/Paste the Endorsement Key from the TPMInfoService
- Registration ID: Copy/Paste the Registration ID from the TPMInfoService
- IoT Hub Device ID: This can be any unique designator. A good method to ensure this is unique is to use the gateway's MAC address and serial number (in the format [MACAddress]-[SerialNumber])
- All other fields: Leave at the default values
Click Save.
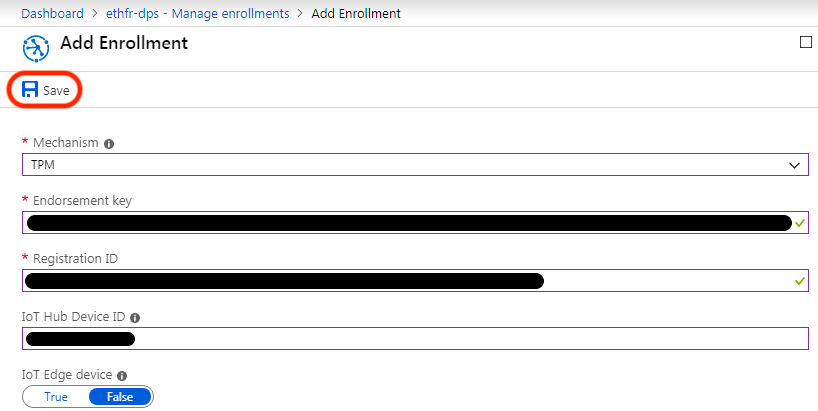
Continue at Create a TPM cloud connection.
Provision Device Using IoT Central Individual Enrollment
Prerequisites
Create an Application
In order to provision your device with TPM credentials using IoT Central Applications, you must first create an application. Instructions on how to create your own IoT Central application can be found here.
Create a Device
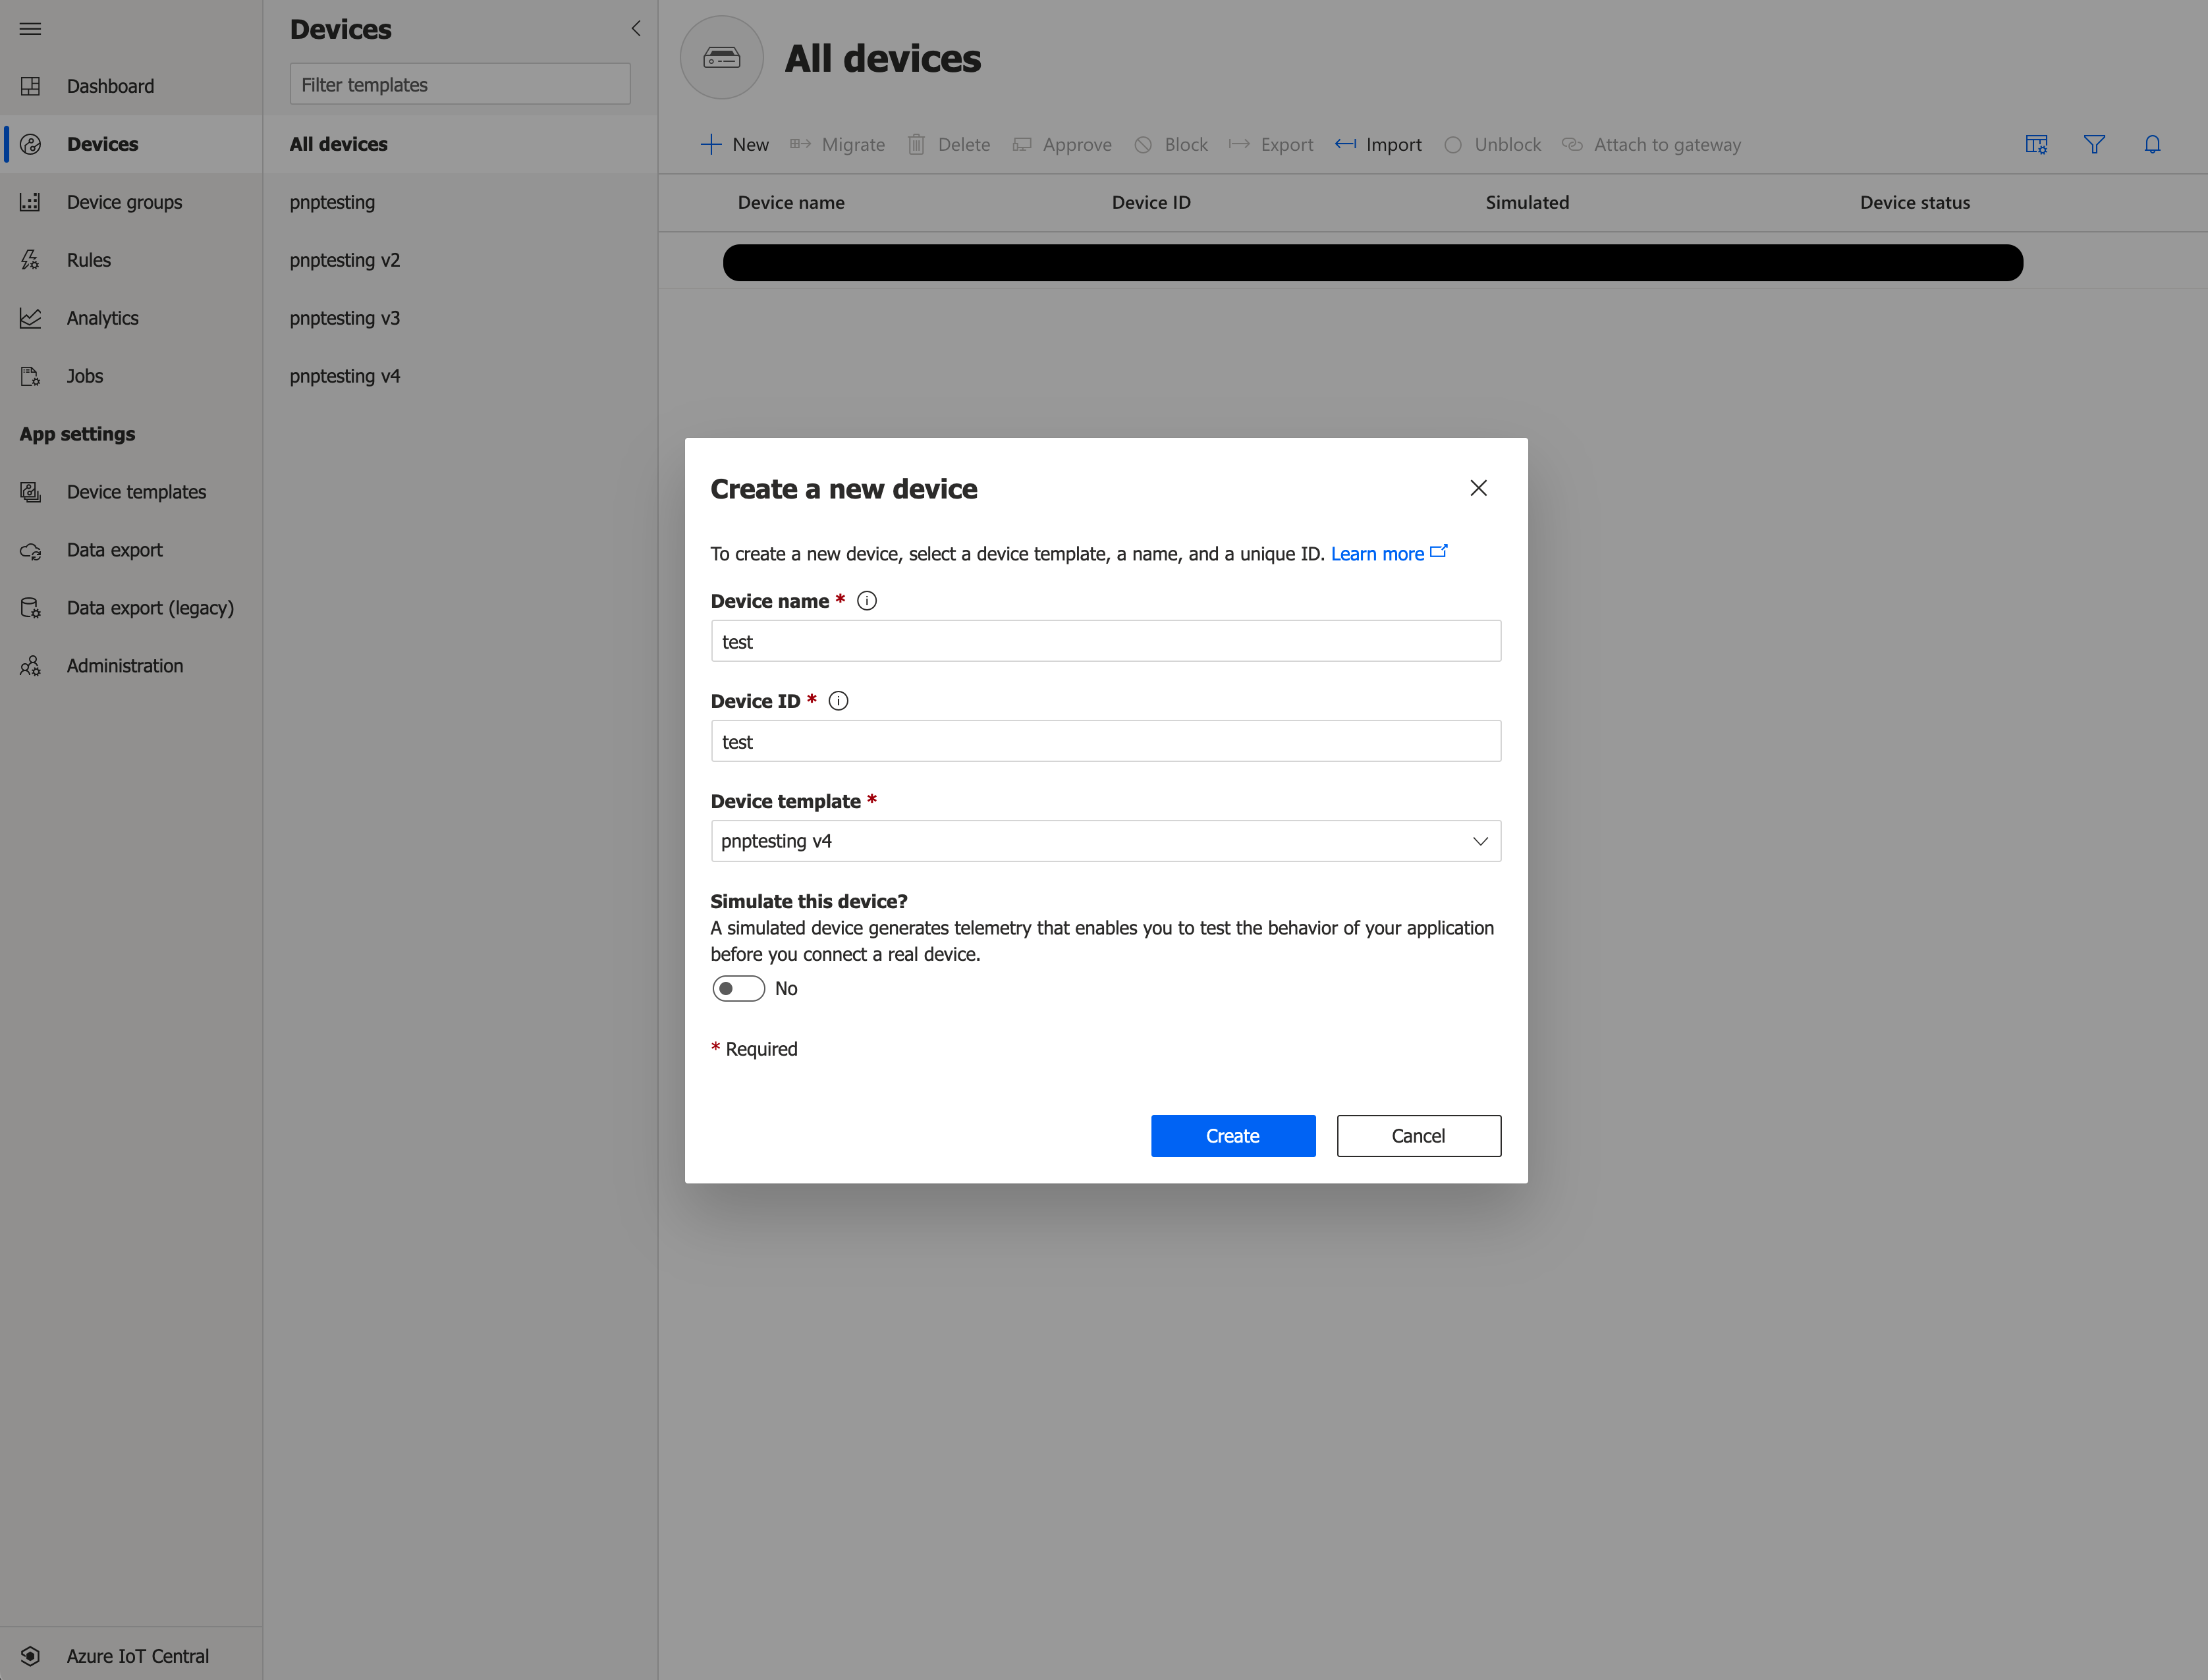
You must Create your device in your Azure IoT Central Application before provisioning using TPM credentials.
When you create a device, the Device ID field must match the Registration ID from the TPMInfoService.
Connect device
Click on your device from the Devices page and click Connect

Set the Authentication Type to "Individual enrollment" and Authentication Method to "TPM".
Copy/paste the Endorsement Key from the ESF TPMInfoService, then click Save, then Close.
Continue at Create a TPM cloud connection.
Create a TPM cloud connection
In the ESF Web interface, go to the Cloud Connection section and click New Connection.
On the New Cloud Connection dialog, enter the following information:
- Cloud Connection Factory PID: AzureDpsTpm
- Cloud Connection Service PID: AzureDpsTpm or other valid Cloud Connection Service PID
Click Apply.
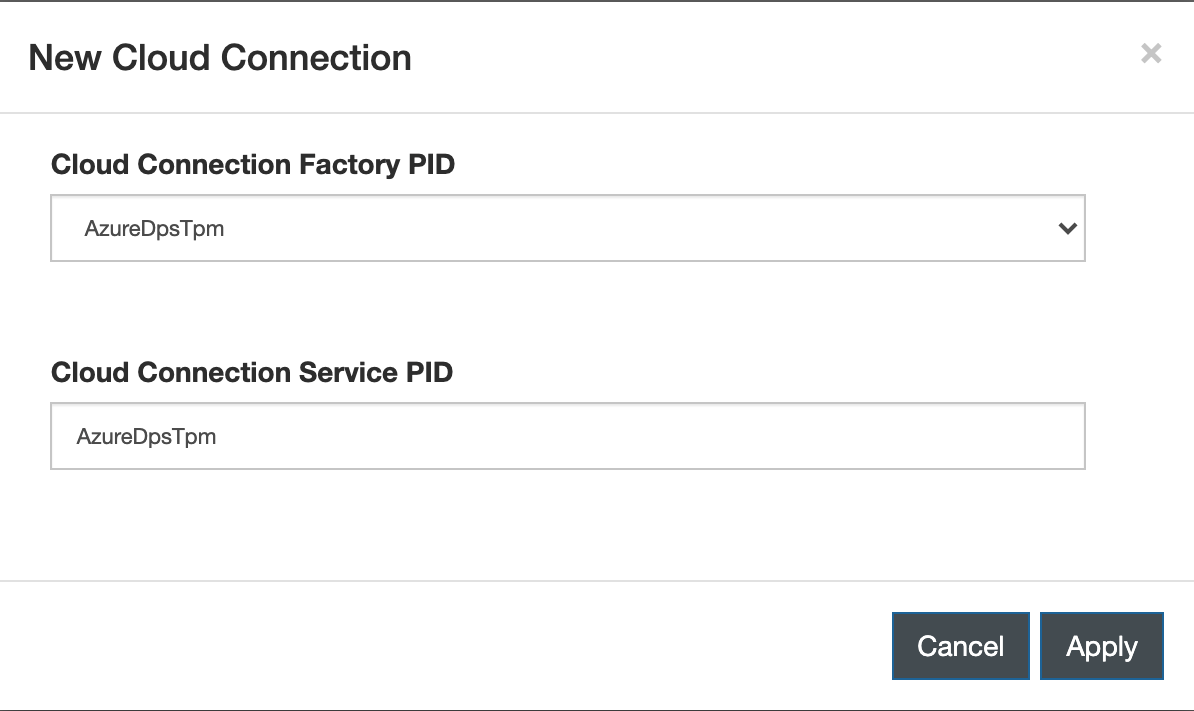
Select the new connection and go to the TpmMqttDataTransport tab.
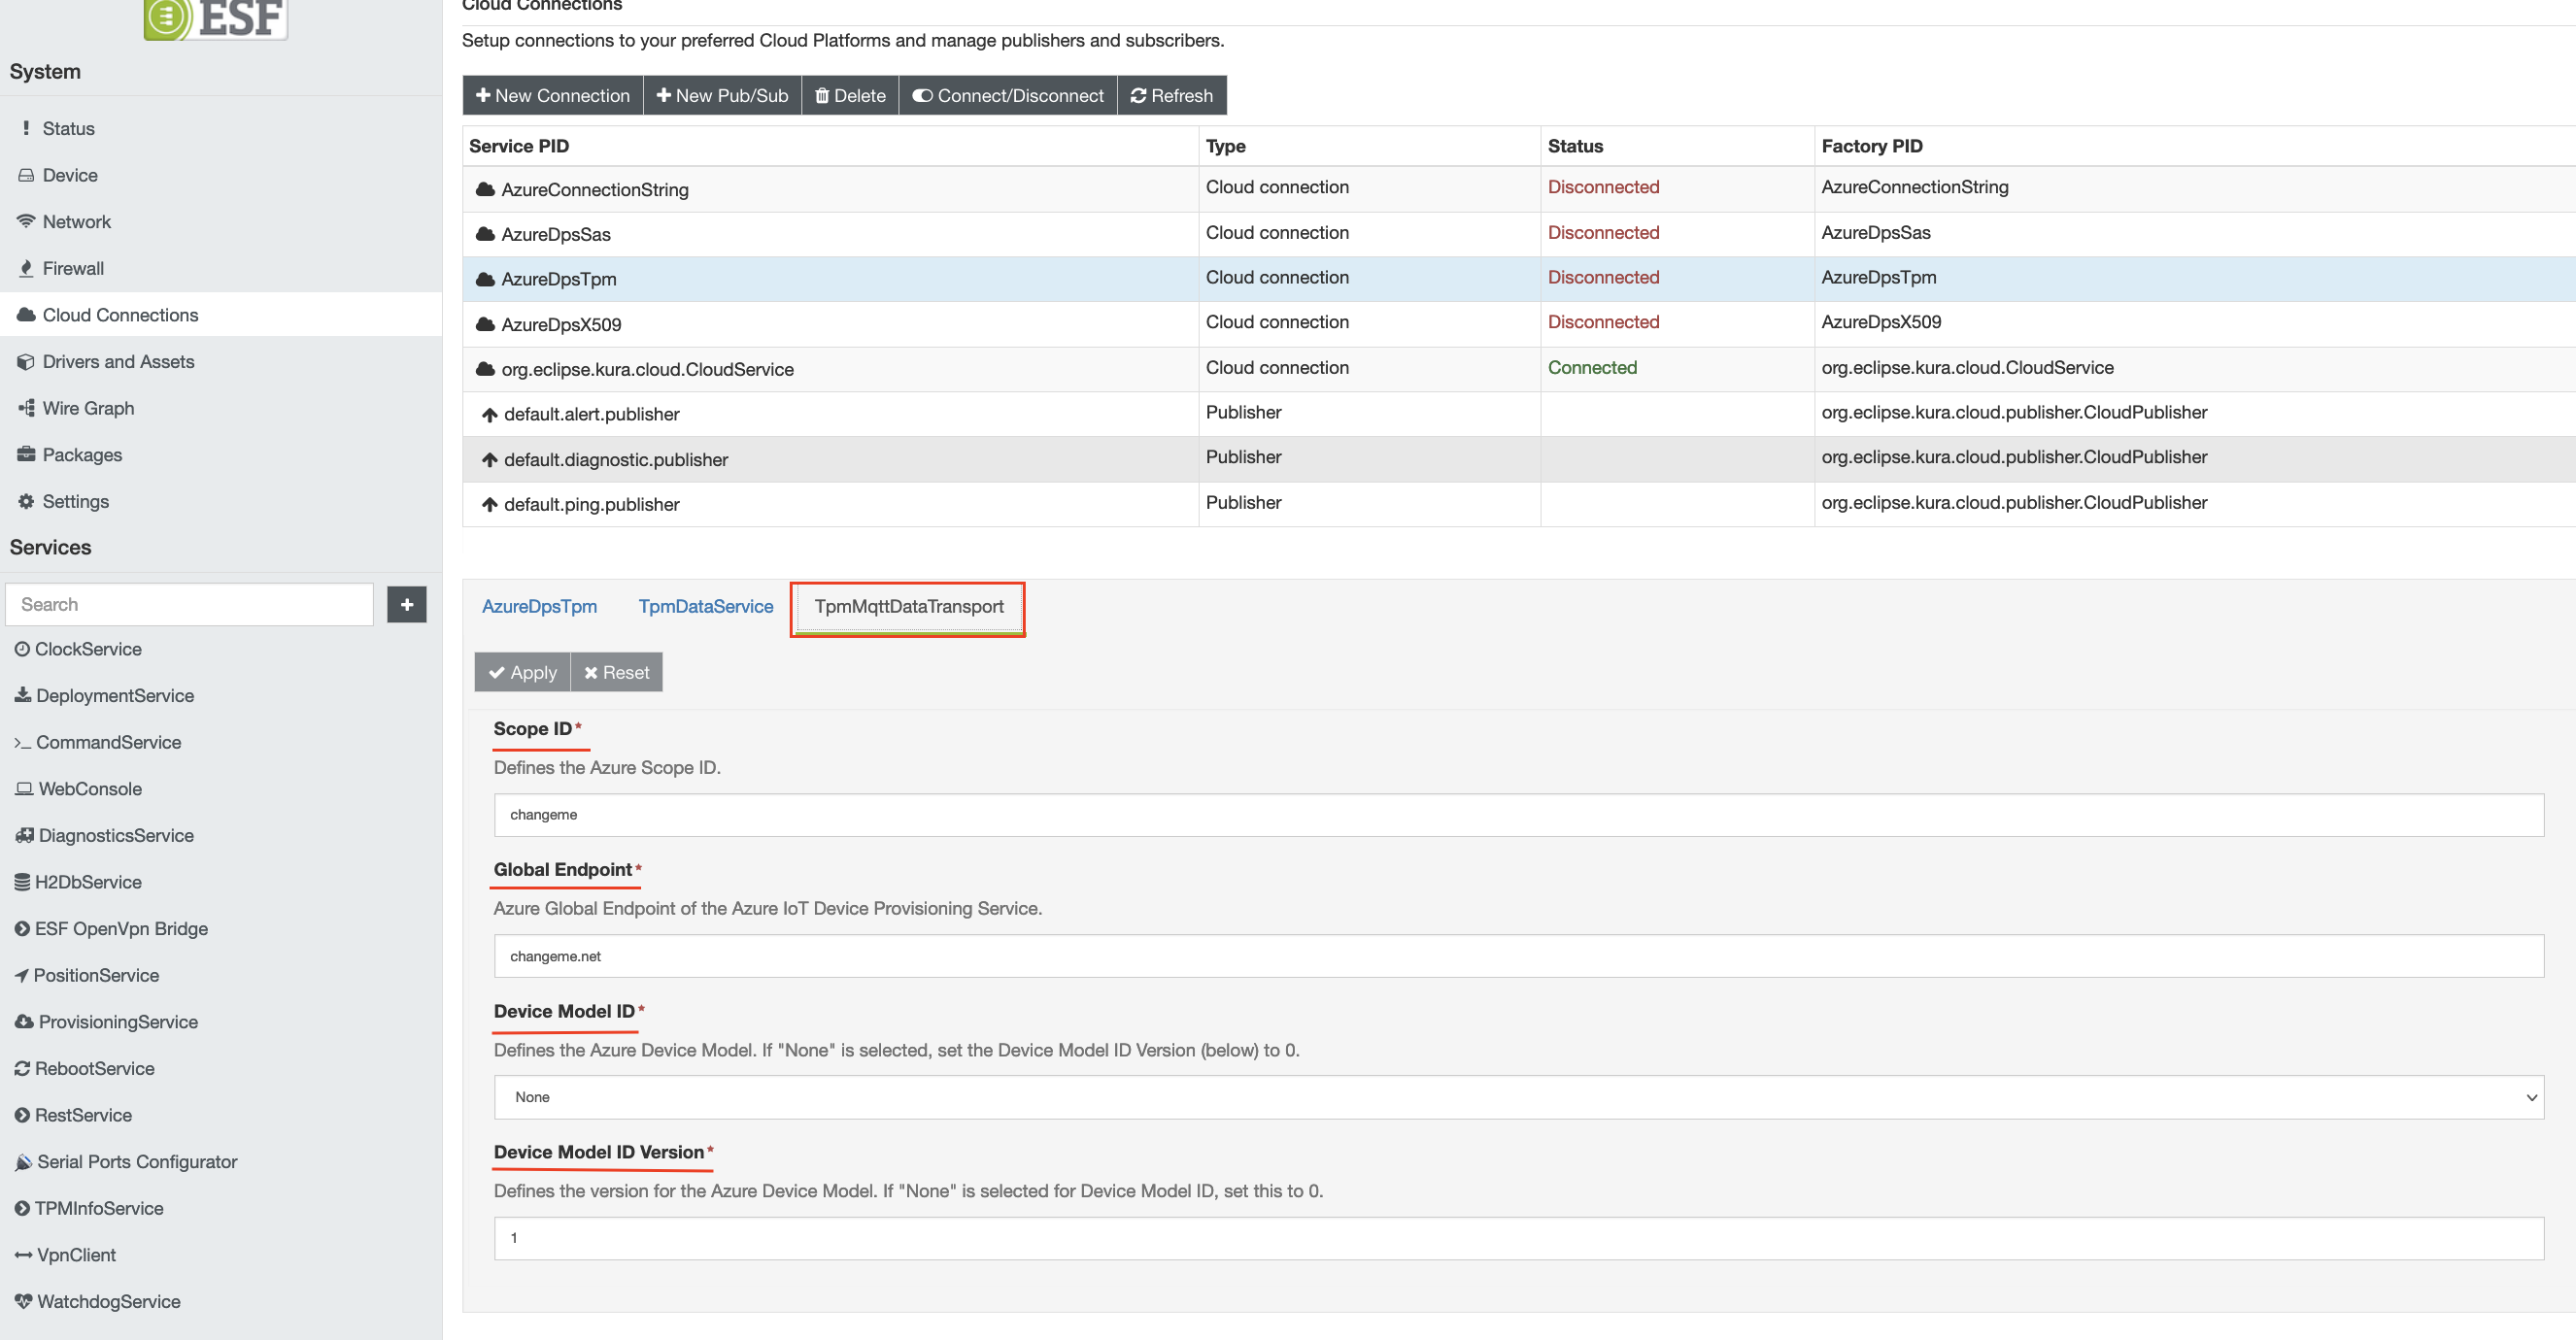
Select the appropriate Device Model ID from the list of options. If a device model does not need to be specified your application, leave the default 'None' field'. Set the 'Device Model ID Version' to the appropriate version of the Device Model.
Connecting to Azure IoT Portal can be accomplished in two ways:
- Start at Configure connection using IoT Hub DPS Individual Enrollment for IoT Hub DPS Individual Enrollment
- Start at Configure connection using IoT Central Individual Enrollment for IoT Central Individual Enrollment
Configure connection using IoT Hub DPS Individual Enrollment
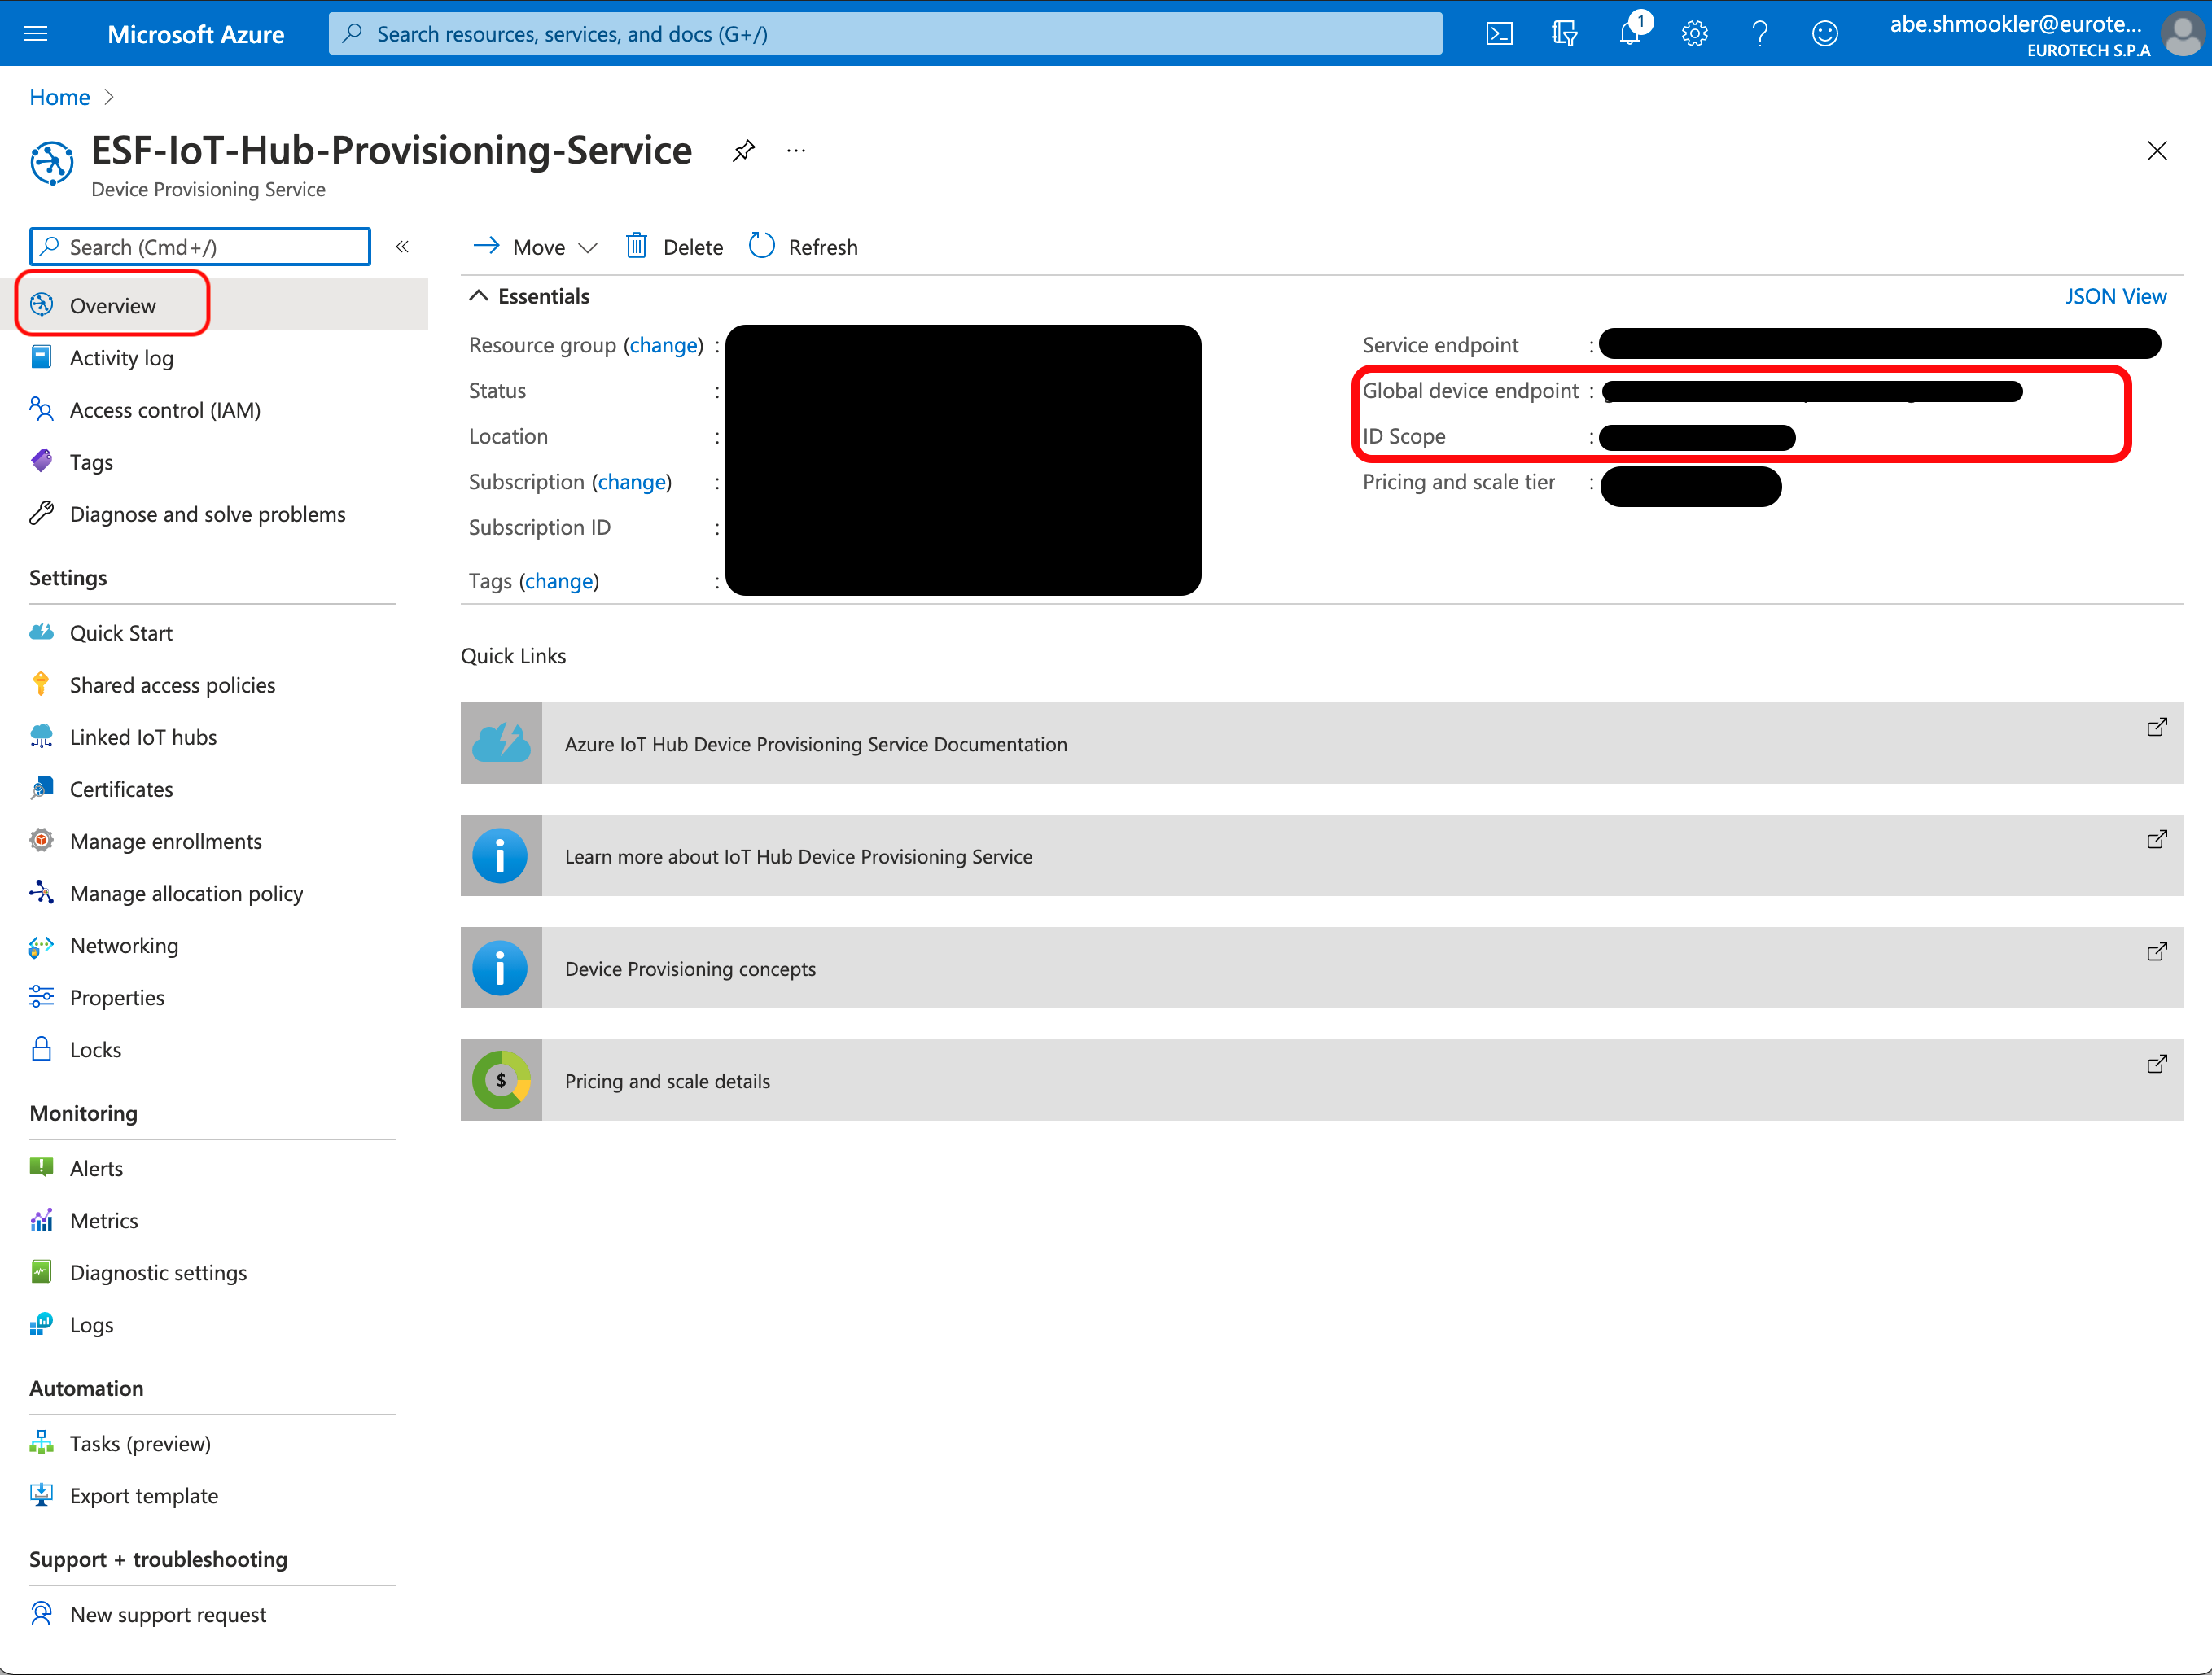
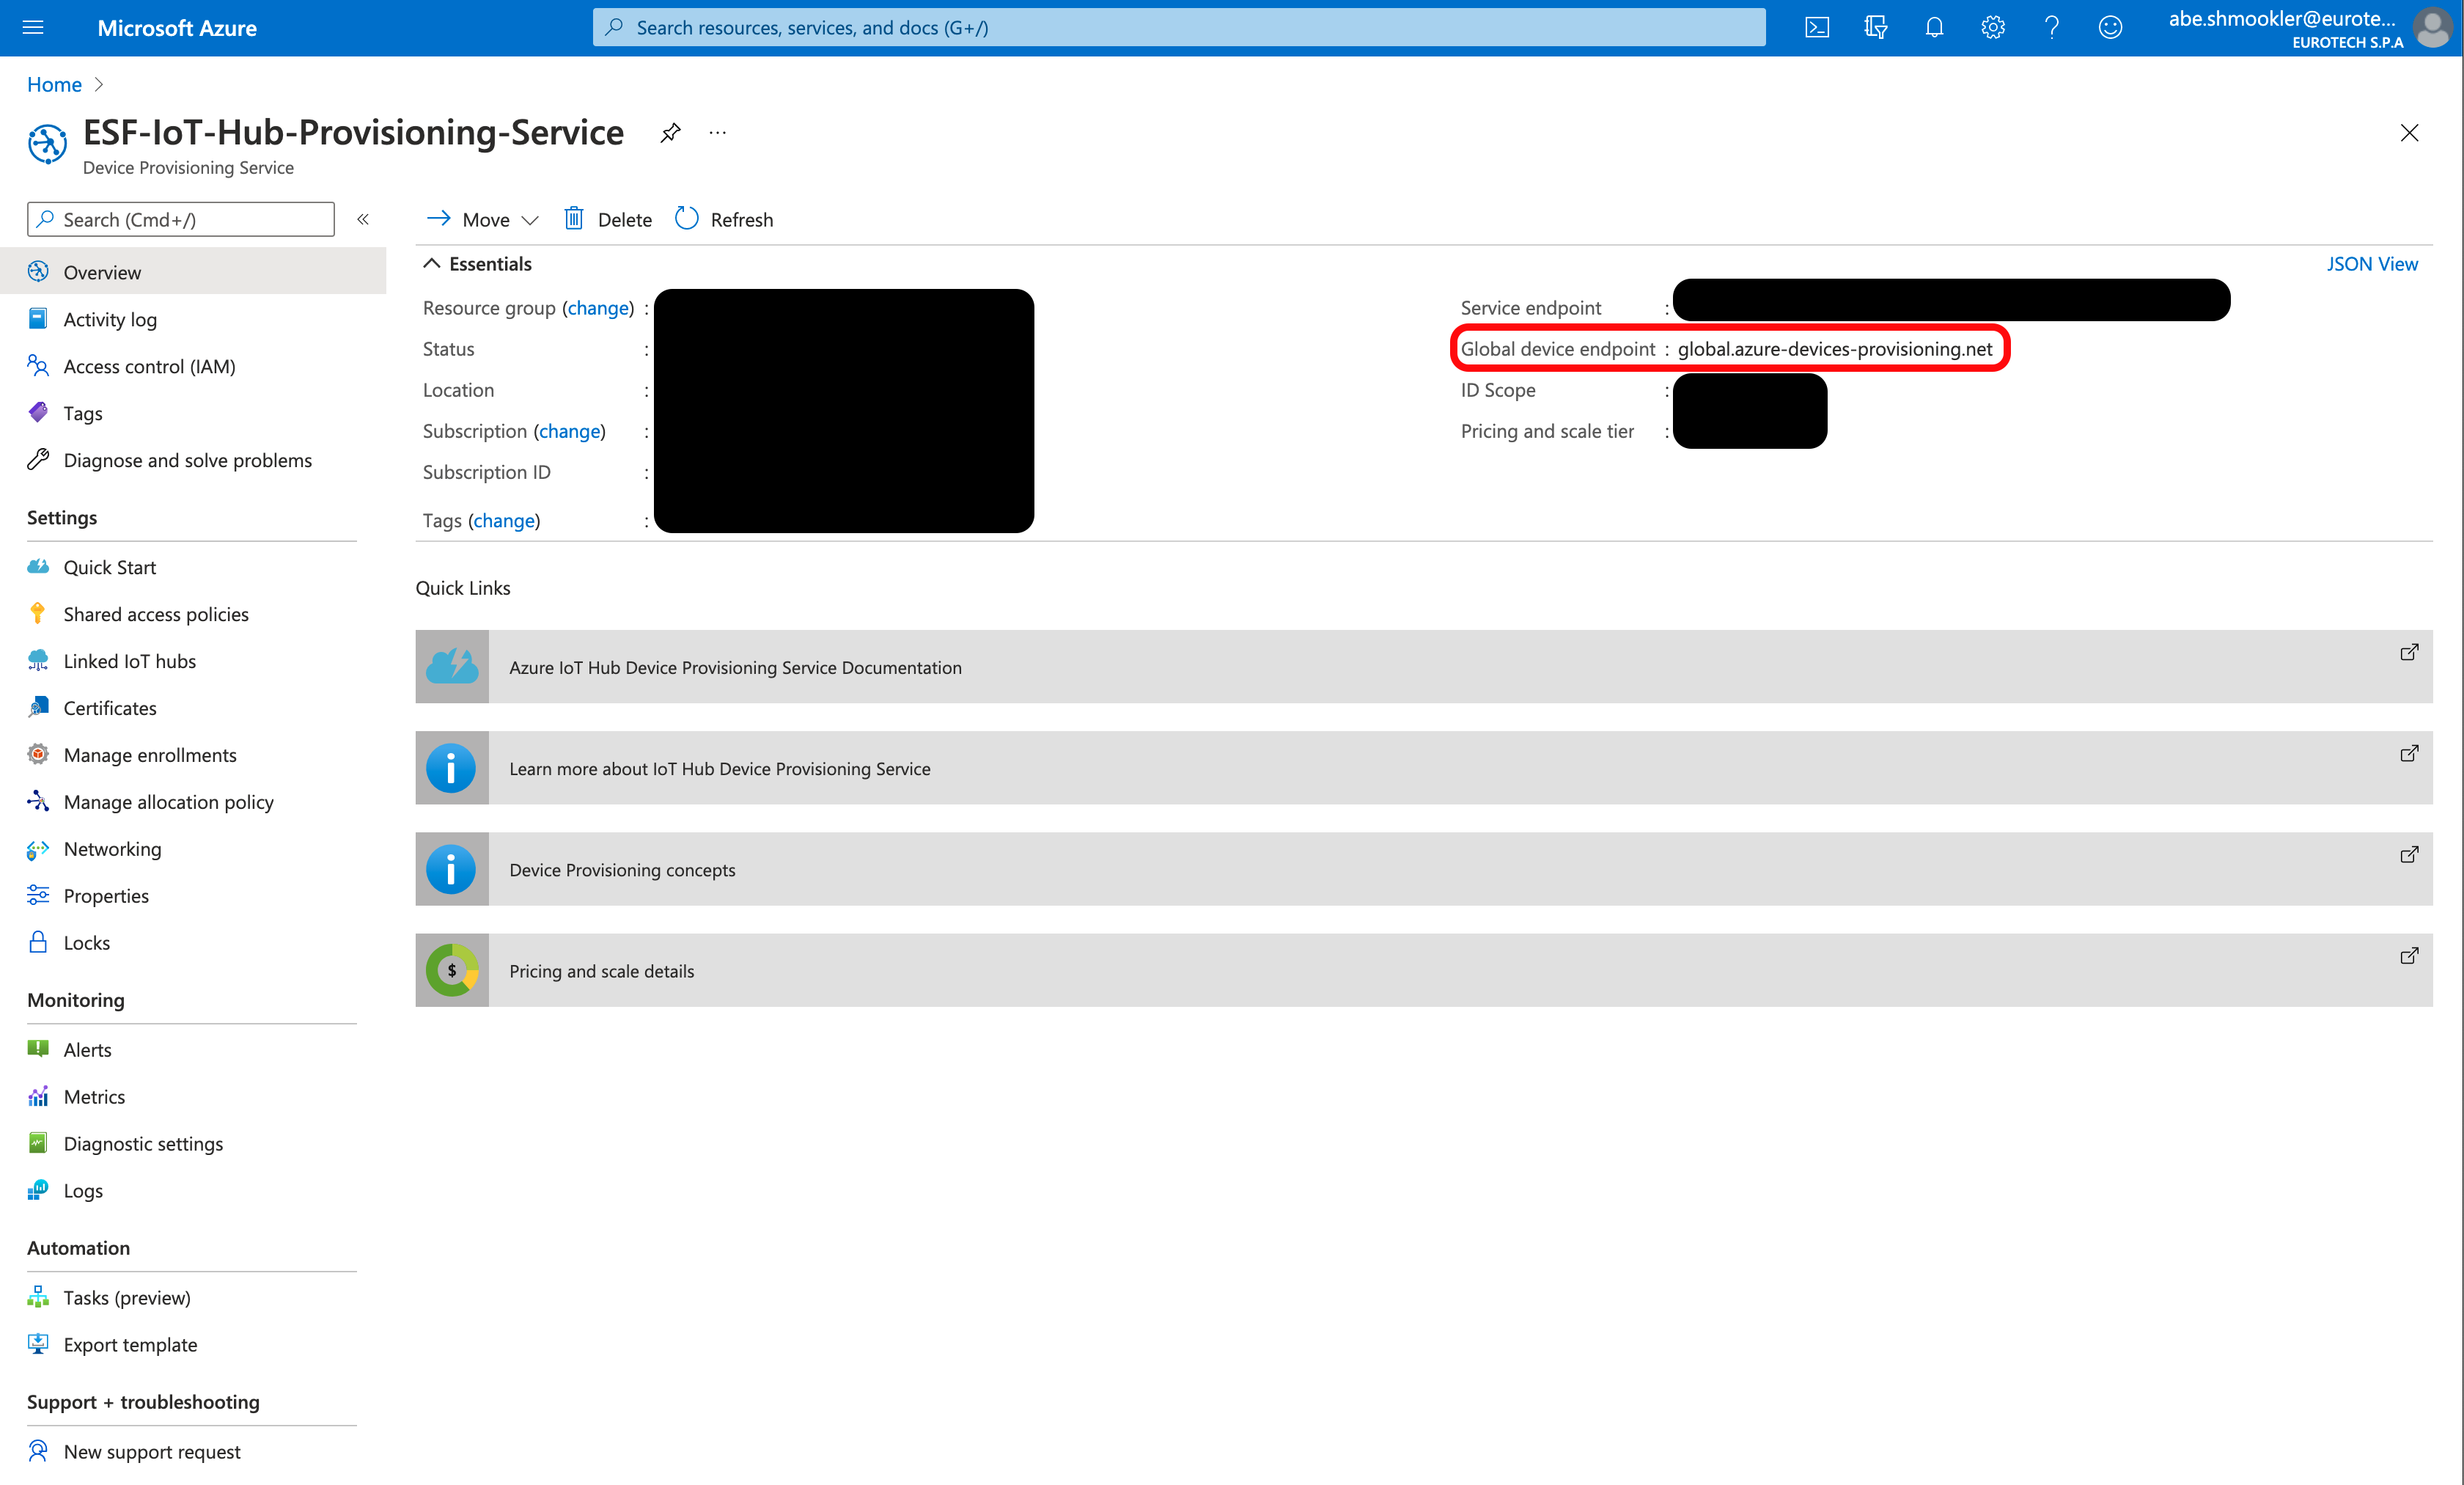
The Scope ID and Global Endpoint can be found in the DPS in the Azure Portal by navigating to the Overview page of your Azure DPS.
Copy/paste the ID Scope and Global device endpoint to the Scope ID and Global Endpoint in ESF and click Apply.
Click the Connect/Disconnect button. The Status should change to Connected. The connection process may take up to 30 seconds.
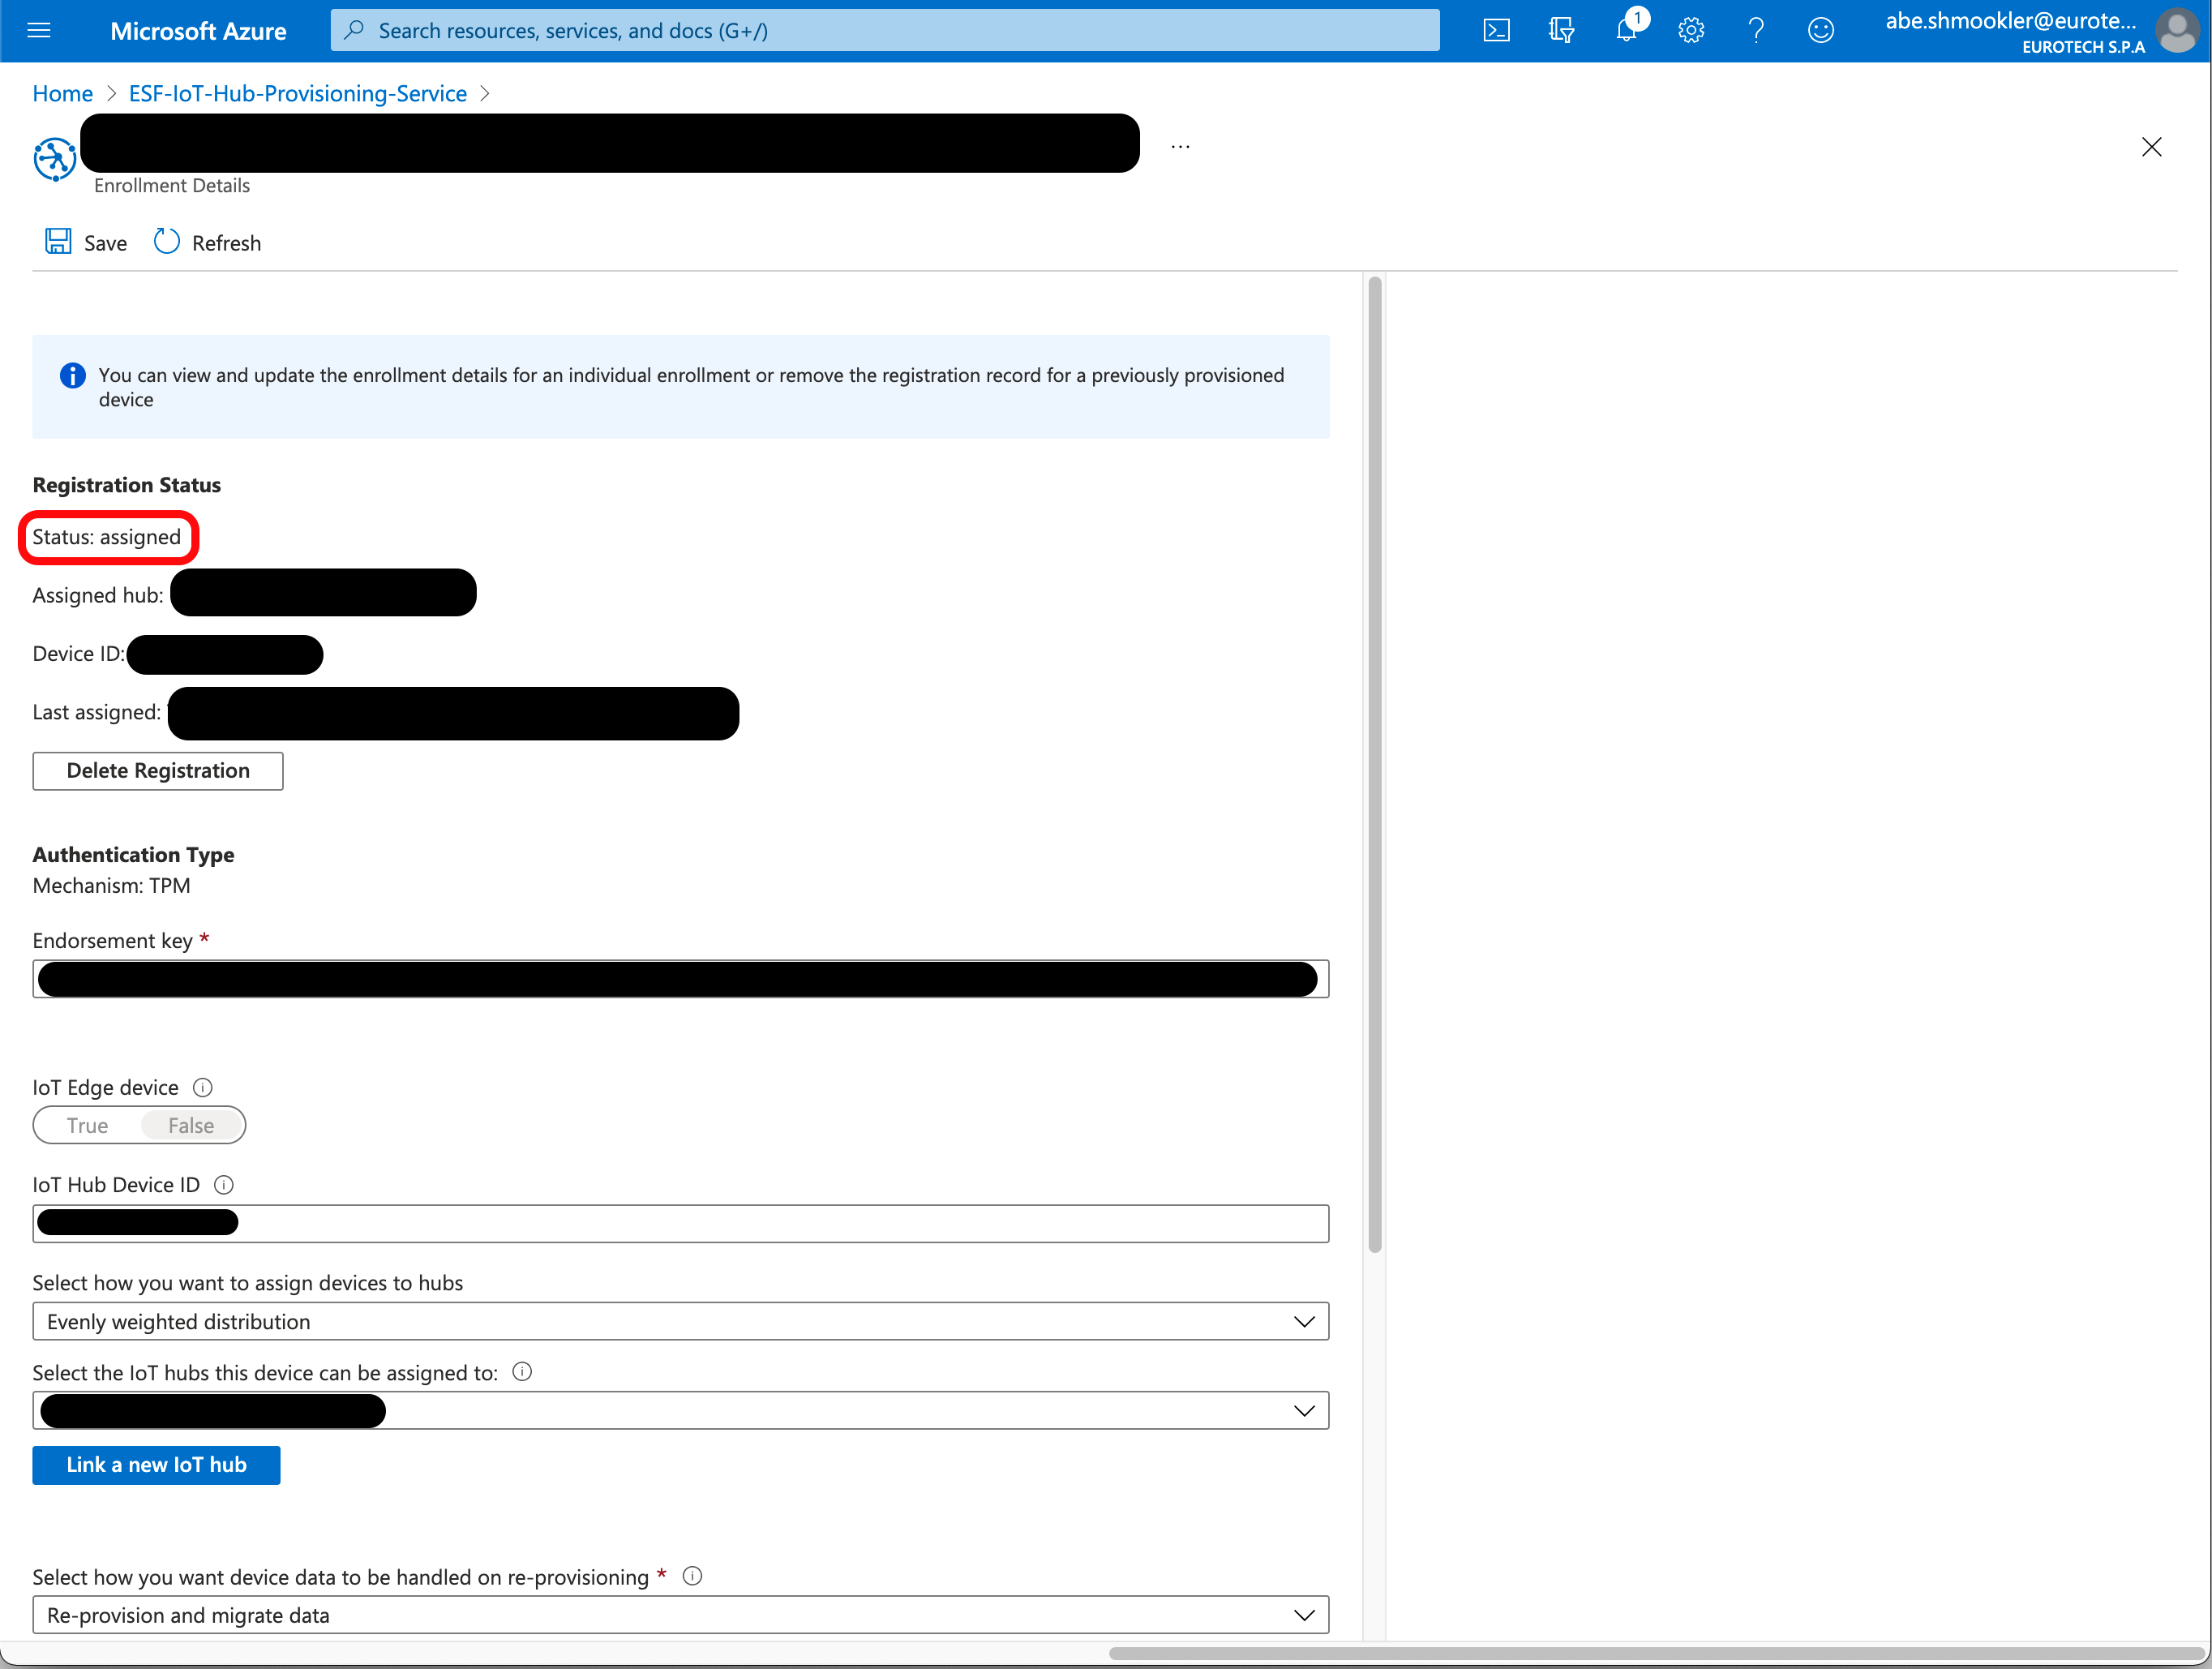
When the AzureDpsTpm is connected, navigate to the device in DPS (via Manage Enrollments/Individual Enrollments). Select your device (the Registration ID will be the Registration ID you entered from the TPMInfoService above).
In the Registration Status section, confirm that the Status is "assigned." If the Status is still "unassigned" try refreshing the page in your browser (not the Azure Portal Refresh button).
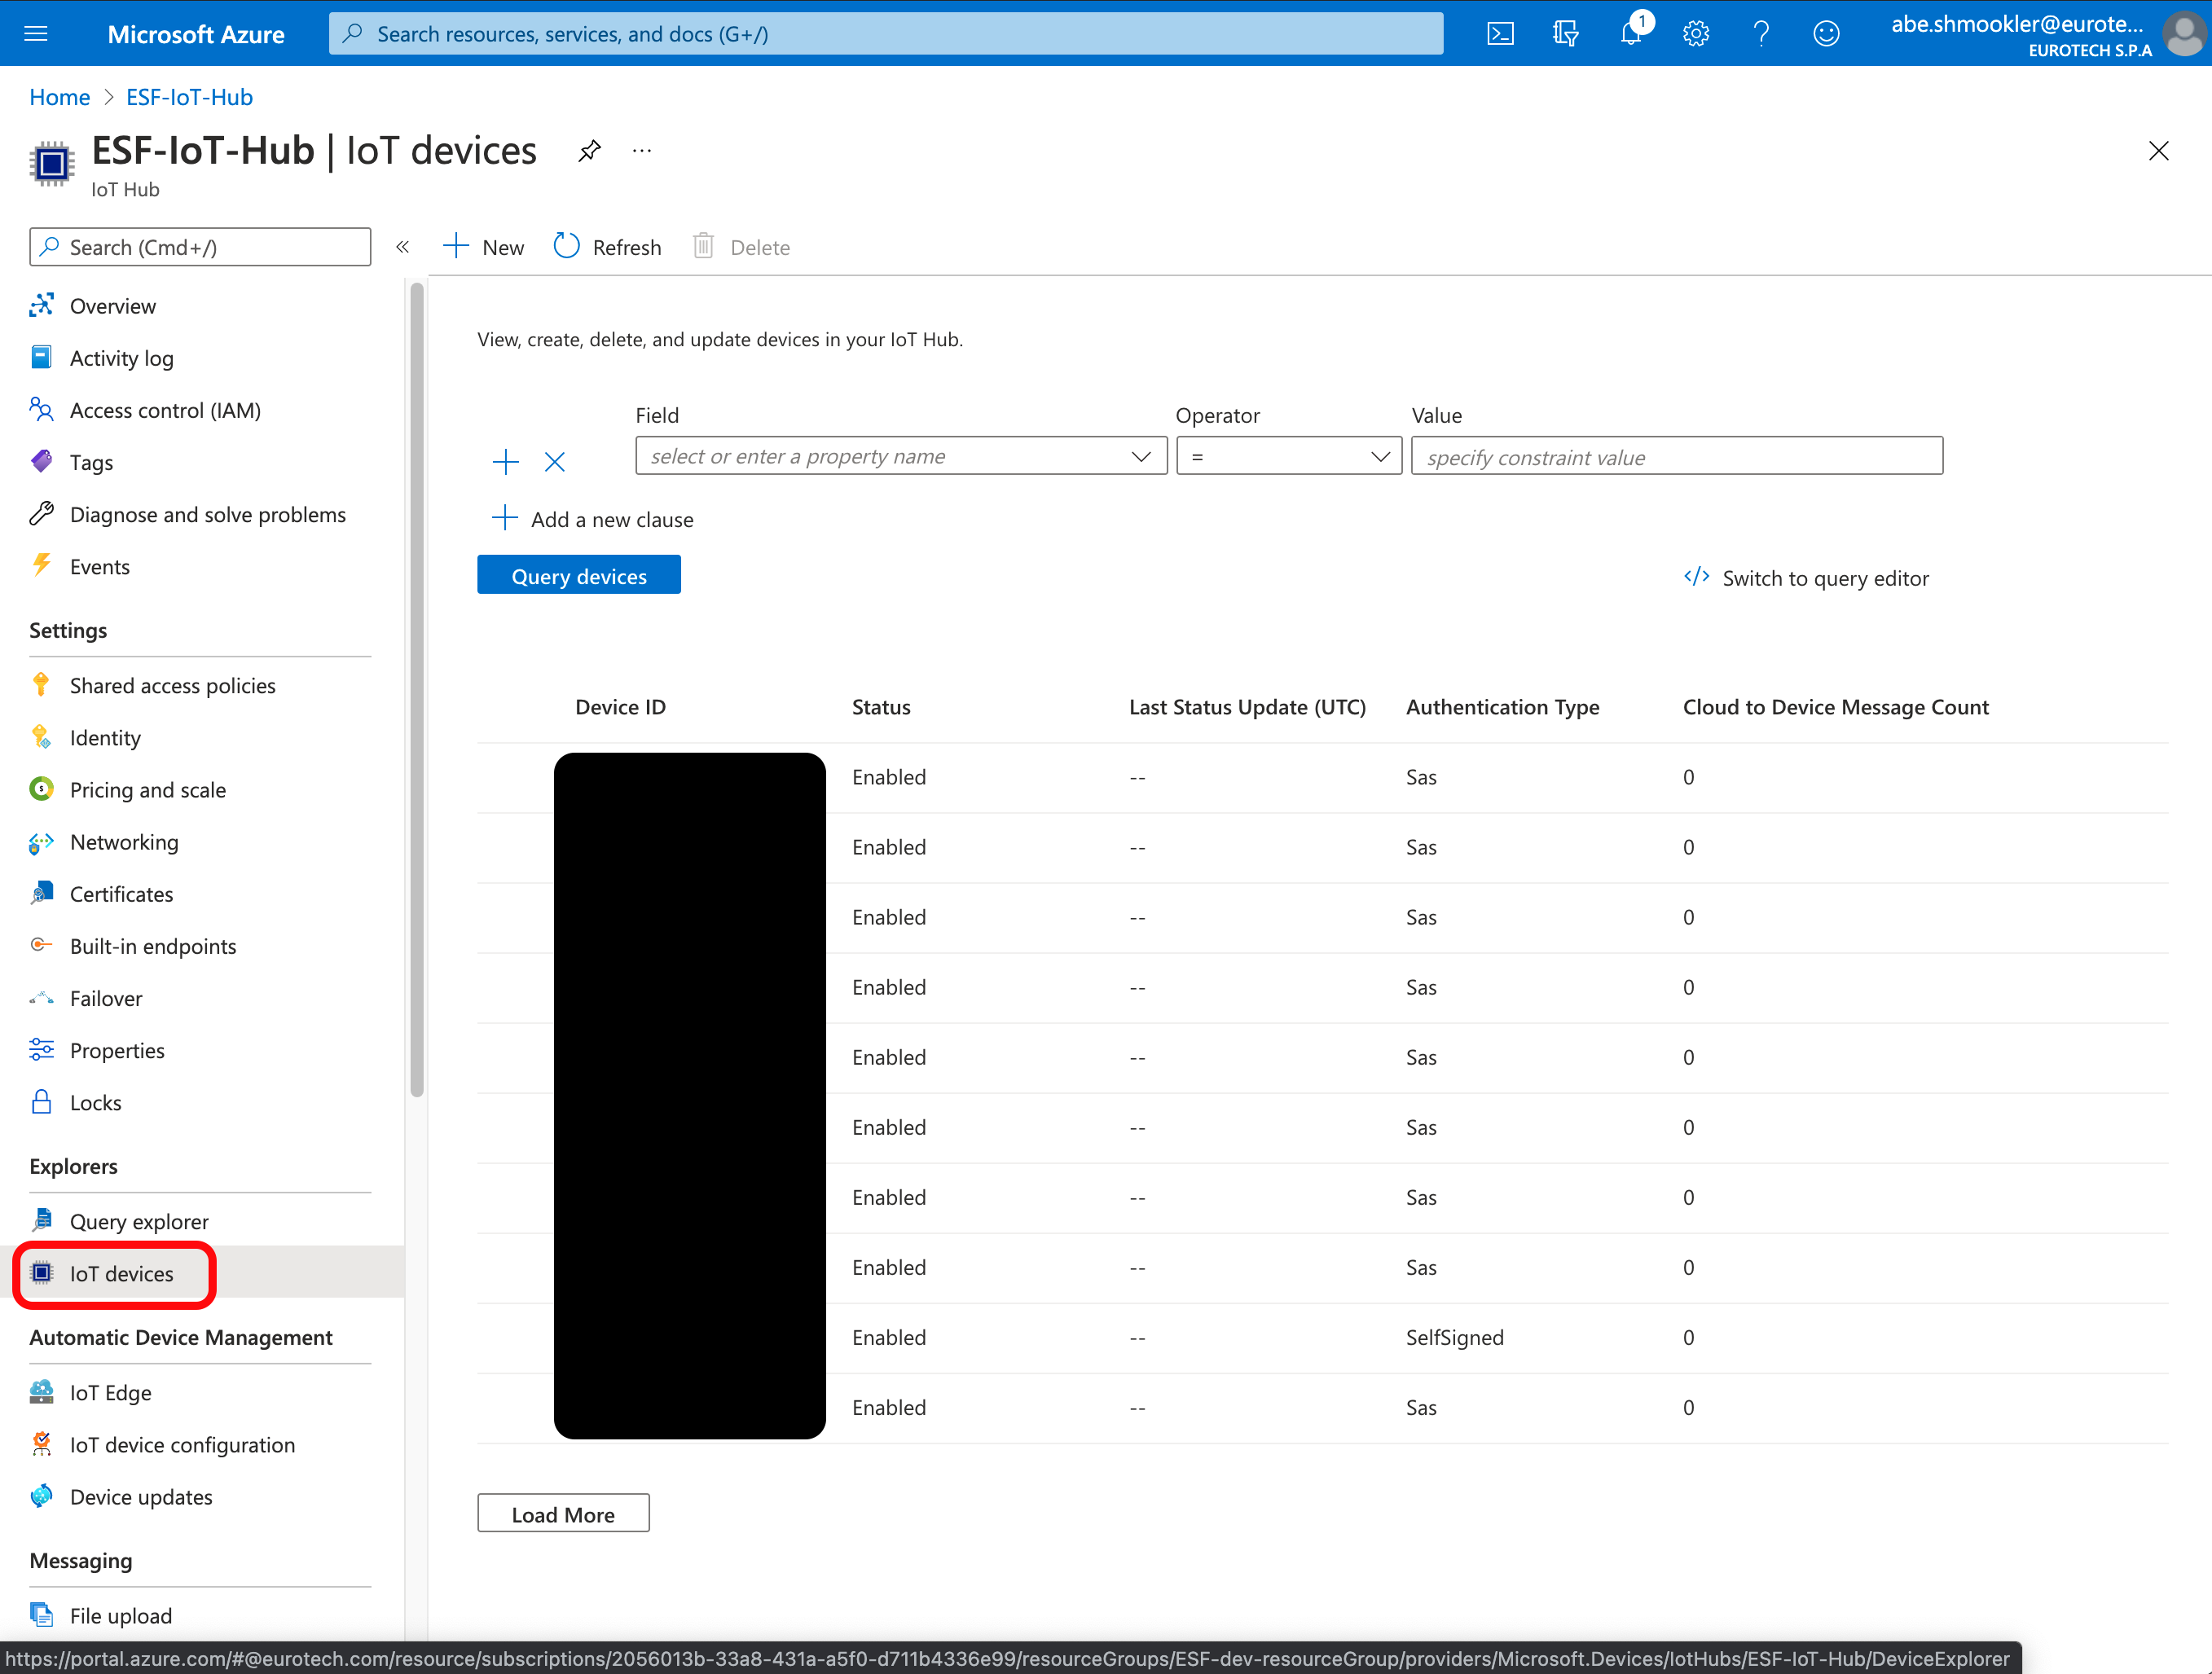
When the gateway connects for the first time, a Device will be created in the IoT Hub. Navigate to your IoT Hub in the Azure Portal. Go to the IoT Devices page and confirm the device is listed. In the IoT Hub the gateway will be listed under the Device ID you entered earlier (not the TPM Registration ID).
The device is now connected.
Configure connection using IoT Central Individual Enrollment
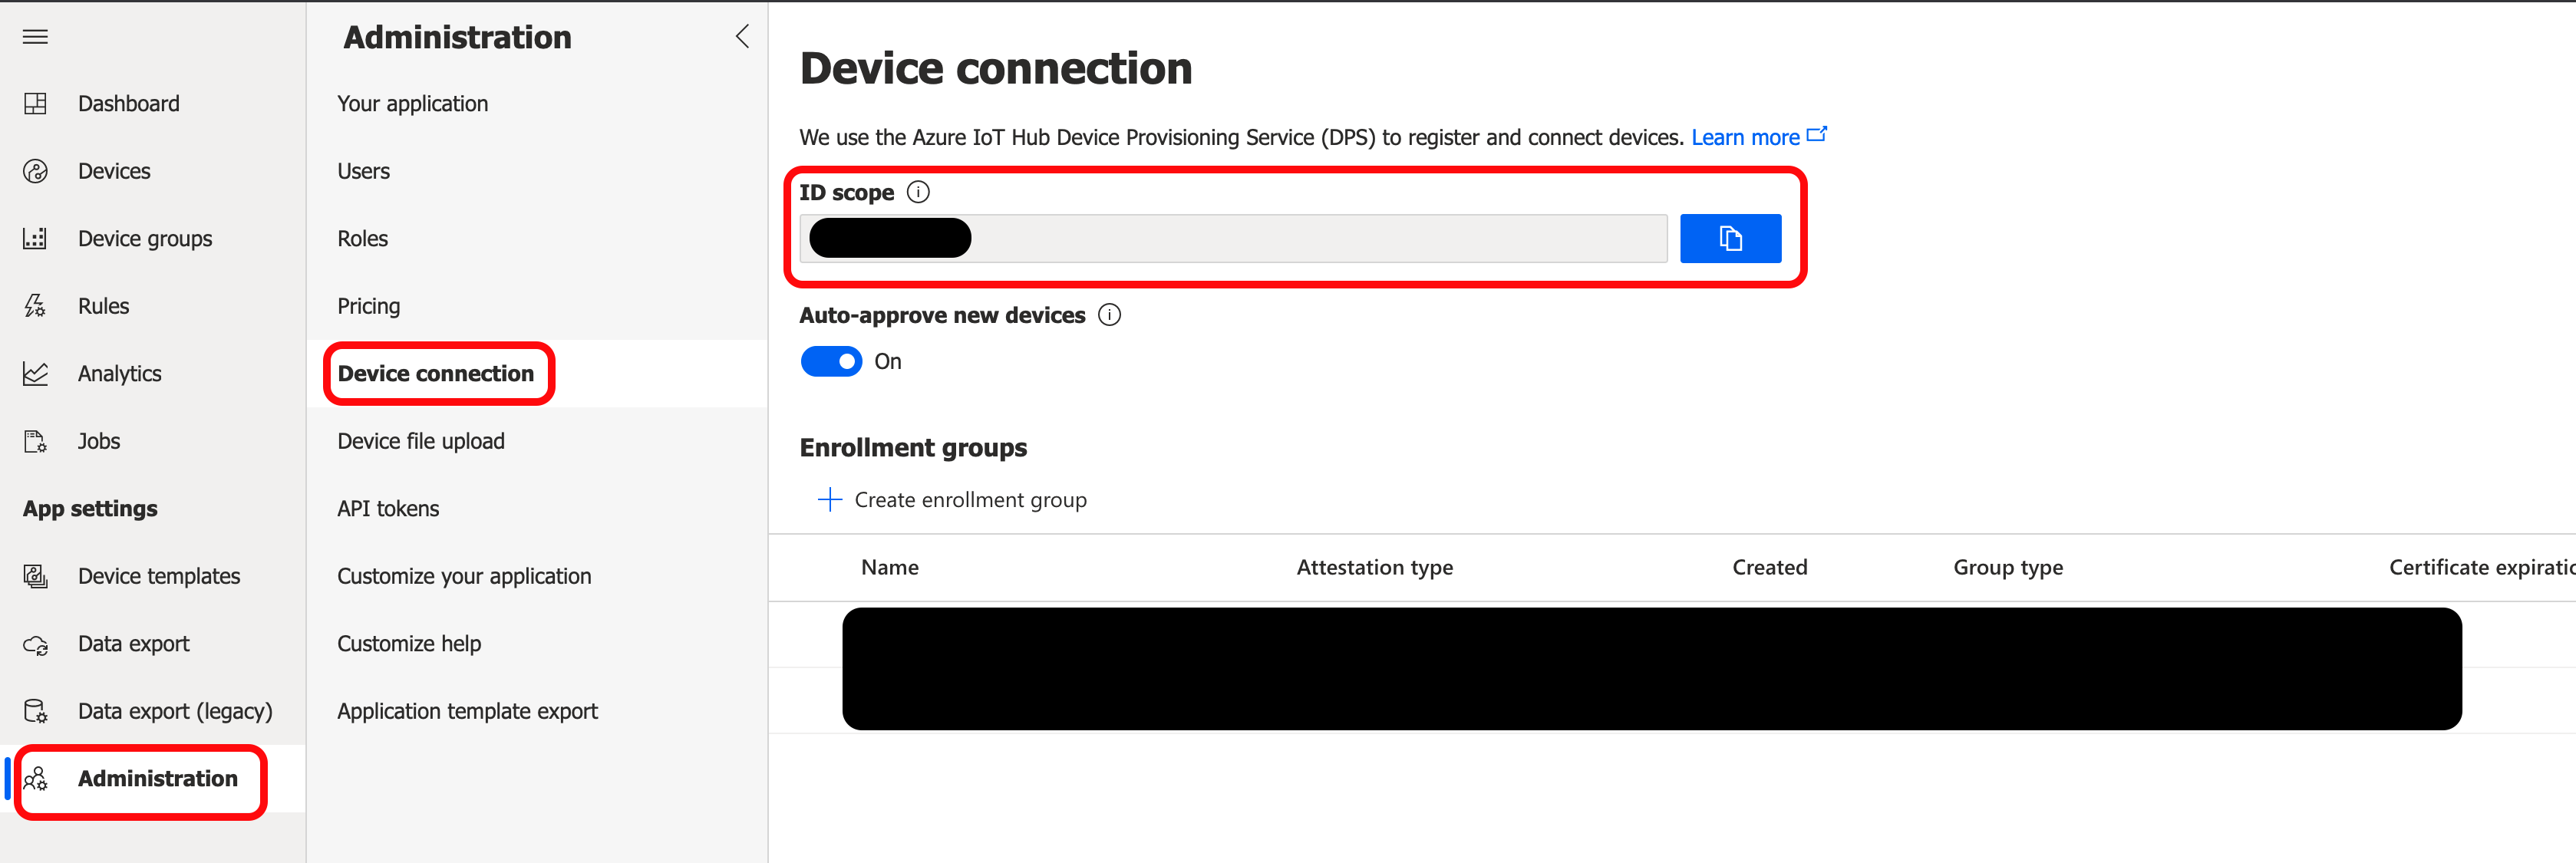
The Scope ID can be found in the Azure IoT Central Application. Navigate to the Device Connection section of the Administration page and copy the ID Scope to the Scope ID in ESF.
The Global Endpoint can be found in the DPS in the Azure Portal by navigating to the Overview page of your Azure DPS.
Copy/paste the Global device endpoint to the Global Endpoint in ESF and click Apply.
Click the Connect/Disconnect button. The Status should change to Connected. The connection process may take up to 30 seconds.
When the AzureDpsTpm is connected, navigate to the Devices page in your IoT Central Application. Confirm the Device status is Provisioned.

The device is now connected.
Updated 4 months ago
