Modbus Application
This tutorial will show how to collect data from a Modbus device and publish it on a cloud platform using Wires. The Modbus device will be emulated using a software simulator, like ModbusPal.
Configure Modbus device
- Download ModbusPal on a computer that will act as a Modbus slave.
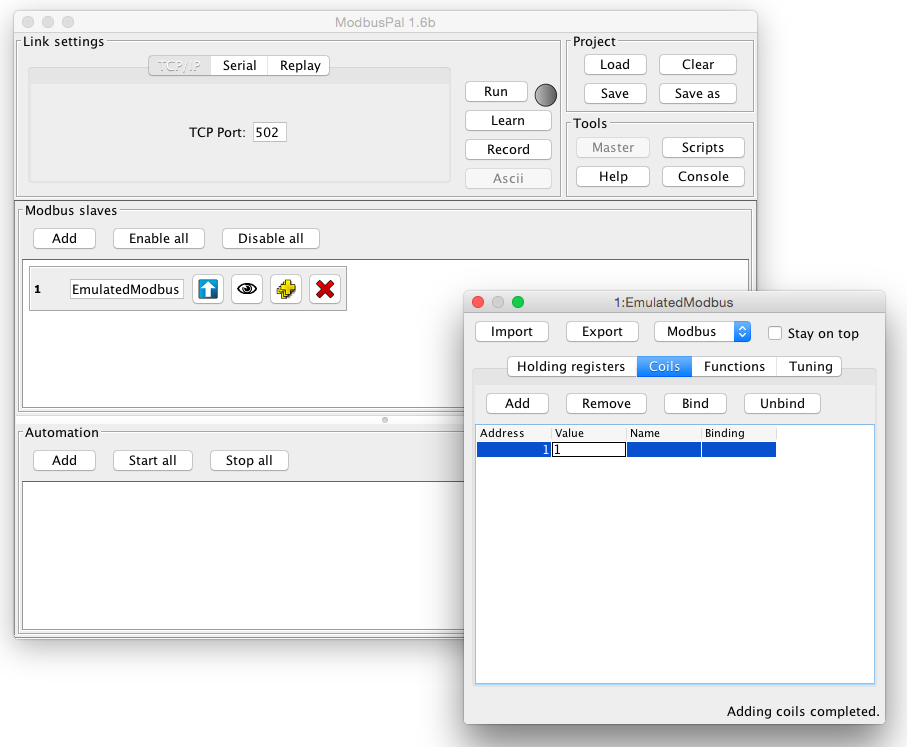
- Open ModbusPal application as root and click on the “Add” button under the “Modbus Slaves” tab to create a Modbus slave device. Select an address (i.e. 1) and put a name into the “Slave name” form.
- Click on the button with the eye to edit the slave device. Once the window is opened, add a coil with address 1 and set a value (0 or 1).
- Close the editor and on the main window, click on the “TCP/IP” button under the “Link Settings” tab. Set the “TCP port” to 502. Be sure that the selected TCP port is opened and reachable on the system.
- Click on “Run” button to start the device.

Configure Wires Modbus application
- Install the Modbus driver from Eclipse Kura Marketplace
- In the ESF Administrative Web Interface, create a new driver instance:
- Under Drivers and Assets, click the New Driver button
- Select org.eclipse.kura.driver.modbus, type in a name, and click Apply: a new service will show up in the Drivers and Assets table.
- Configure the new service as follows:
- access.type: TCP
- modbus.tcp-udp.ip: IP address of the system where ModbusPal is running
- modbus.tcp-udp.port: 502
- Click on Wires in System
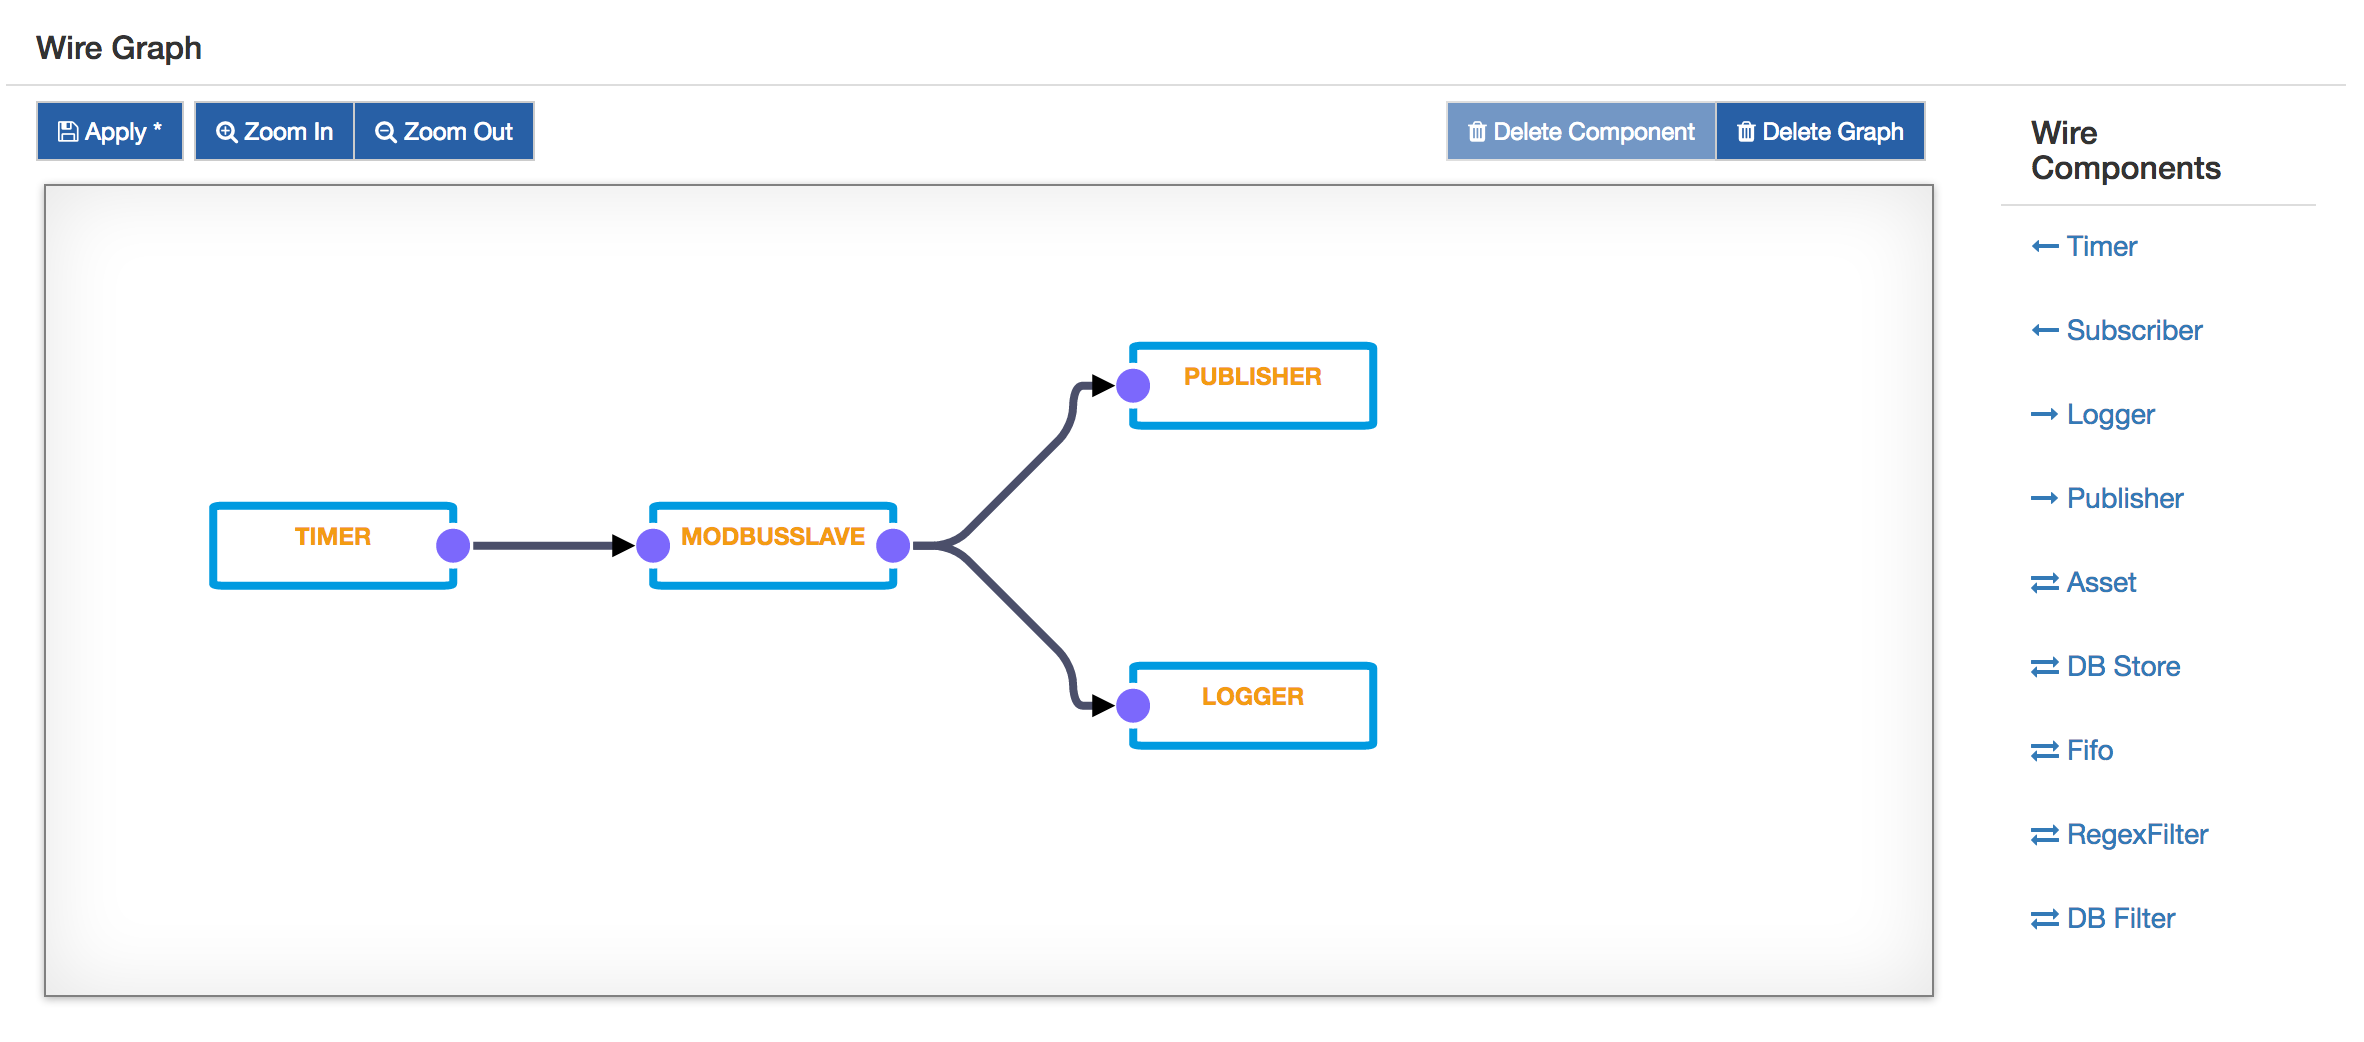
- Add a new Timer component and configure the interval at which the Modbus slave will be sampled
- Add a new Asset with the previously added Modbus driver
- Configure the new Modbus asset, adding a new Channel with the following configuration:
- name: a custom cool name
- type: READ_WRITE
- value type: BOOLEAN
- unit.id: the Modbus slave address configured in ModbusPal (i.e. 1)
- primary.table: COILS
- memory.address: the Modbus coil address configured in ModbusPal (i.e. 1)
- Add a new Publisher component and configure the chosen cloud platform stack in cloud.service.pid option
- Add a Logger component
- Connect the Timer to the Asset, and the Asset to the Publisher and Logger.
- Click on Apply and check the logs and cloud platform that the data is correctly published.

Updated 3 months ago
