X.509 Provisioning and Connection
Overview
This section explains how to provision a gateway and how to connect to the Azure IoT Services using X.509 certificates. This connection method can be used with IoT Hub DPS Individual Enrollment, IoT Hub DPS Enrollment Group, IoT Central Individual Enrollment, or IoT Central Enrollment Group.
ESF Cloud Connector for Azure IoT, Version 2.0.0 and Above OnlyThese instructions apply to the ESF Cloud Connector for Azure IoT, Version 2.0.0 and above. See Legacy v2 Azure IoT Connection if you are using any version under 2.0.0.
Testing Use OnlyThese instructions are for testing and development only. The certificates generated in this guide are not suitable for deployment!
Always follow the correct procedures for generating secure certificates!
Prerequisites
A terminal application and the OpenSSL package are required. These are often pre-installed with operating systems.
Create a X.509 Self-Signed CA Certificate (Root Certificate) and Key
Create a PEM formatted X.509 self-signed CA certificate (also known as a Root Certificate) and key by running the following command:
Unencrypted Private Key FileThe command below will generate a private key file that is unencrypted. If you prefer to encrypt the private key file, remove the "-nodes" argument from the command.
openssl req -x509 -newkey rsa:2048 -keyout root-private-key.pem -nodes -out root-cert.pemEnter the following information when prompted. The values you enter into the fields other than Common Name can be anything and do not matter. Make sure to note what you entered in the Common Name field as it will be used later in the provisioning process.
Certificate Detail FieldsYou must enter a value into at least one of the configuration fields other than Common Name. If all fields other than Common Name are blank, the certificate generation will succeed but the Azure authentication will fail.
Common Name FormatThe Common Name field must be alphanumeric (a-z, 0-9) characters only and all lower case. If the Common Name field is not all lower case or includes any non-alphanumeric characters, the certificate generation will succeed but the Azure authentication will fail.
Note the Common NameMake sure you keep a copy of the Common Name. It will be required later in the provisioning process and must be an exact match to the Common Name used in this certificate.
Configuration Fields:
- Country Name: Enter any 2 letter code. Enter a period for blank. At least one of these fields must be filled in.
- State or Province Name: Enter anything. Enter a period for blank. At least one of these fields must be filled in.
- Locality Name: Enter anything. Enter a period for blank. At least one of these fields must be filled in.
- Organization Name: Enter anything. Enter a period for blank. At least one of these fields must be filled in.
- Organization Unit Name: Enter anything. Enter a period for blank. At least one of these fields must be filled in.
- Common Name: This is required. Must be all lower case. Make sure you note this value as it will be used later in the provisioning status. At least one other field must be filled in as well.
- Email Address: Enter anything. Enter a period for blank. At least one of these fields must be filled in.
Provisioning
X.509 Provisioning can be accomplished in five ways:
- Start at Provision Device Using IoT Hub DPS Individual Enrollment for IoT Hub DPS Individual Enrollment
- Start at Provision Device Using IoT Hub DPS Enrollment Group for IoT Hub DPS Enrollment Group
- Start at Provision Device Using IoT Central Individual Enrollment for IoT Central Individual Enrollment
- Start at Provision Device Using IoT Central Enrollment Group for IoT Central Enrollment Group
Provision Device Using IoT Hub DPS Individual Enrollment
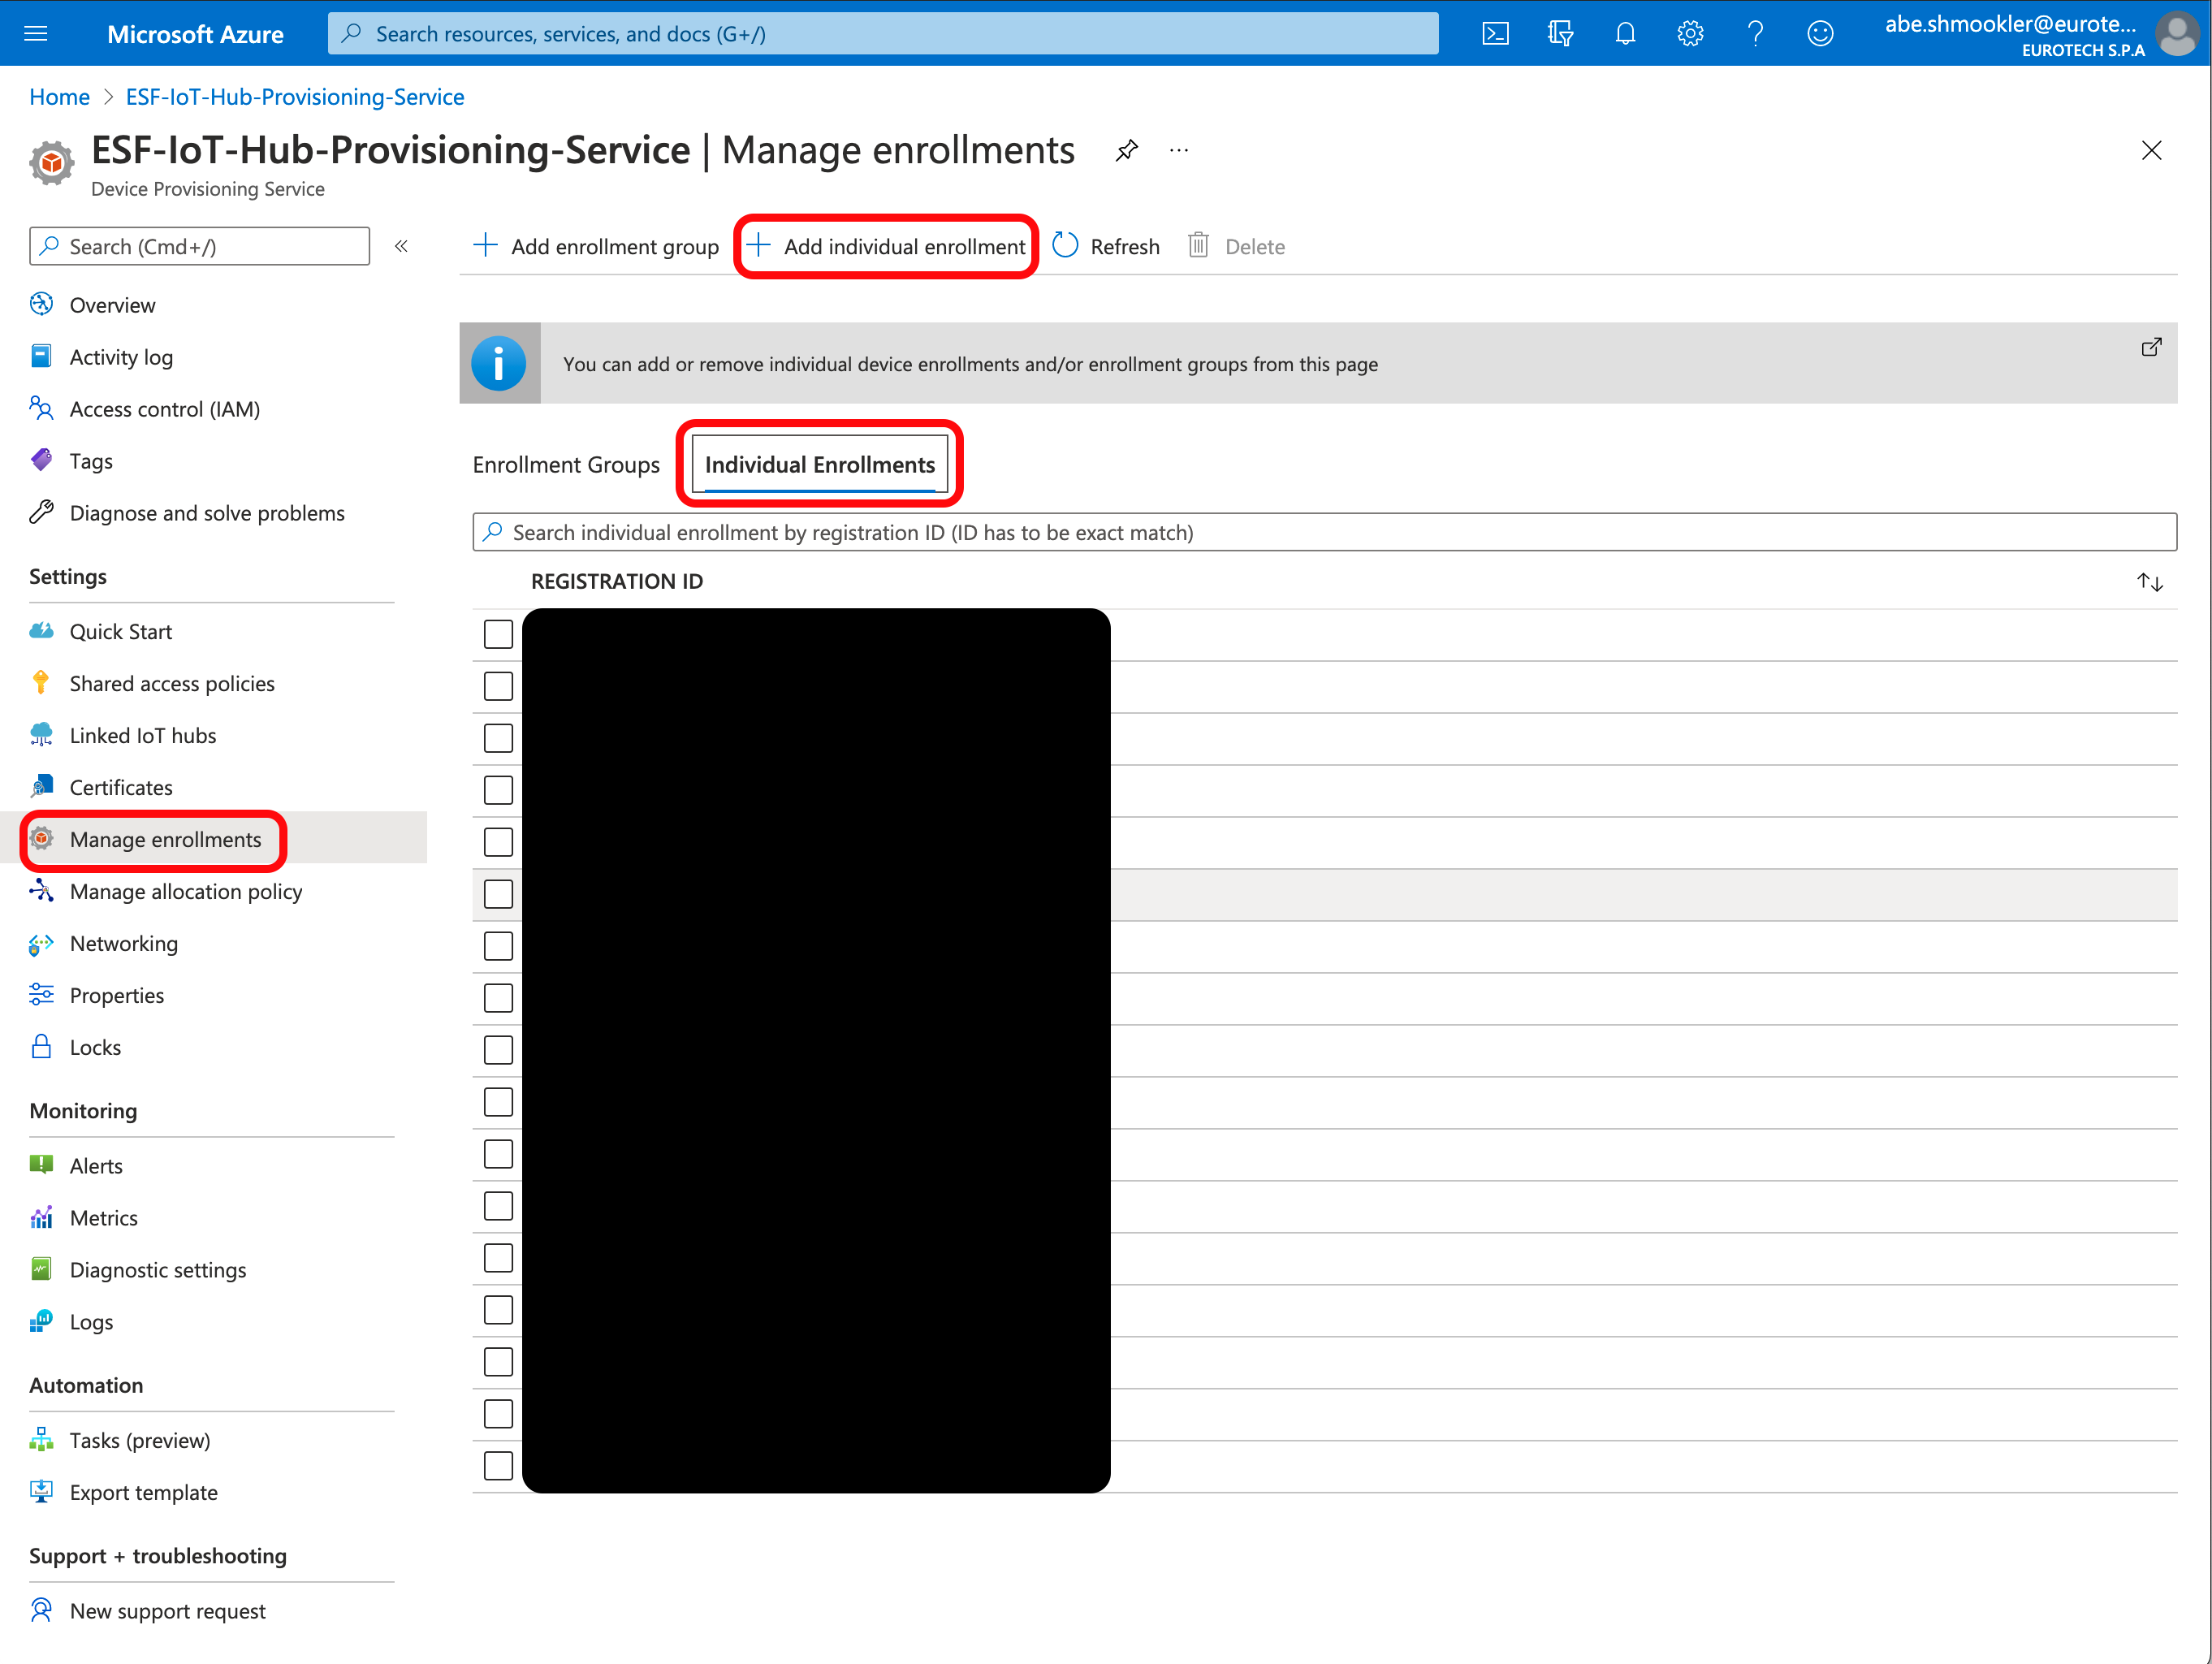
Go to the Manage Enrollments page of your DPS in your Azure Portal and Click + Add individual enrollment.
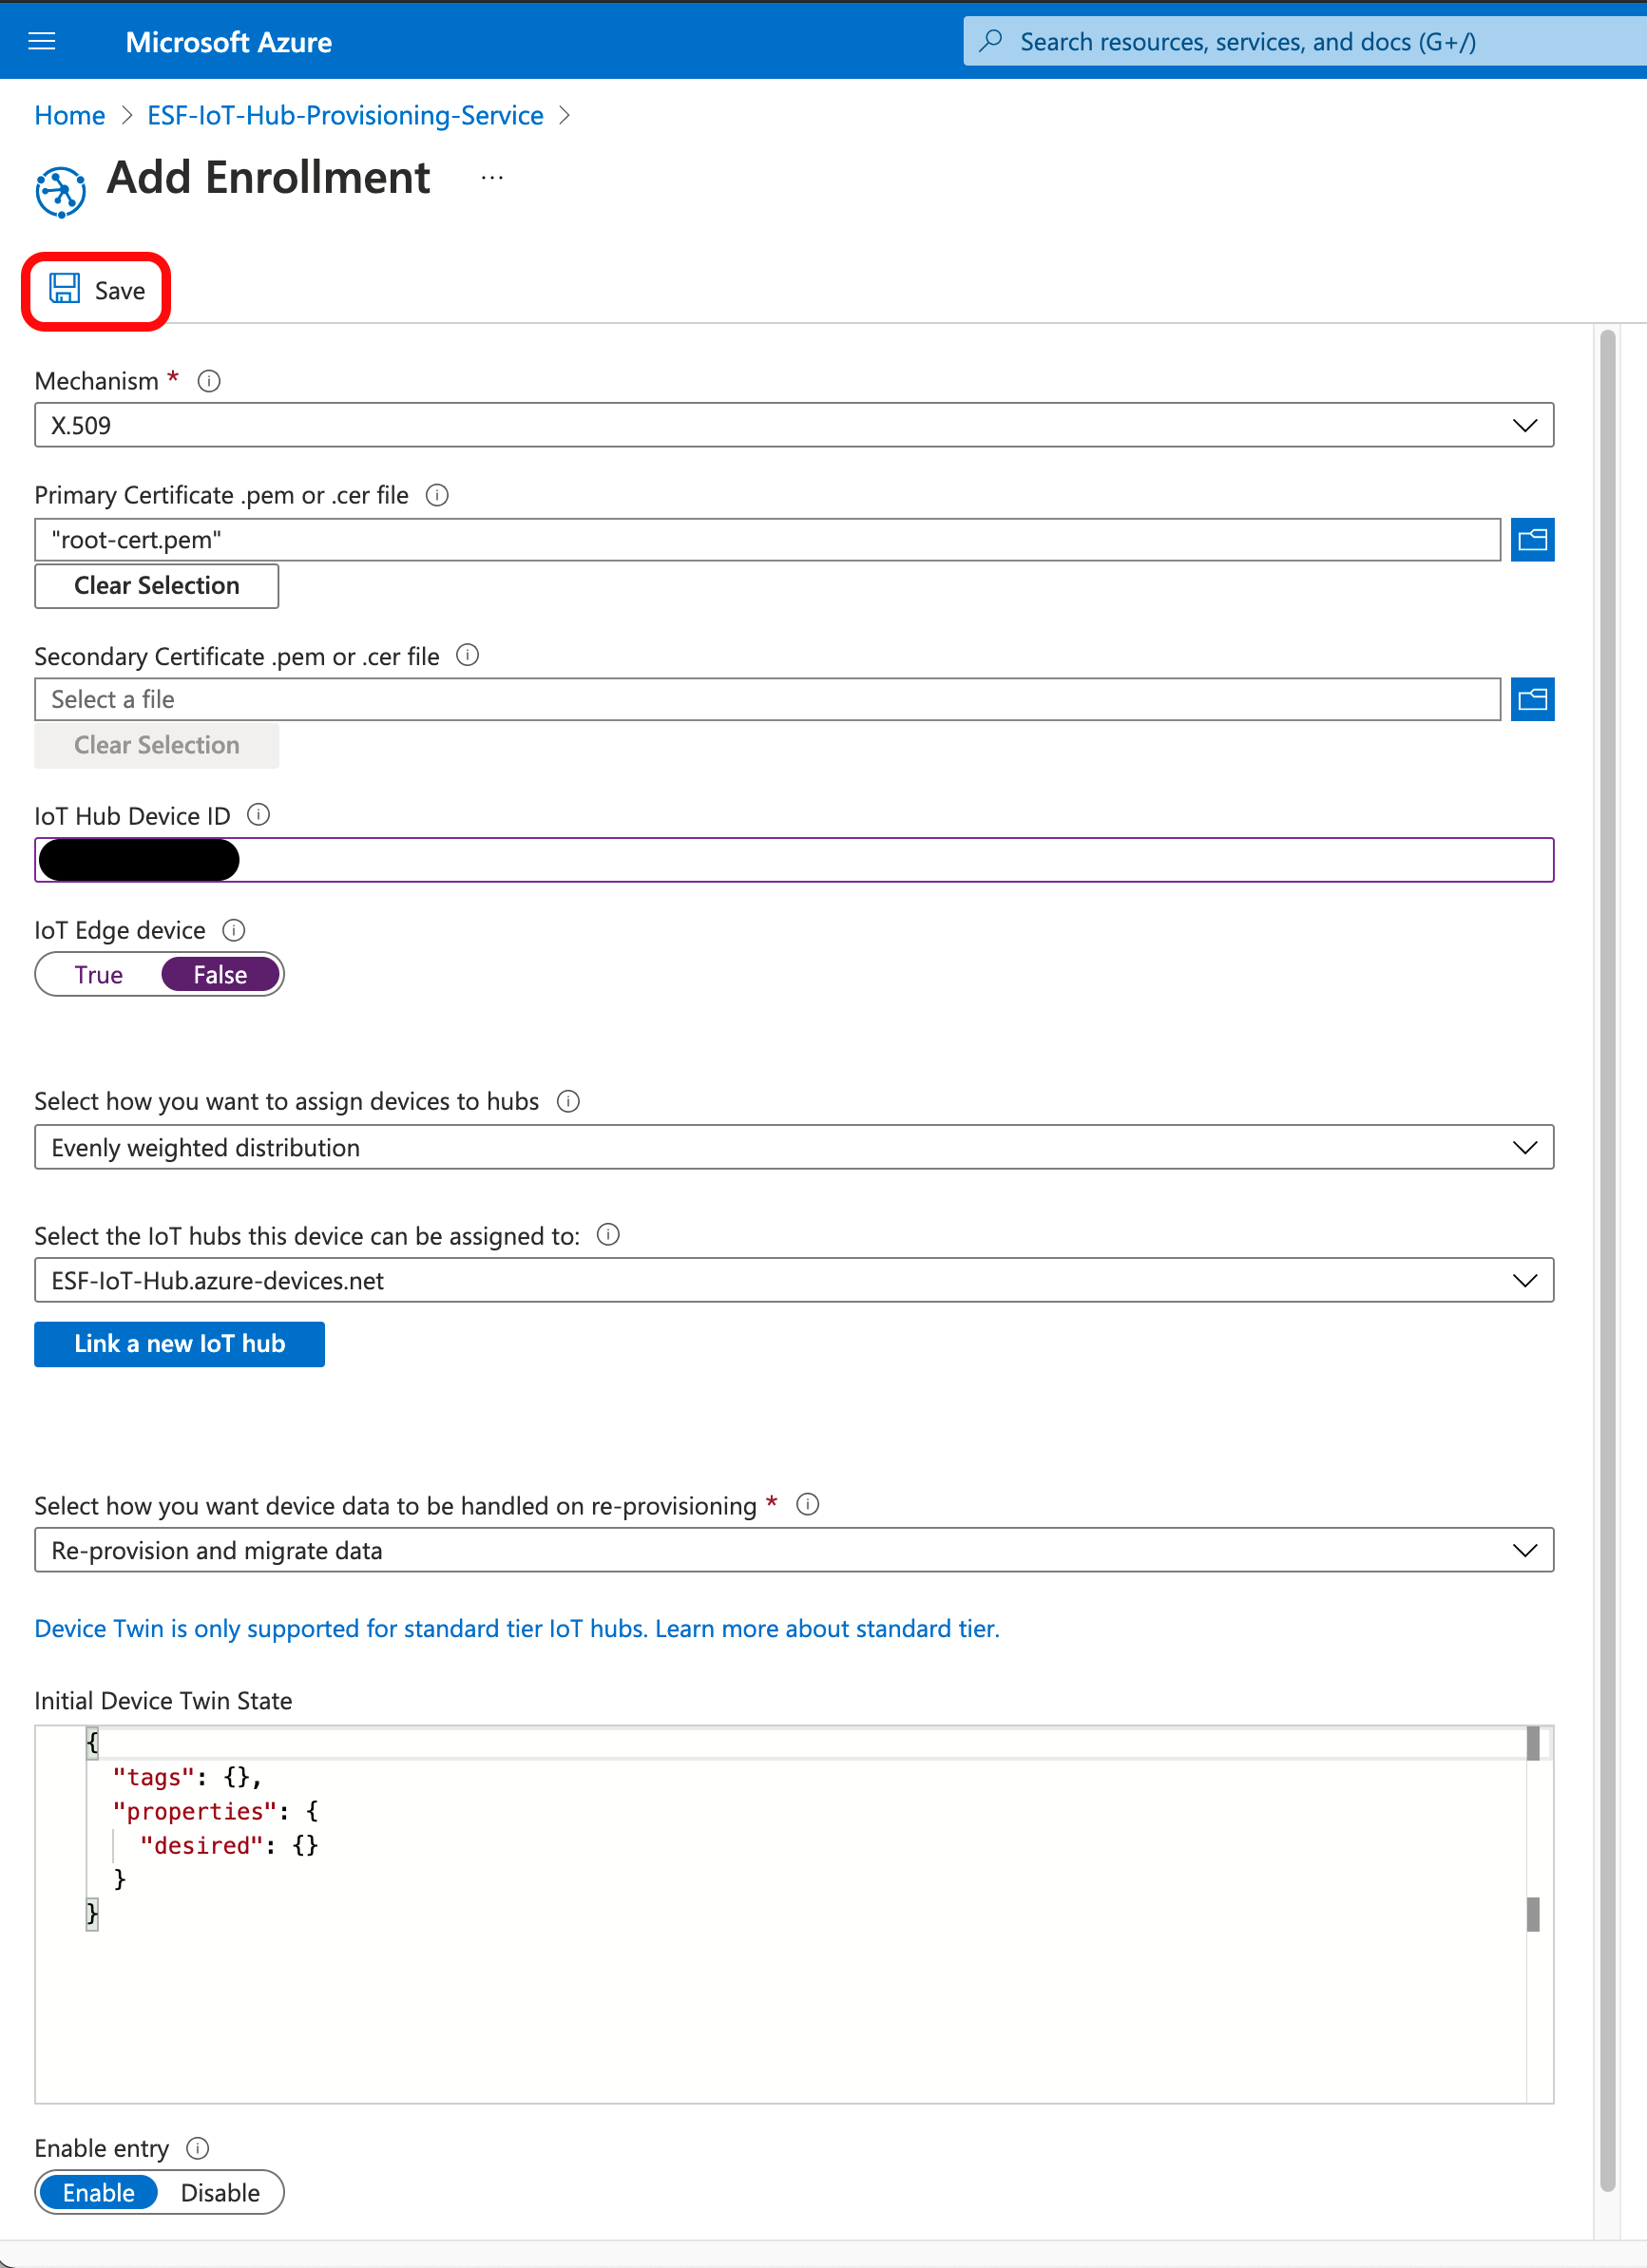
On the Add Enrollment page, enter the following information:
- Mechanism: X.509
- Primary Certificate: Upload the root-cert.pem you generated above
- IoT Hub Device ID: Enter the name you gave the certificate in the Common Name field here. This must be all lower case (you must generate a new certificate if it is not all lower case).
- All other fields: Leave at the default values
Click Save.
The Azure Portal will return you to the Manage Enrollments page. Navigate to the Manage Enrollments page if you are not automatically returned to it.
Continue At Create a X.509 cloud connection.
Provision Device Using IoT Hub DPS Enrollment Group
Add Certificate to DPS
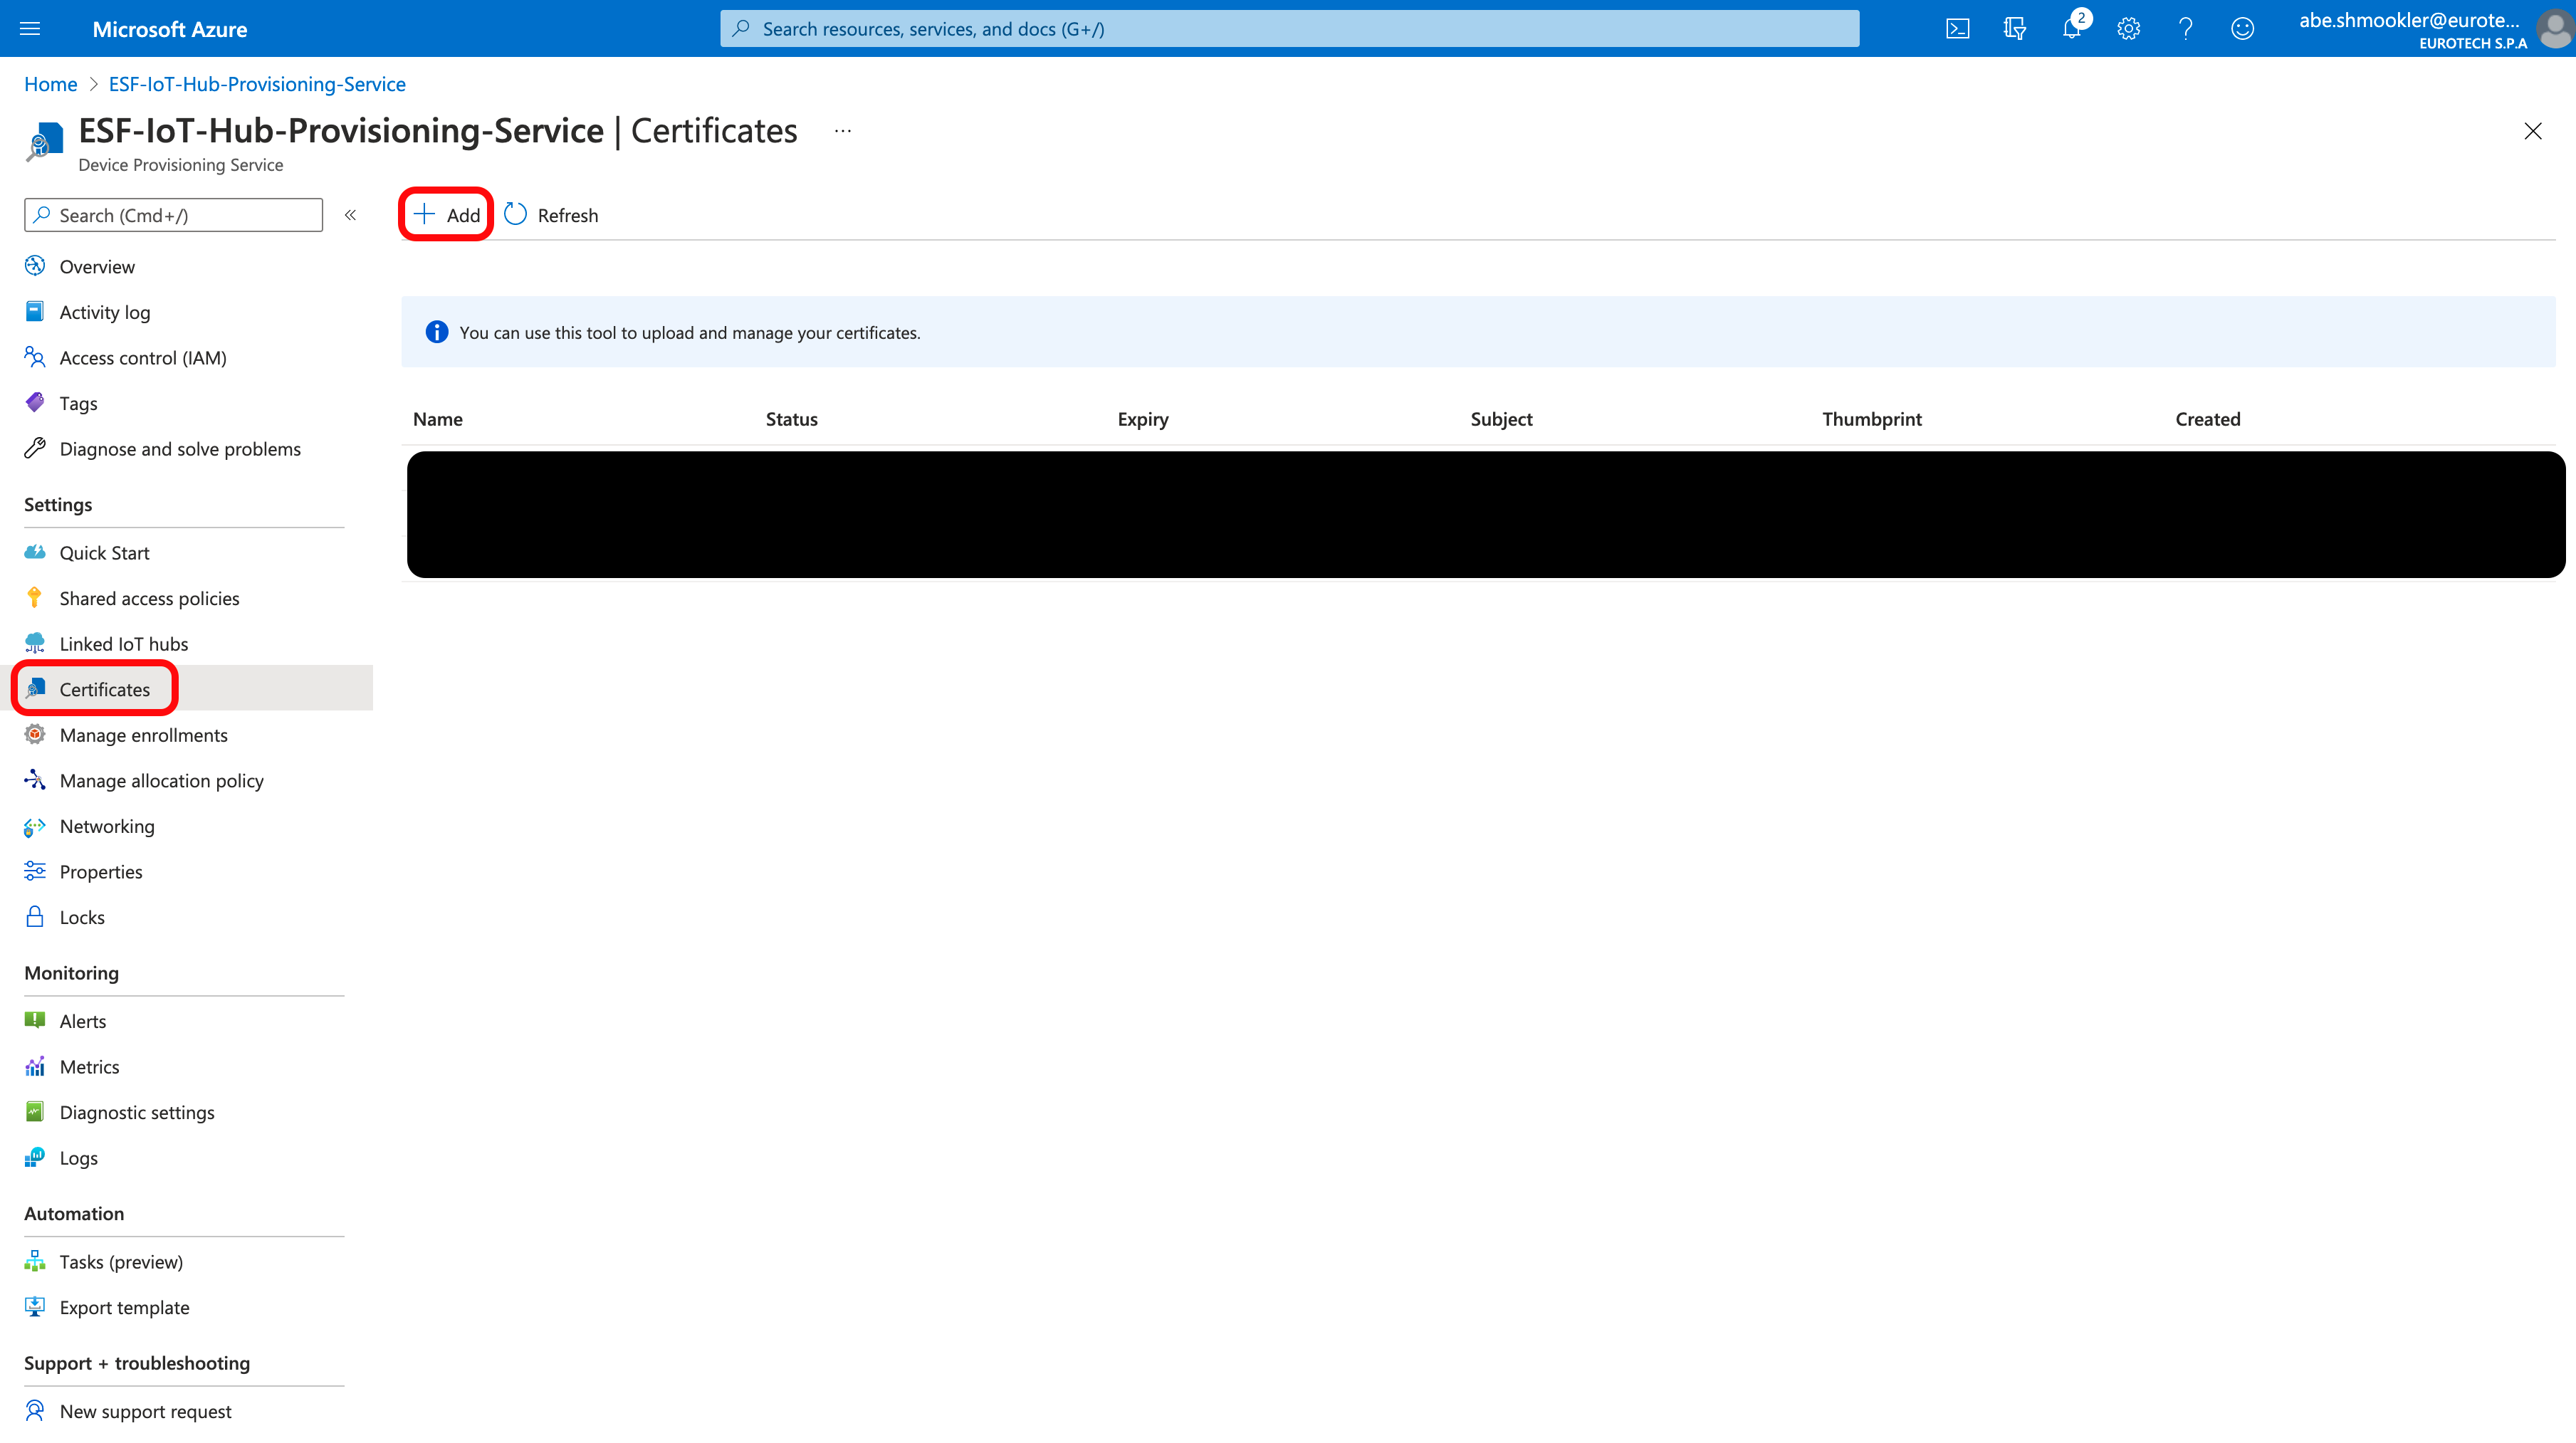
Go to the Certificates page of your DPS in your Azure Portal and click + Add.
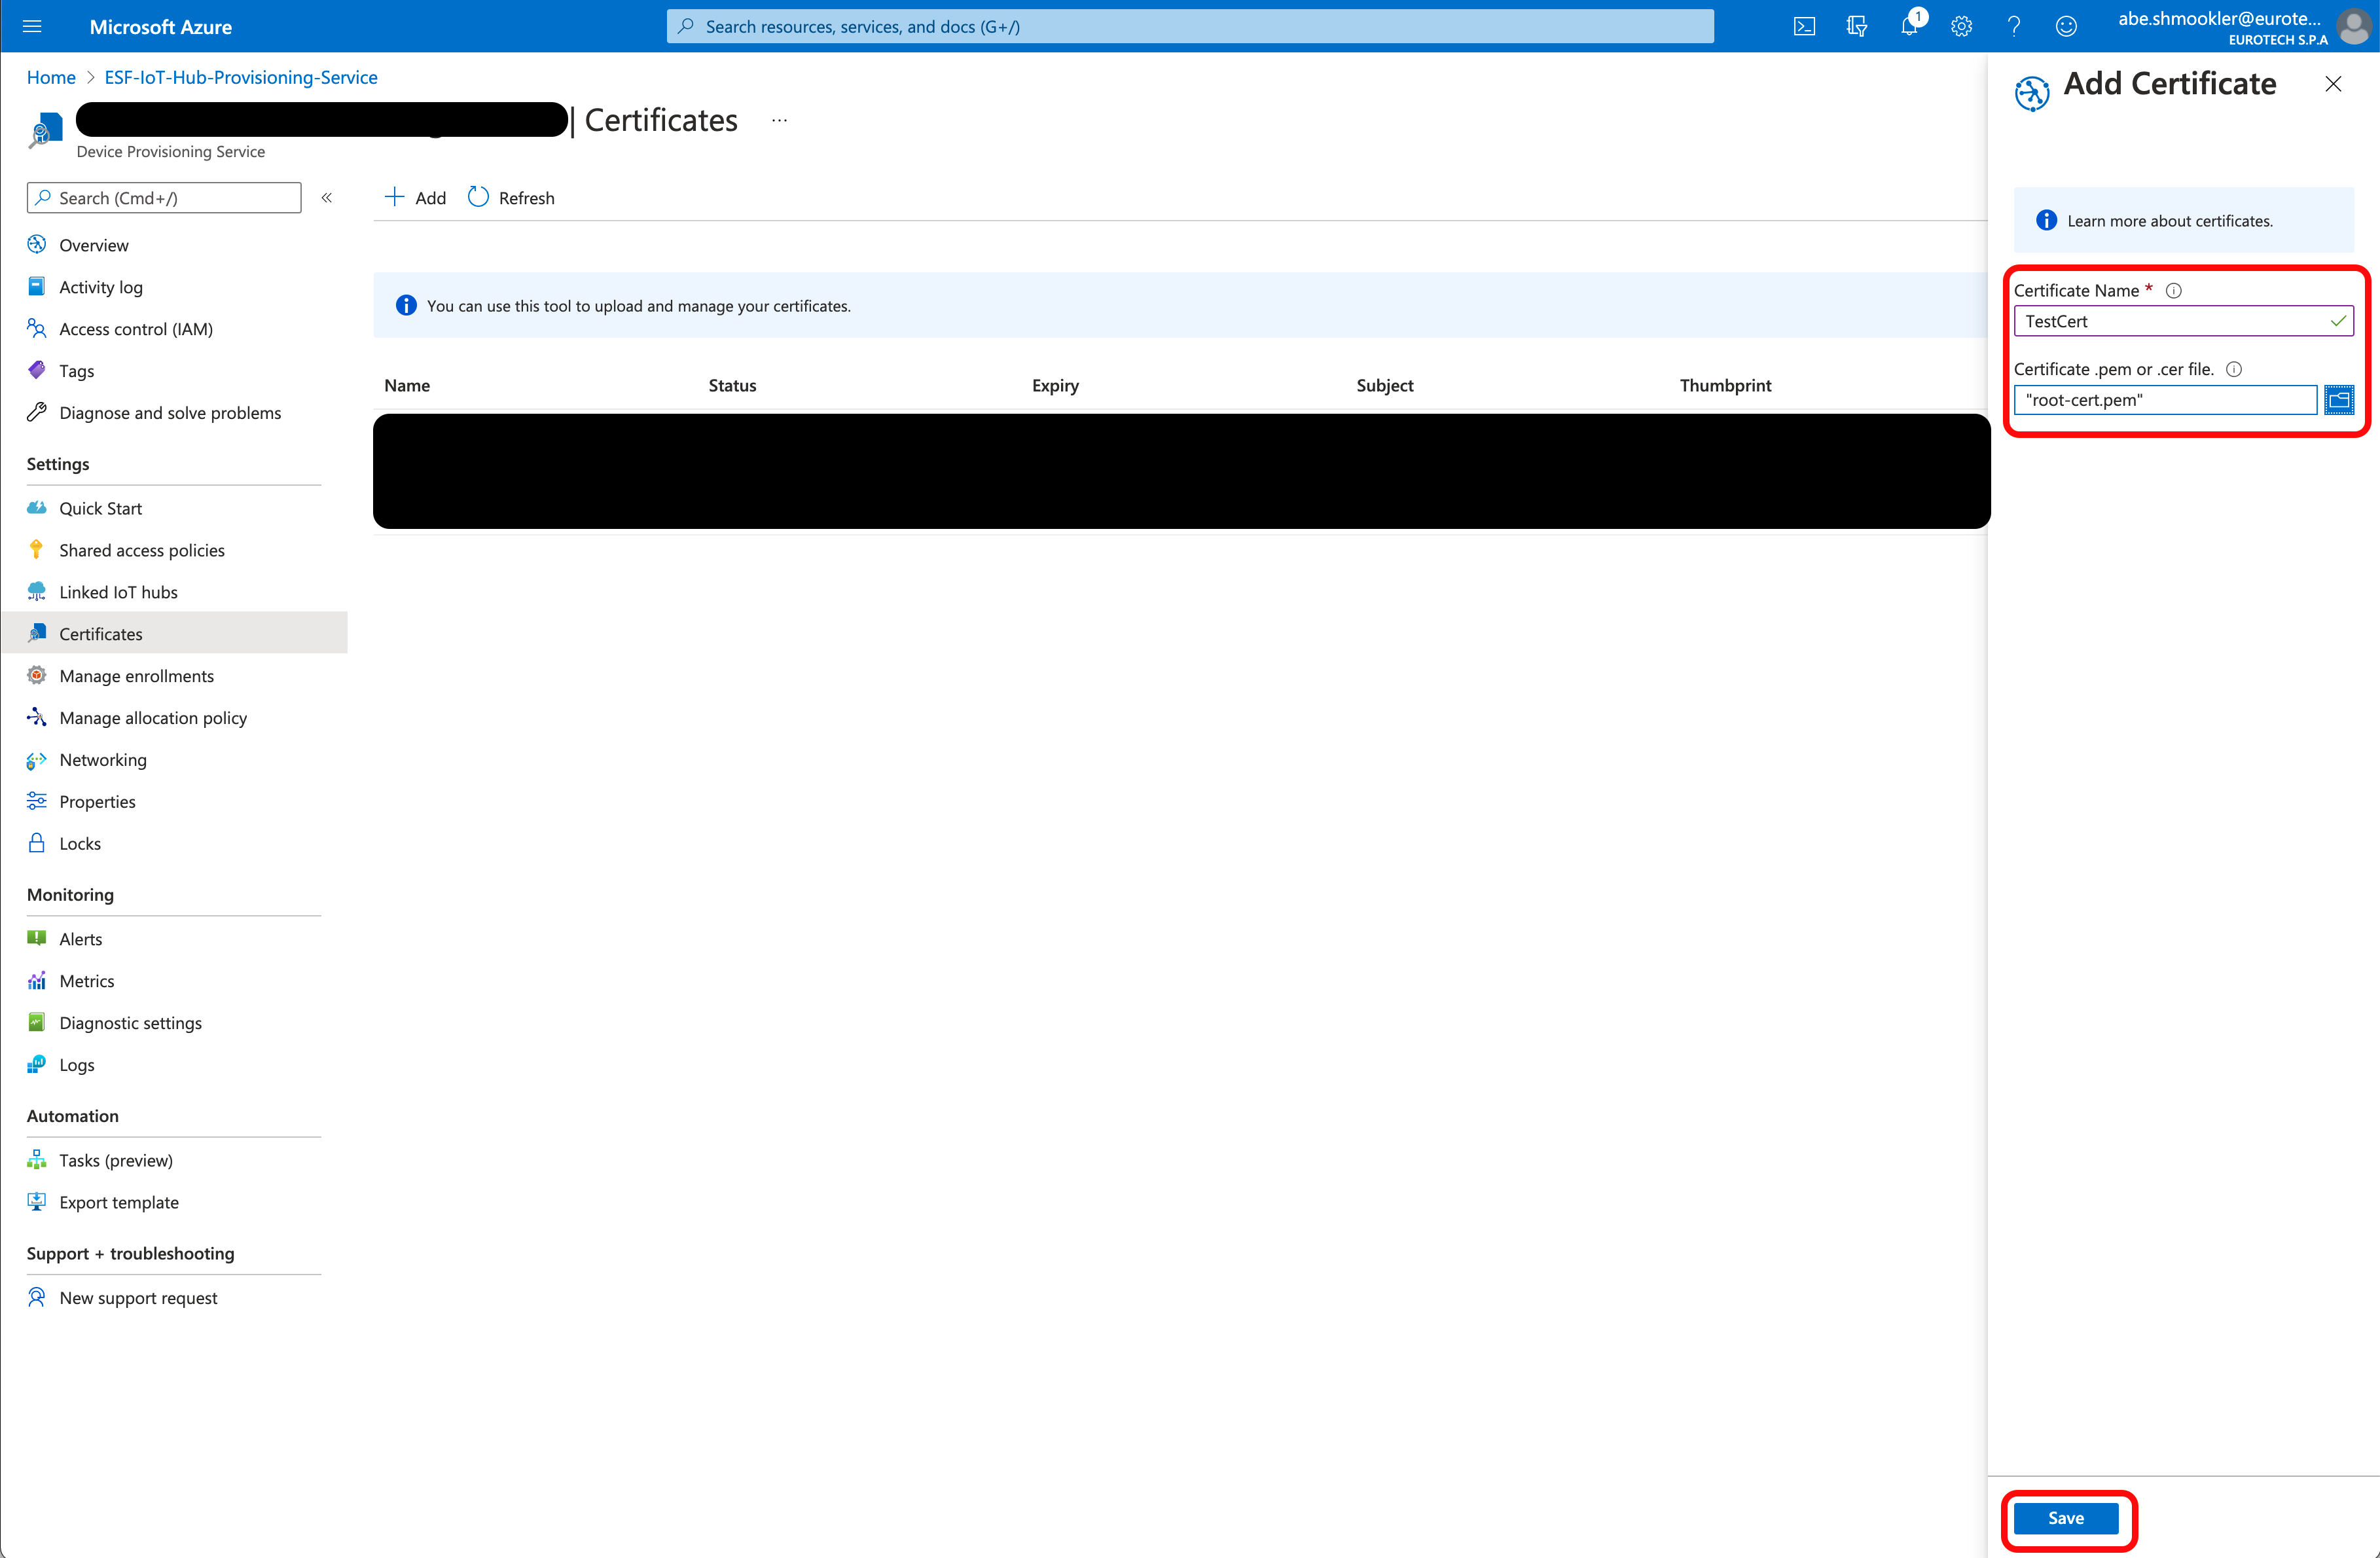
Enter a certificate name and upload the root-cert.pem you created above. Click Save.
The certificate will be added to the list of certificates and will have Unverified in the Status column. Click on the certificate name to bring up the Certificate Details panel.

Click Generate Verification Code. This will populate the Verification Code field with the verification code.
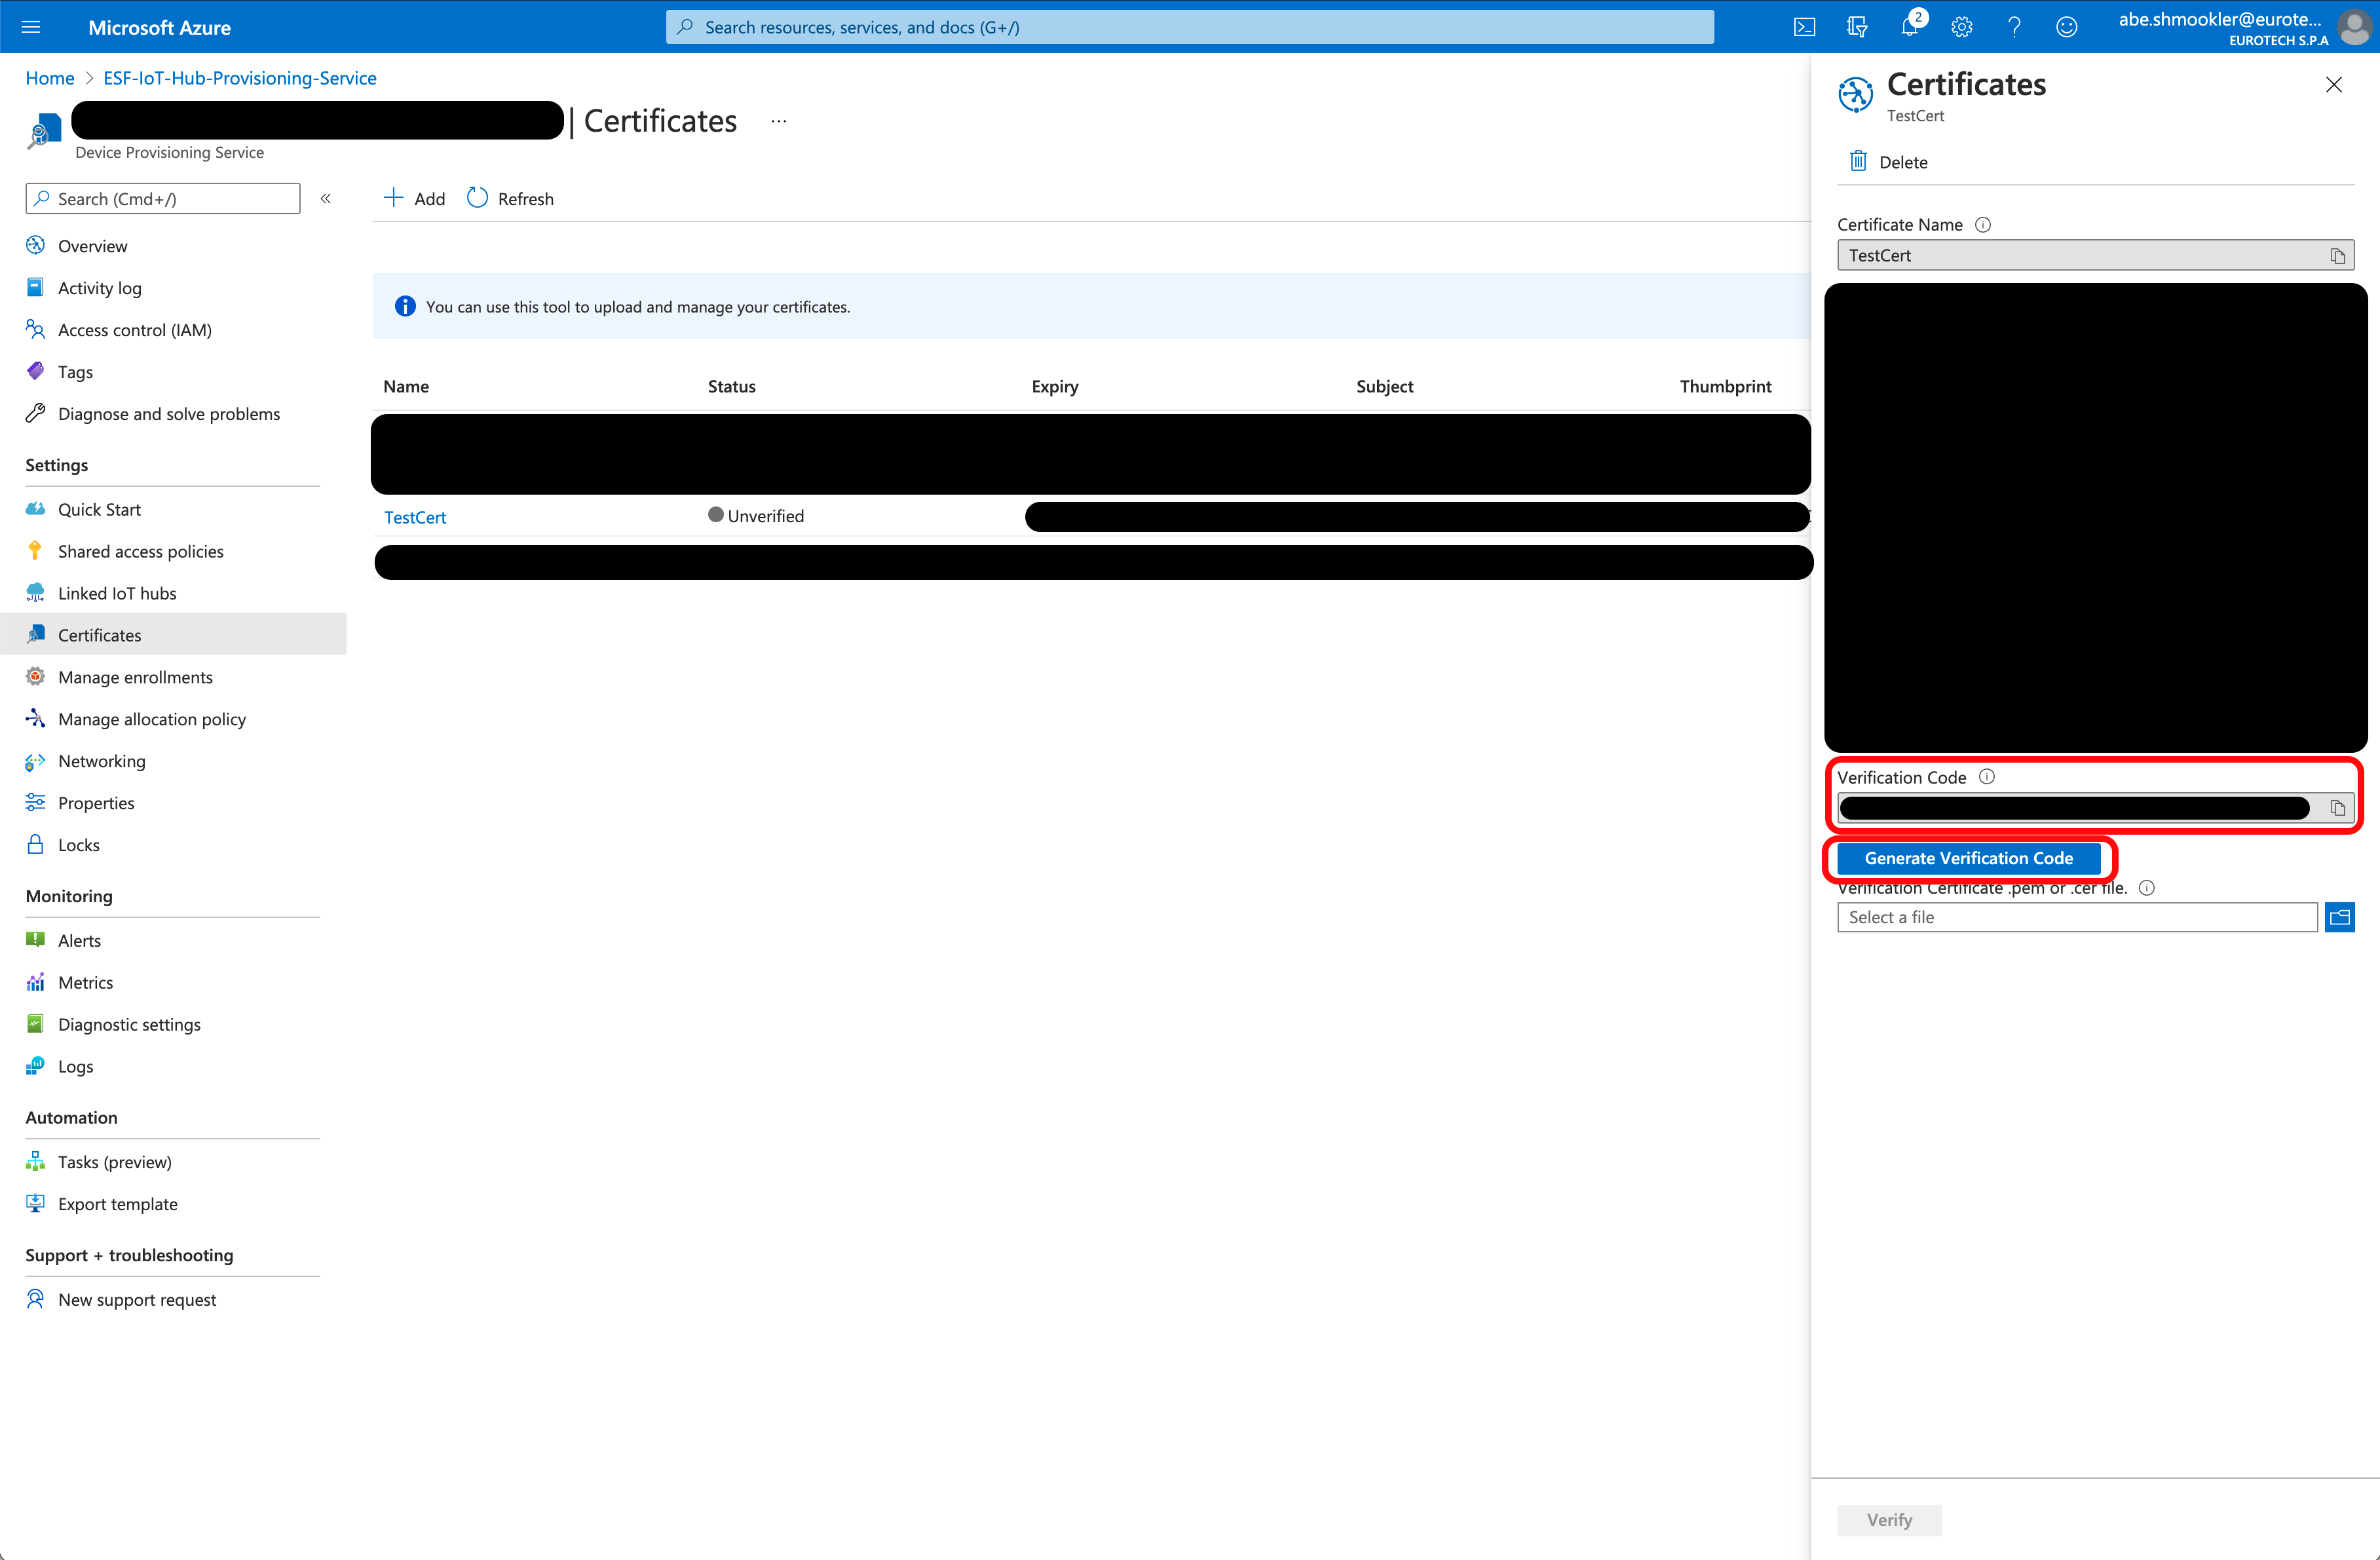
Copy the verification code. Open the Verification Certificates section of Creating Additional Types of Certificates for Azure IoT in a new window and follow the instructions to create a verification certificate. Continue with these instructions once you have created the verification certificate.
Upload the verification certificate you just created and click Verify.
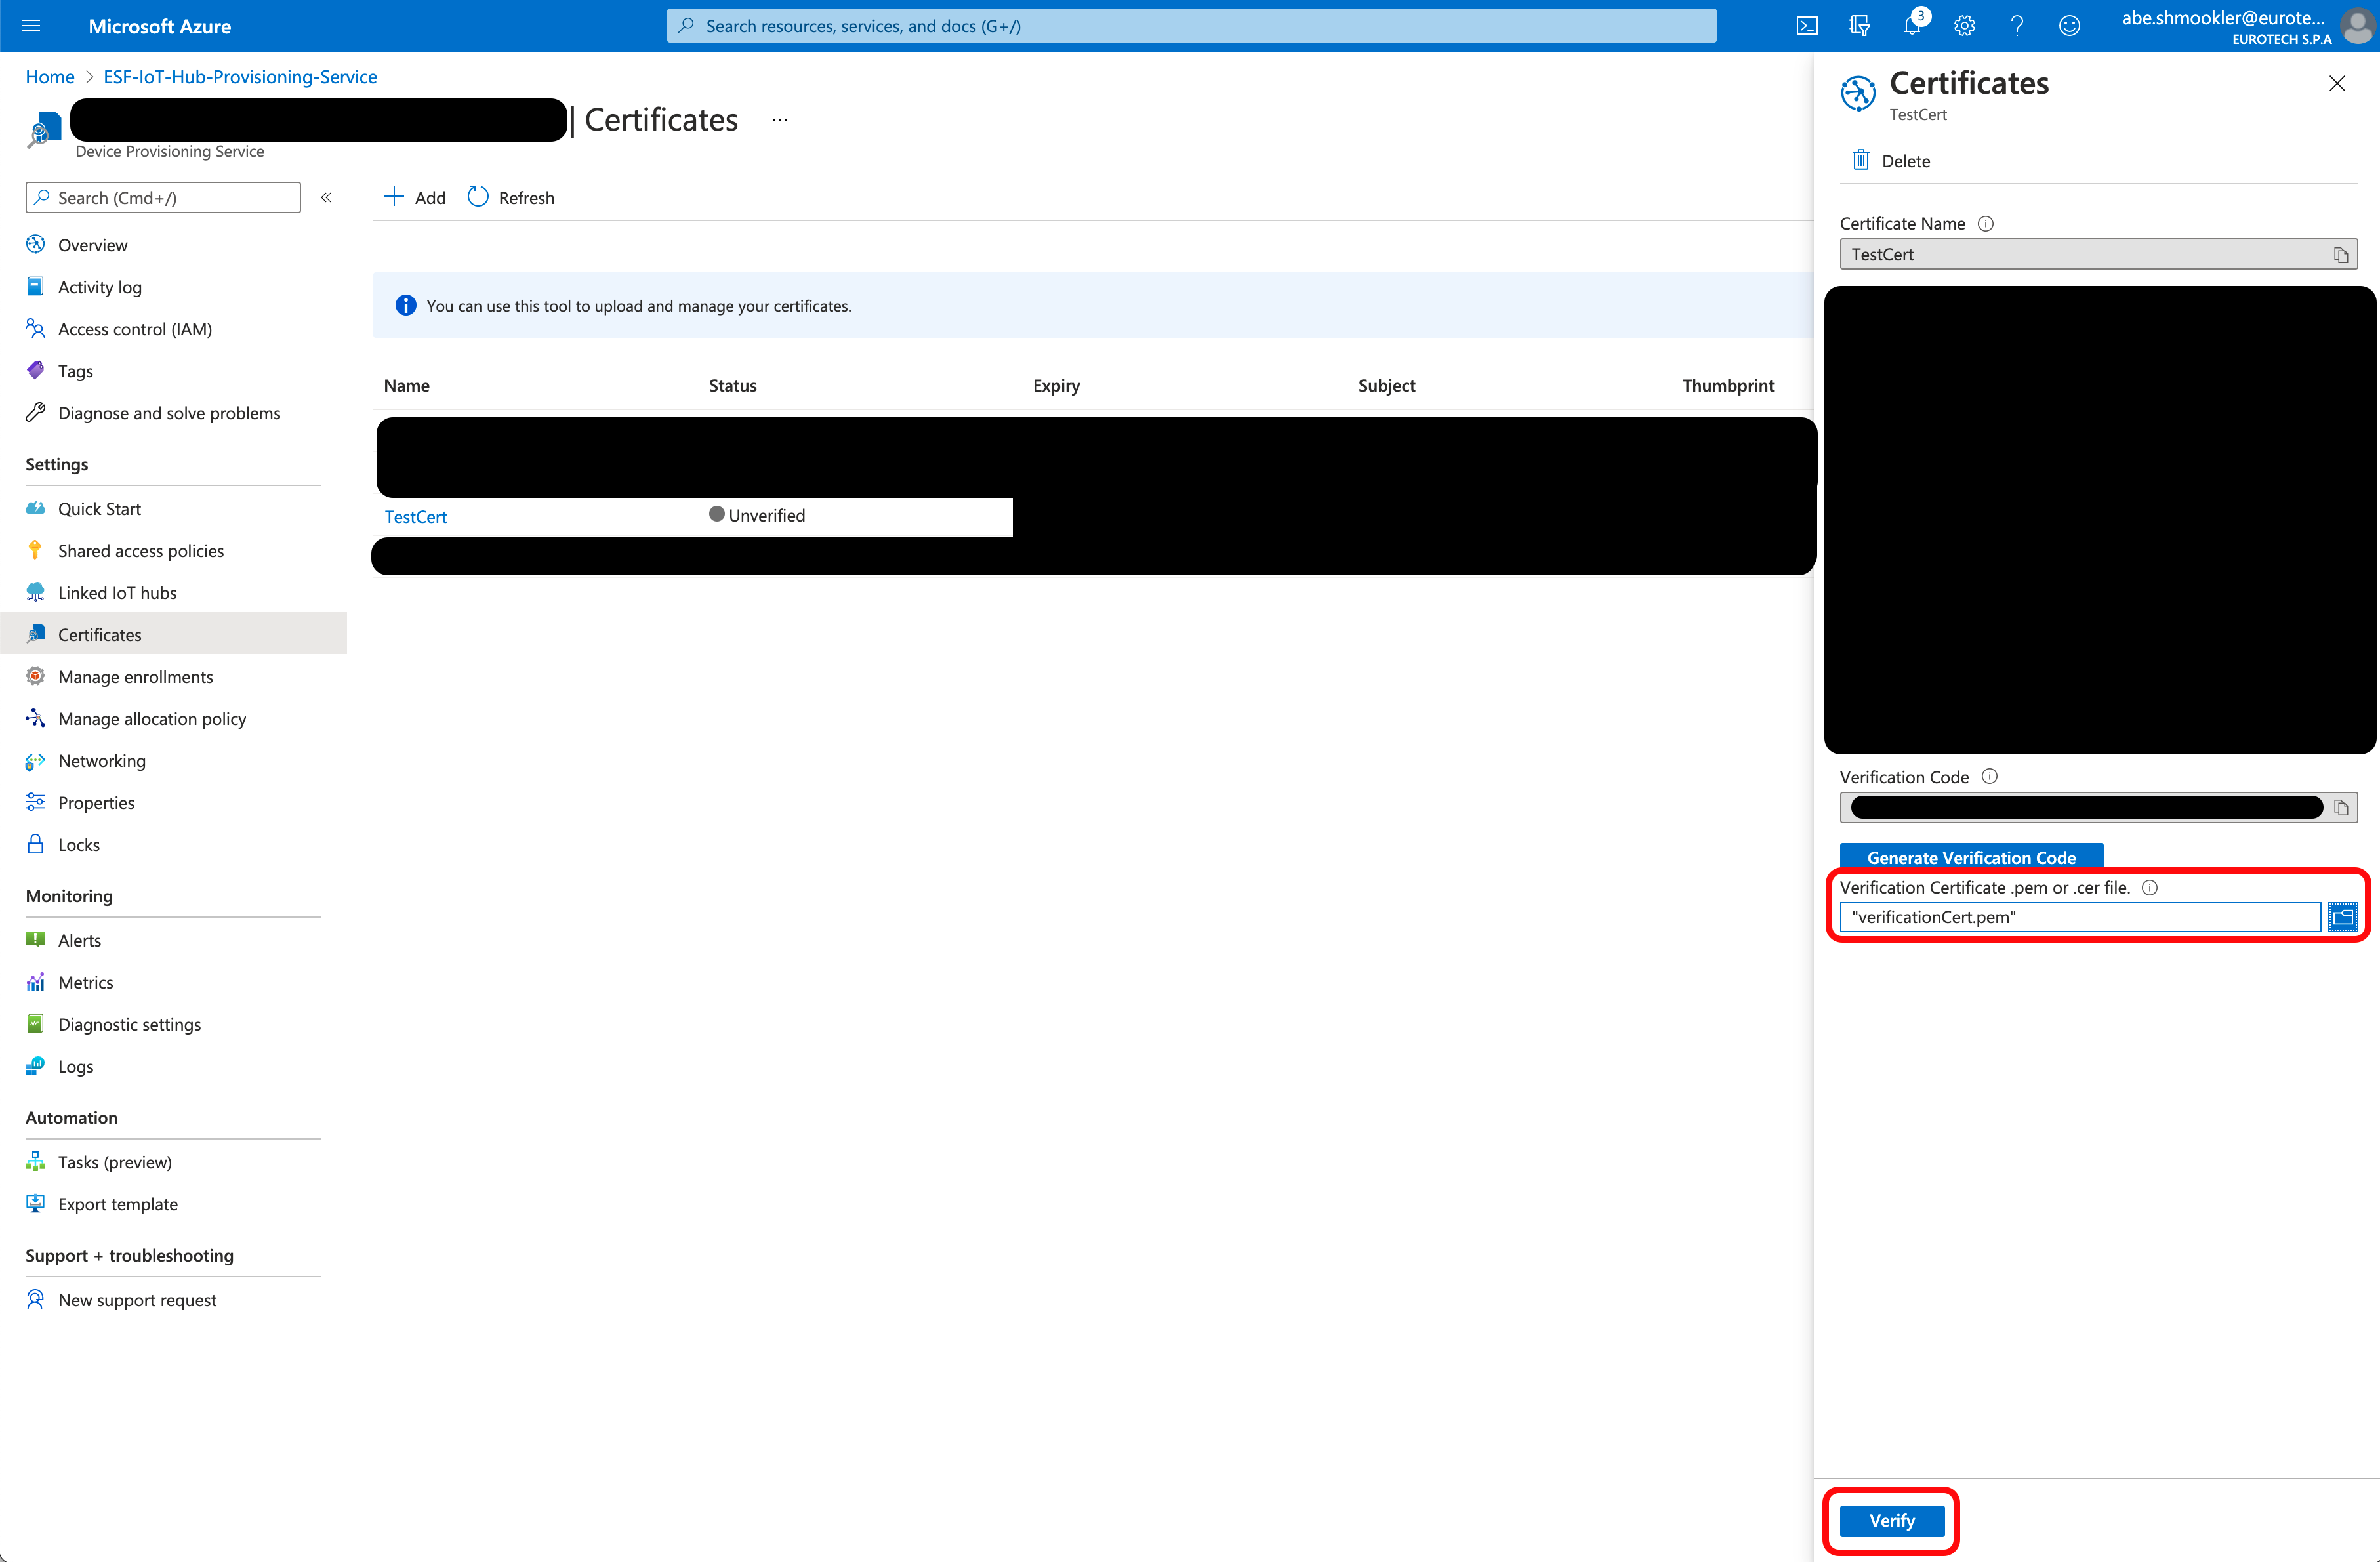
The certificate should now show Verified with a green checkmark in the Status column.

Create Enrollment Group
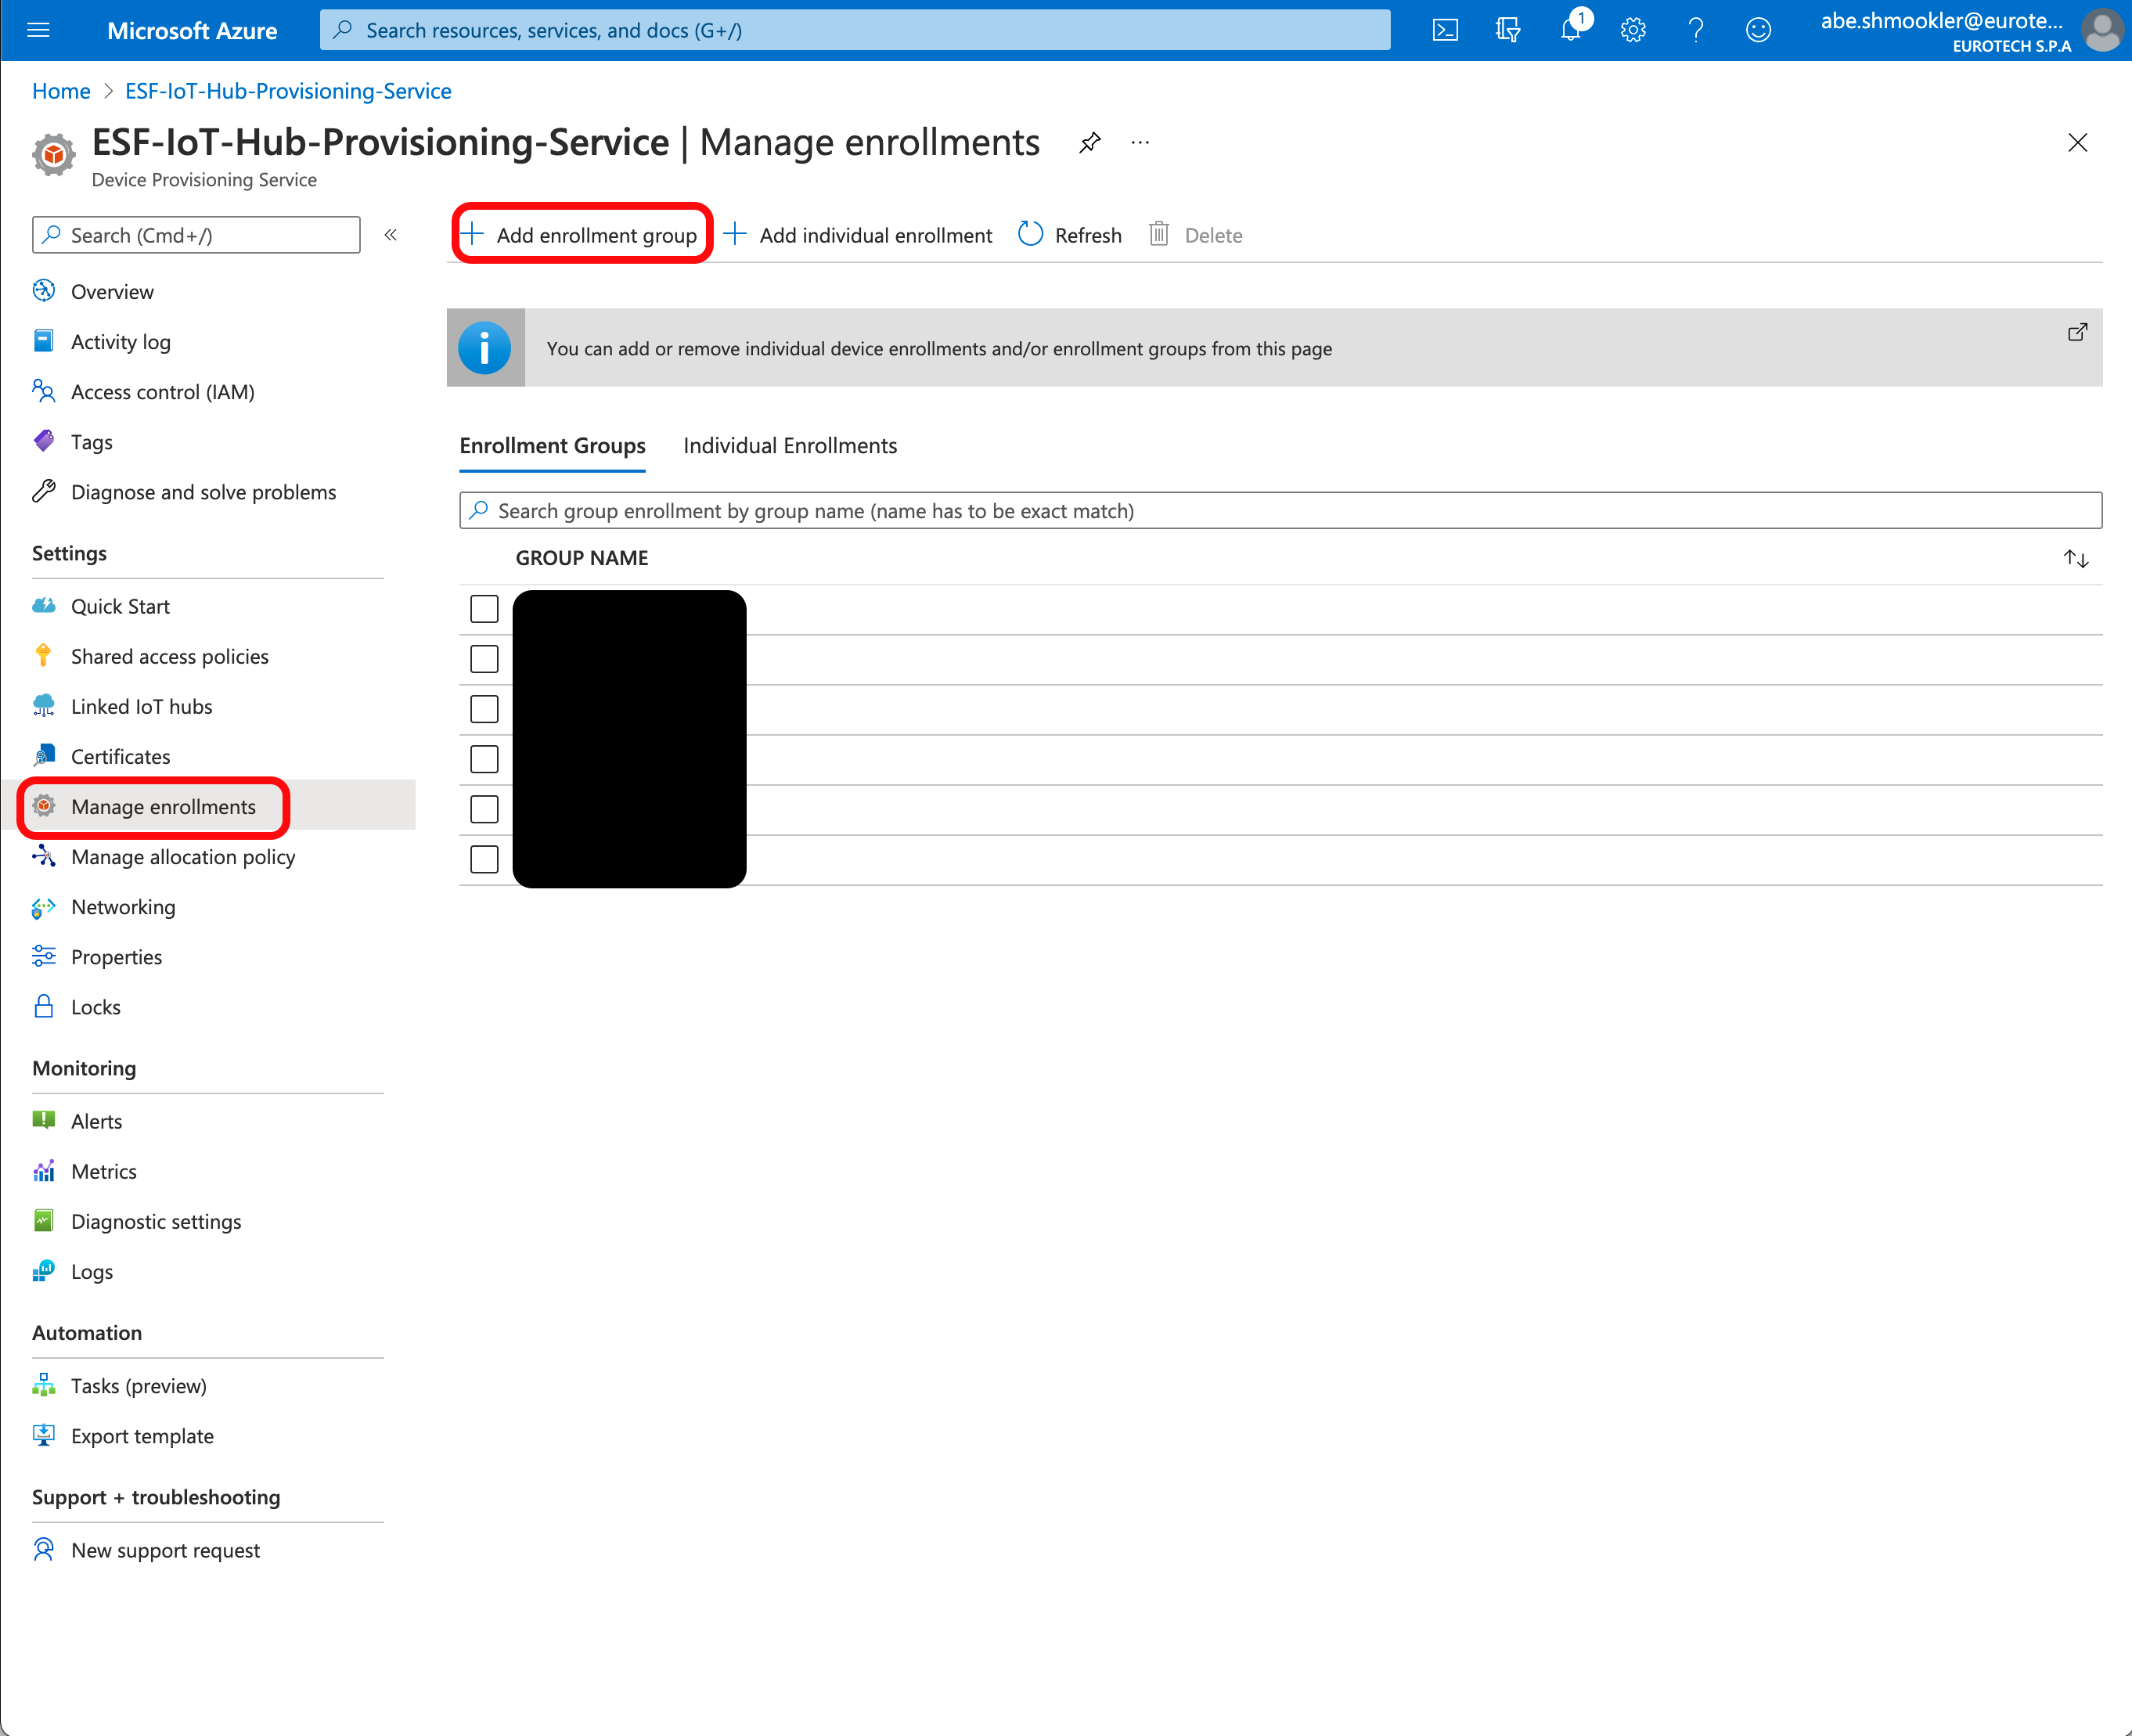
Go to the Manage Enrollments page of your DPS. Click + Add Enrollment Group.
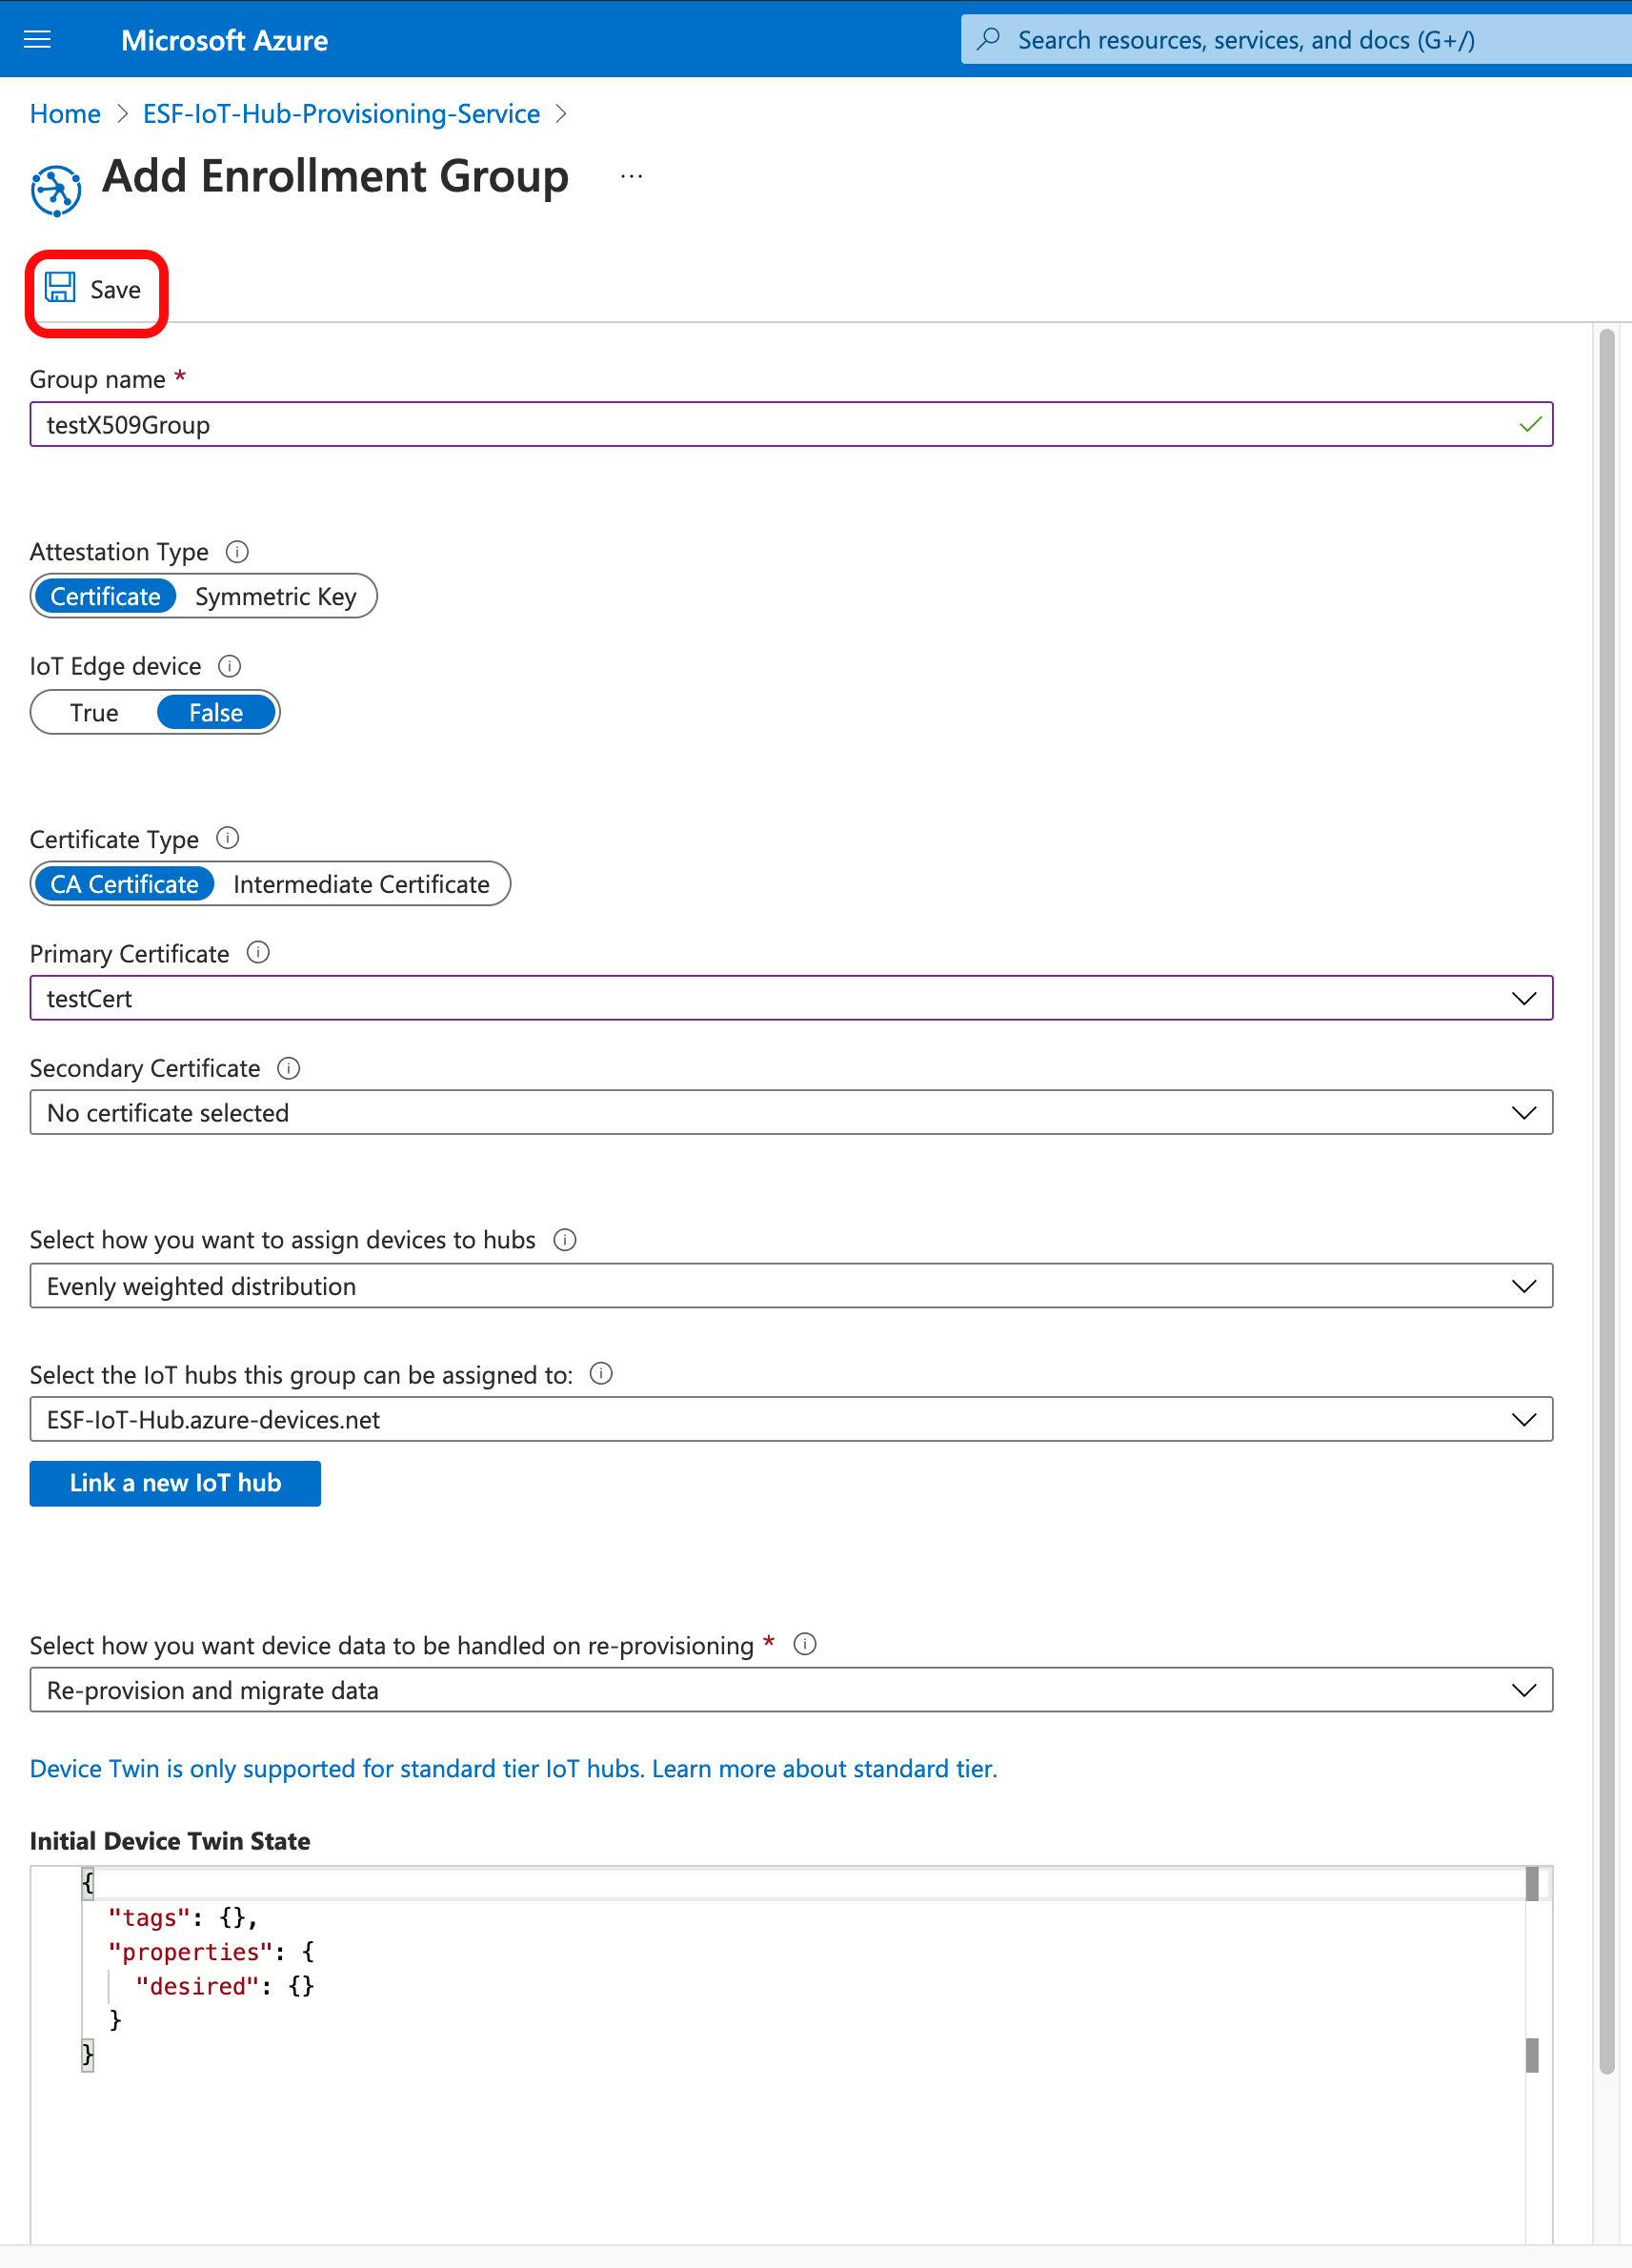
On the Add Enrollment Group page, enter the following information:
- Group Name: Any unique designator.
- Attestation Type: Certificate
- Primary Certificate: Select the certificate you uploaded and verified above.
- All other fields: Leave at the default values
Click Save.
Continue At Create a X.509 cloud connection.
Provision Device Using IoT Central Individual Enrollment
Prerequisites
Create an Application
In order to provision your device with X.509 credentials using IoT Central Applications, you must first create an application. Instructions on how to create your own IoT Central application can be found here.
Create a Device
You must Create your device in your Azure IoT Central Application before provisioning using X.509 credentials.
Device ID Must Match Certificate Common NameWhen you create a device in your Azure IoT Central Application, the Device ID must match the Common Name that you used when creating the root certificate (in the Prerequisites section at the start of this document).
Connect device
Click on your device from the Devices page and click Connect.

Set the Authentication Type to "Individual Enrollment" and the Authentication Method to "Certificates (X.509)".
Click the button to upload your root certificate for both Primary and Secondary. You should use the same certificate for both.
Click Save.
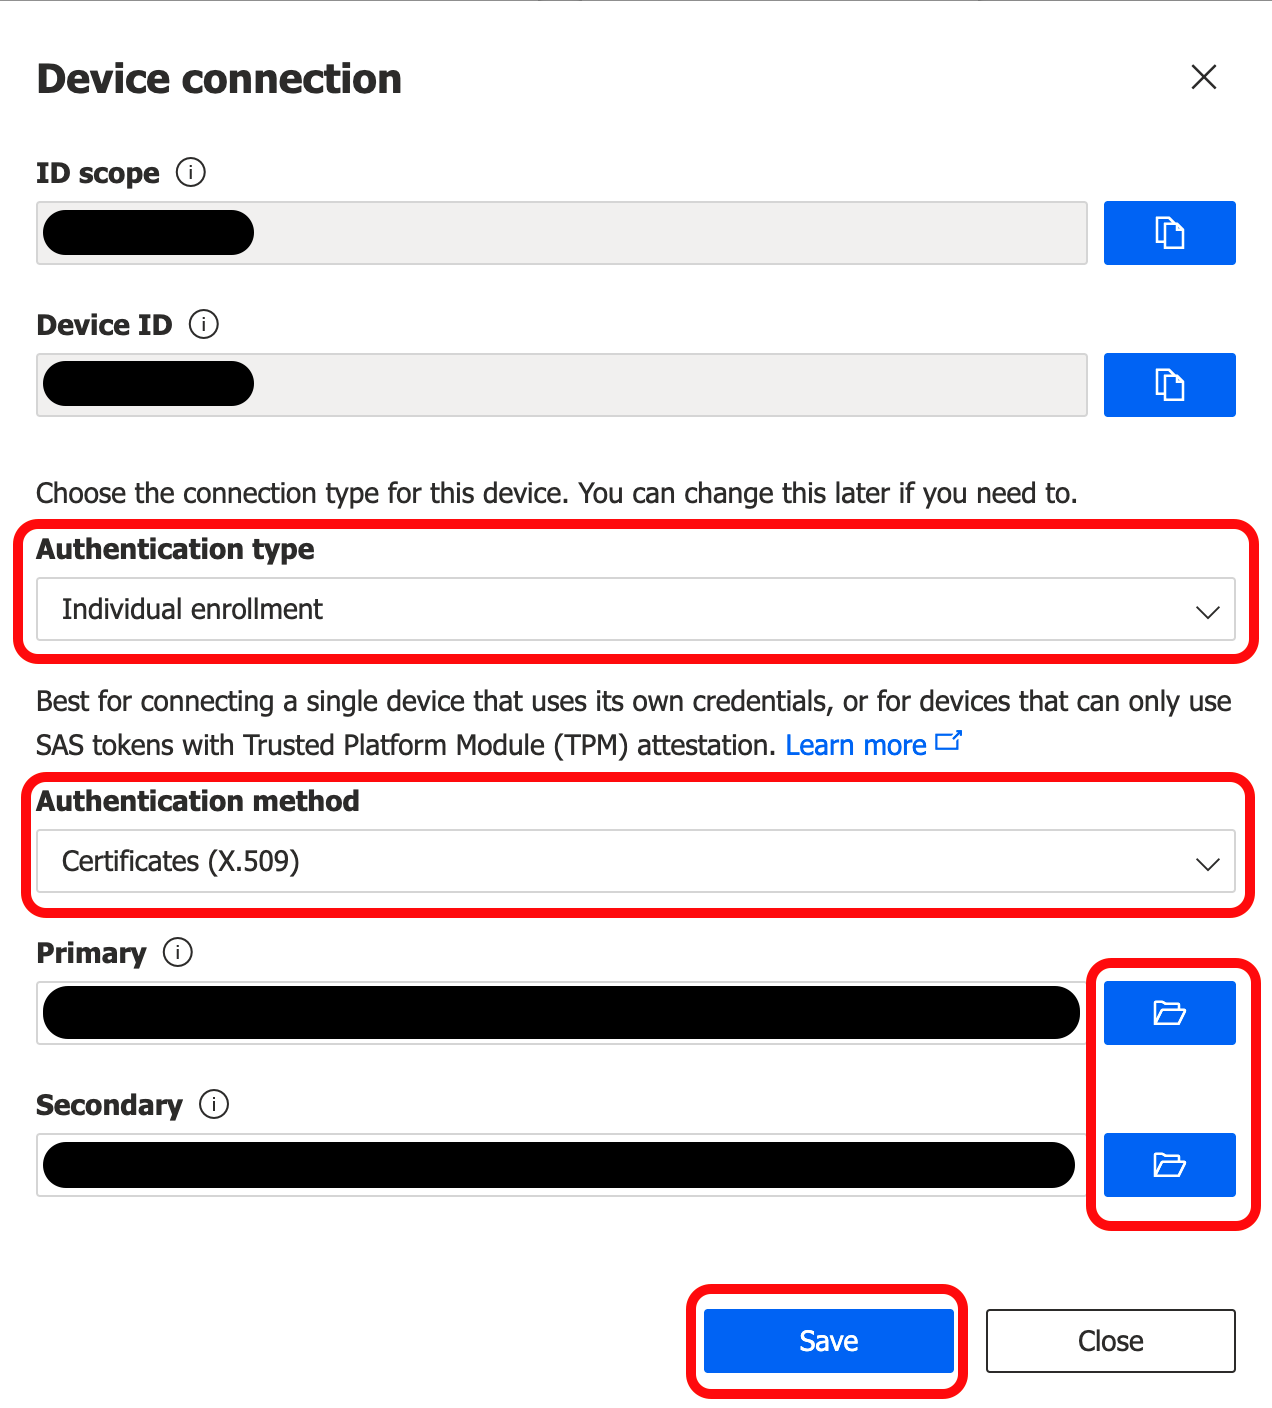
Leave this window open. It will be used in the next section.
Continue At Create a X.509 cloud connection.
Provision Device Using IoT Central Enrollment Group
Prerequisites
Create an Application
In order to provision your device with X.509 credentials using IoT Central Applications, you must first create an application. Instructions on how to create your own IoT Central application can be found here.
Navigate to the Device connection section of the Administration page in your IoT Central Application. Click + Create enrollment group.
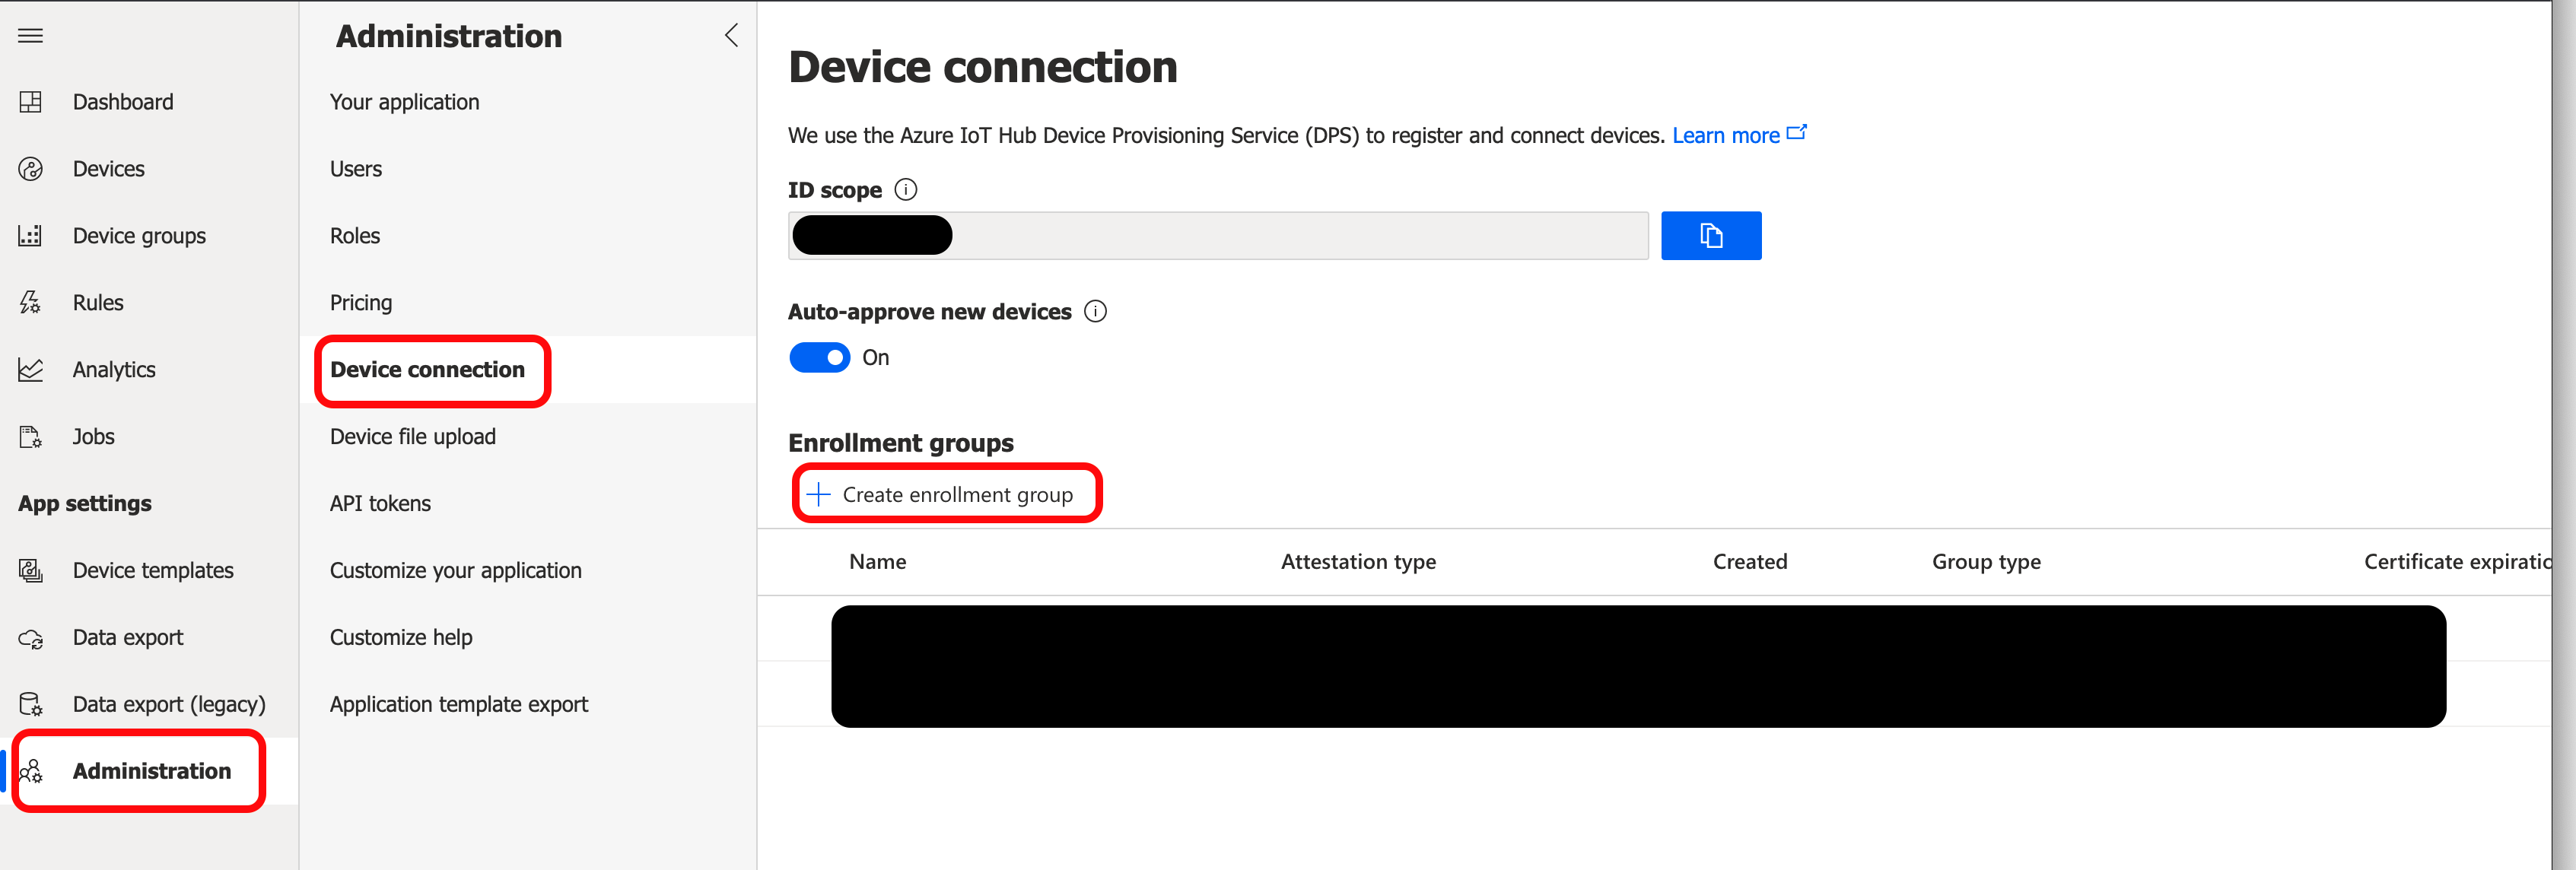
The Name must be set to a unique enrollment group name. Set the Attestation type to "Certificates (X.509)". Leave all other fields at default values and click Save.
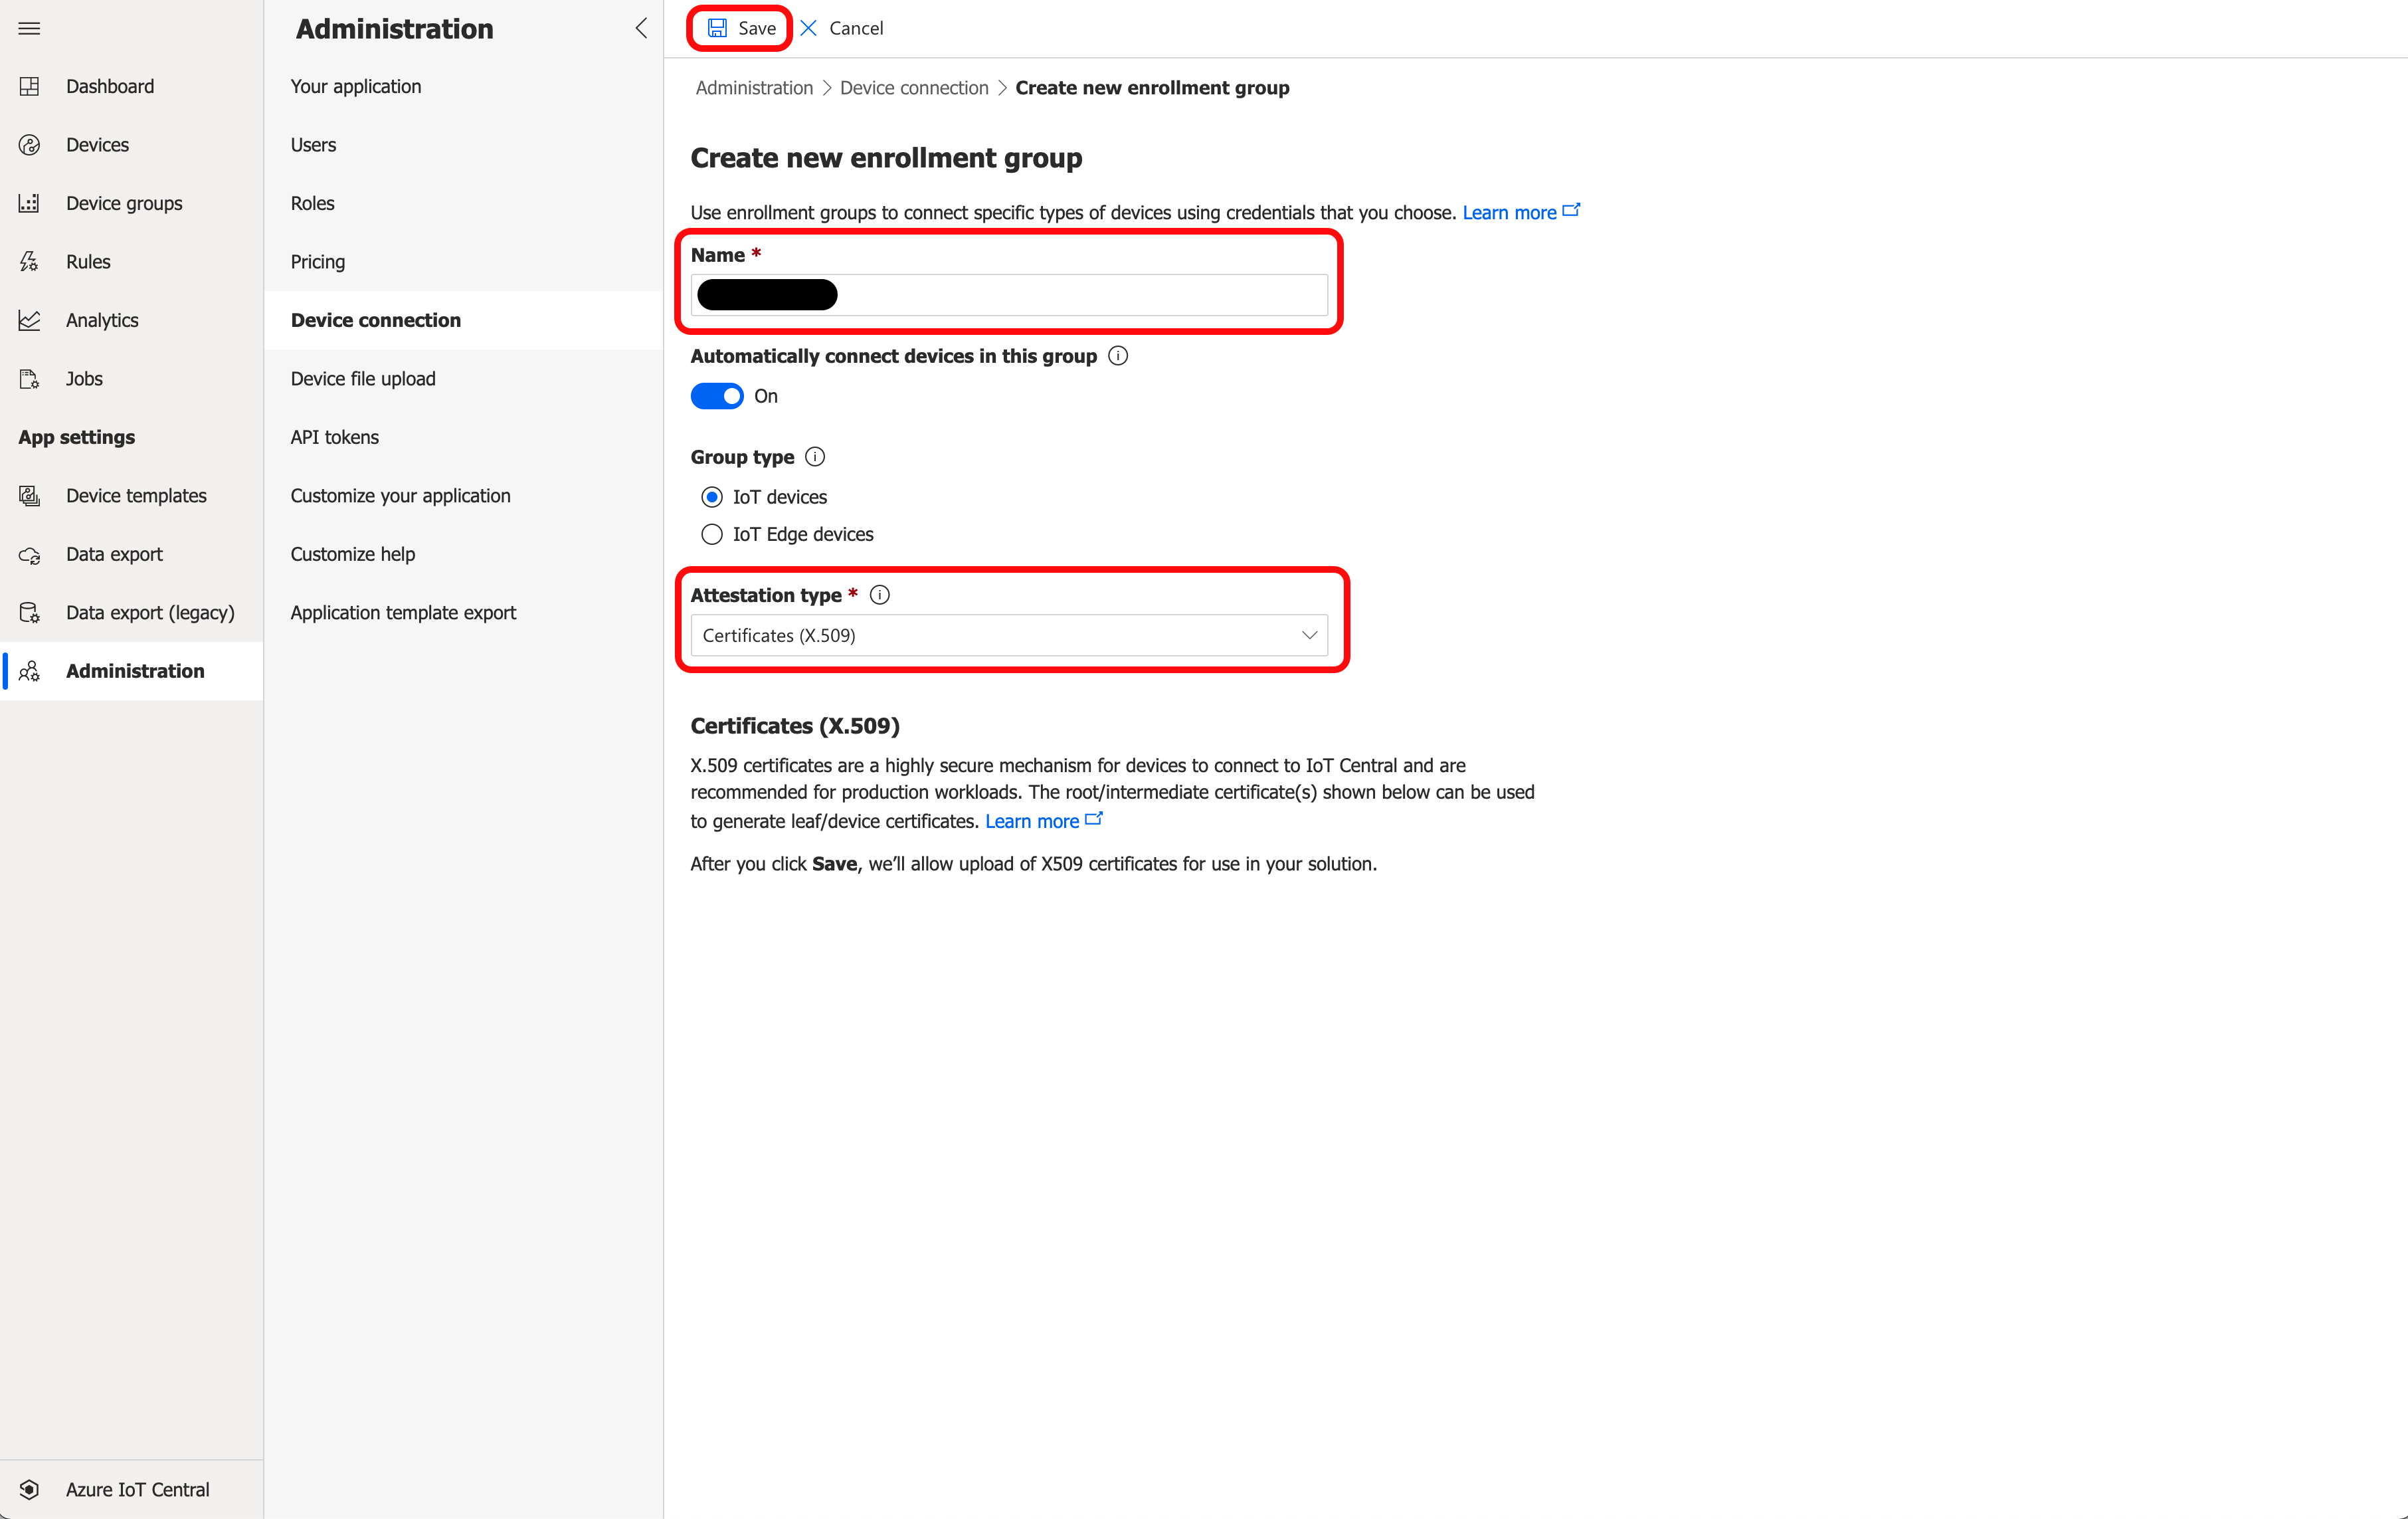
Once the Enrollment Group is saved, new options will appear under Certificates (X.509). Click + Manage Primary.
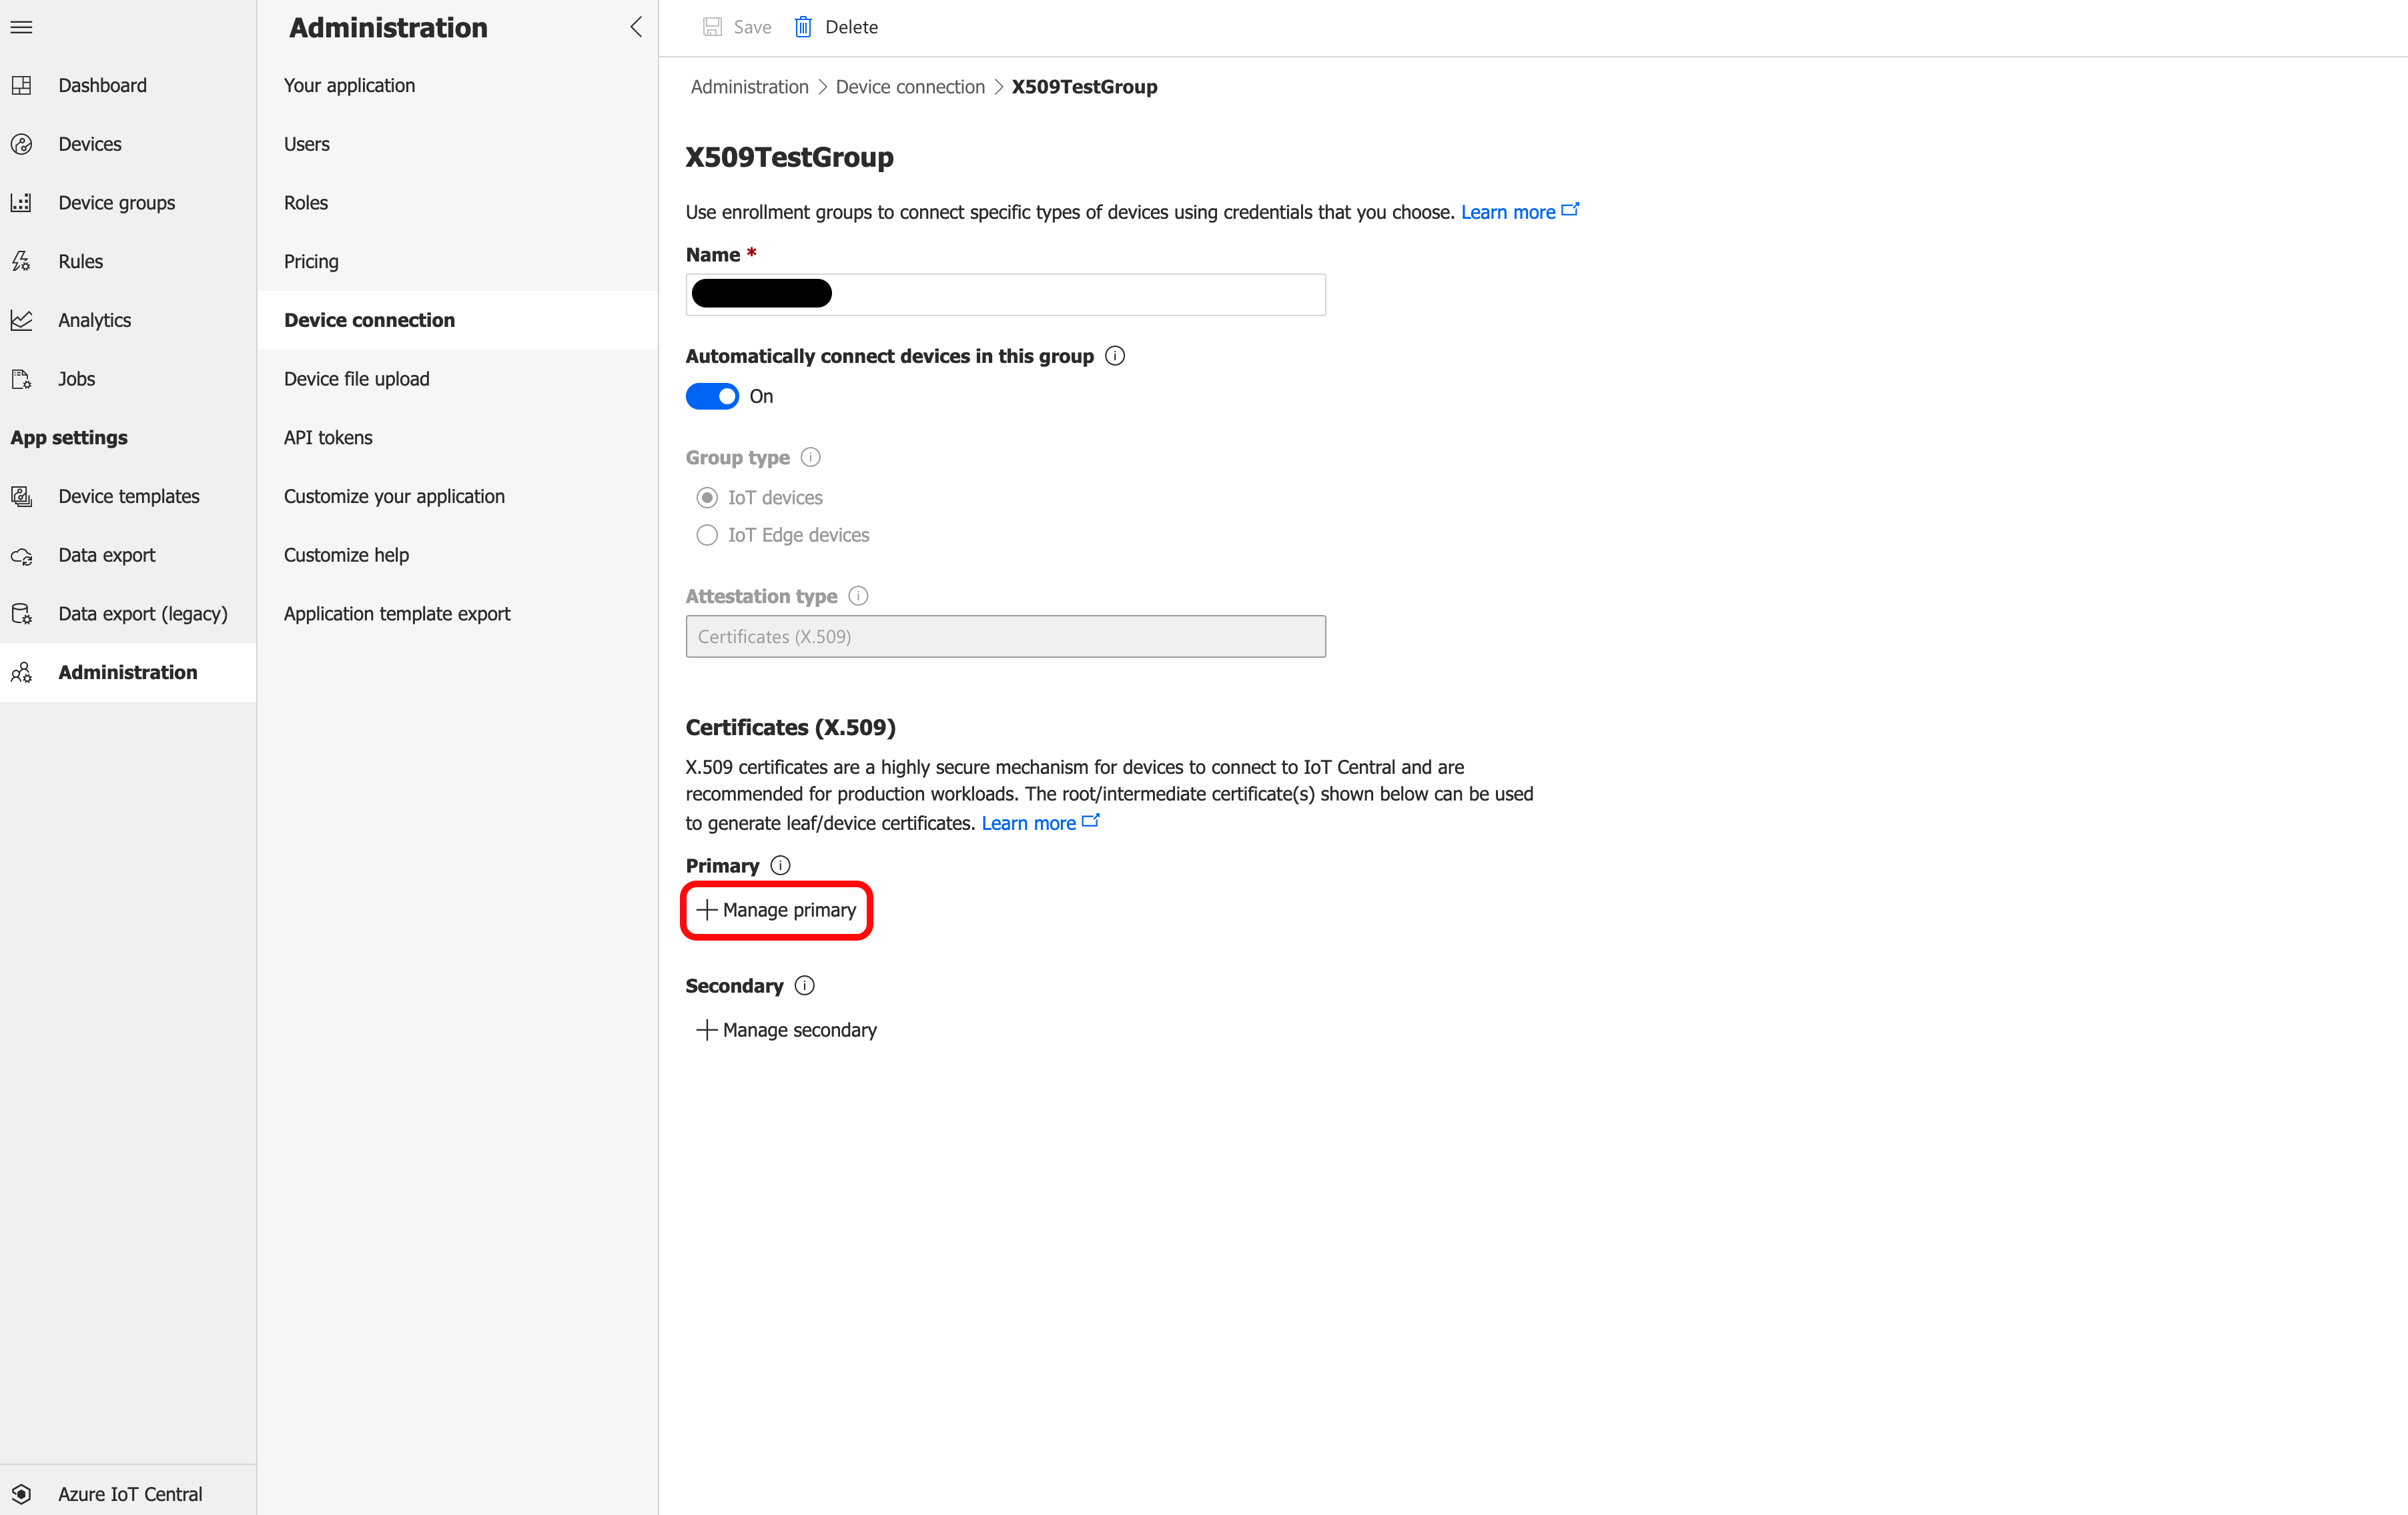
Upload the root certificate to Primary. You should see a warning in red that says Needs verification just under the Primary field.
Click Generate verification code. This will generate a verification code.
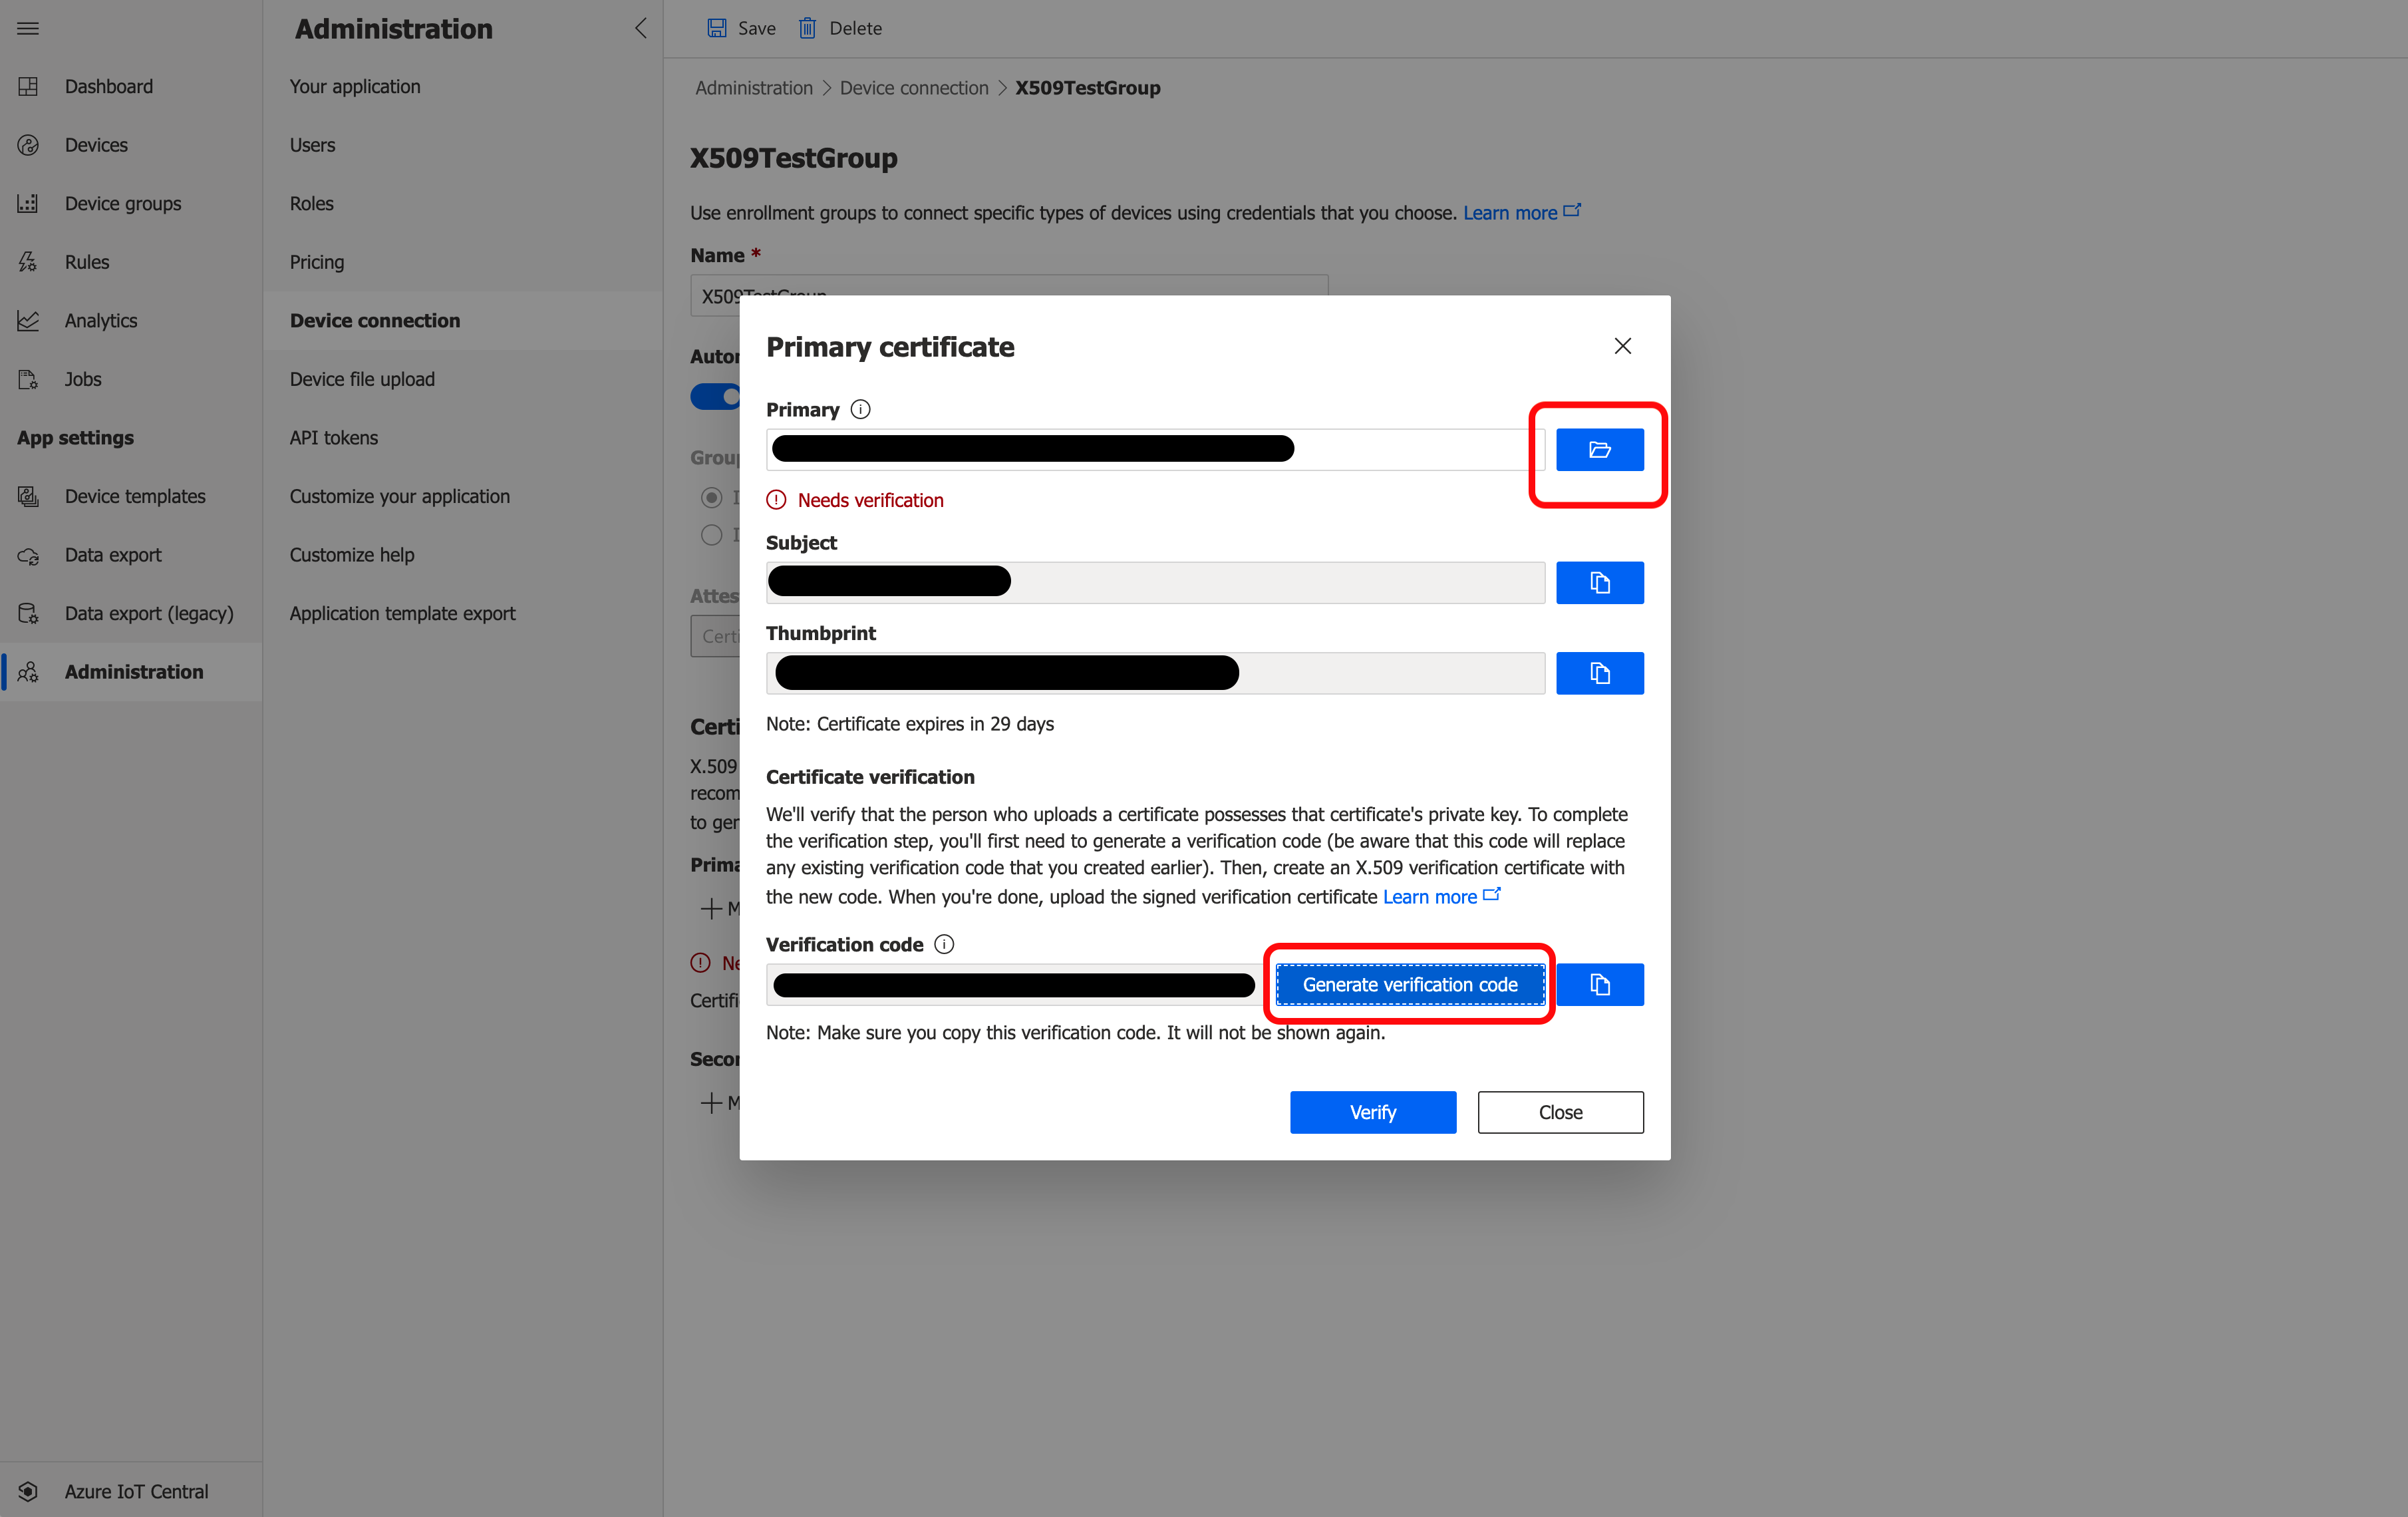
Copy the verification code. Open the Verification Certificates section of Creating Additional Types of Certificates for Azure IoT in a new window and follow the instructions to create a verification certificate. Continue with these instructions once you have created the verification certificate.
Click Verify and upload your verification certificate. The message below Primary will change to a green "Verified".
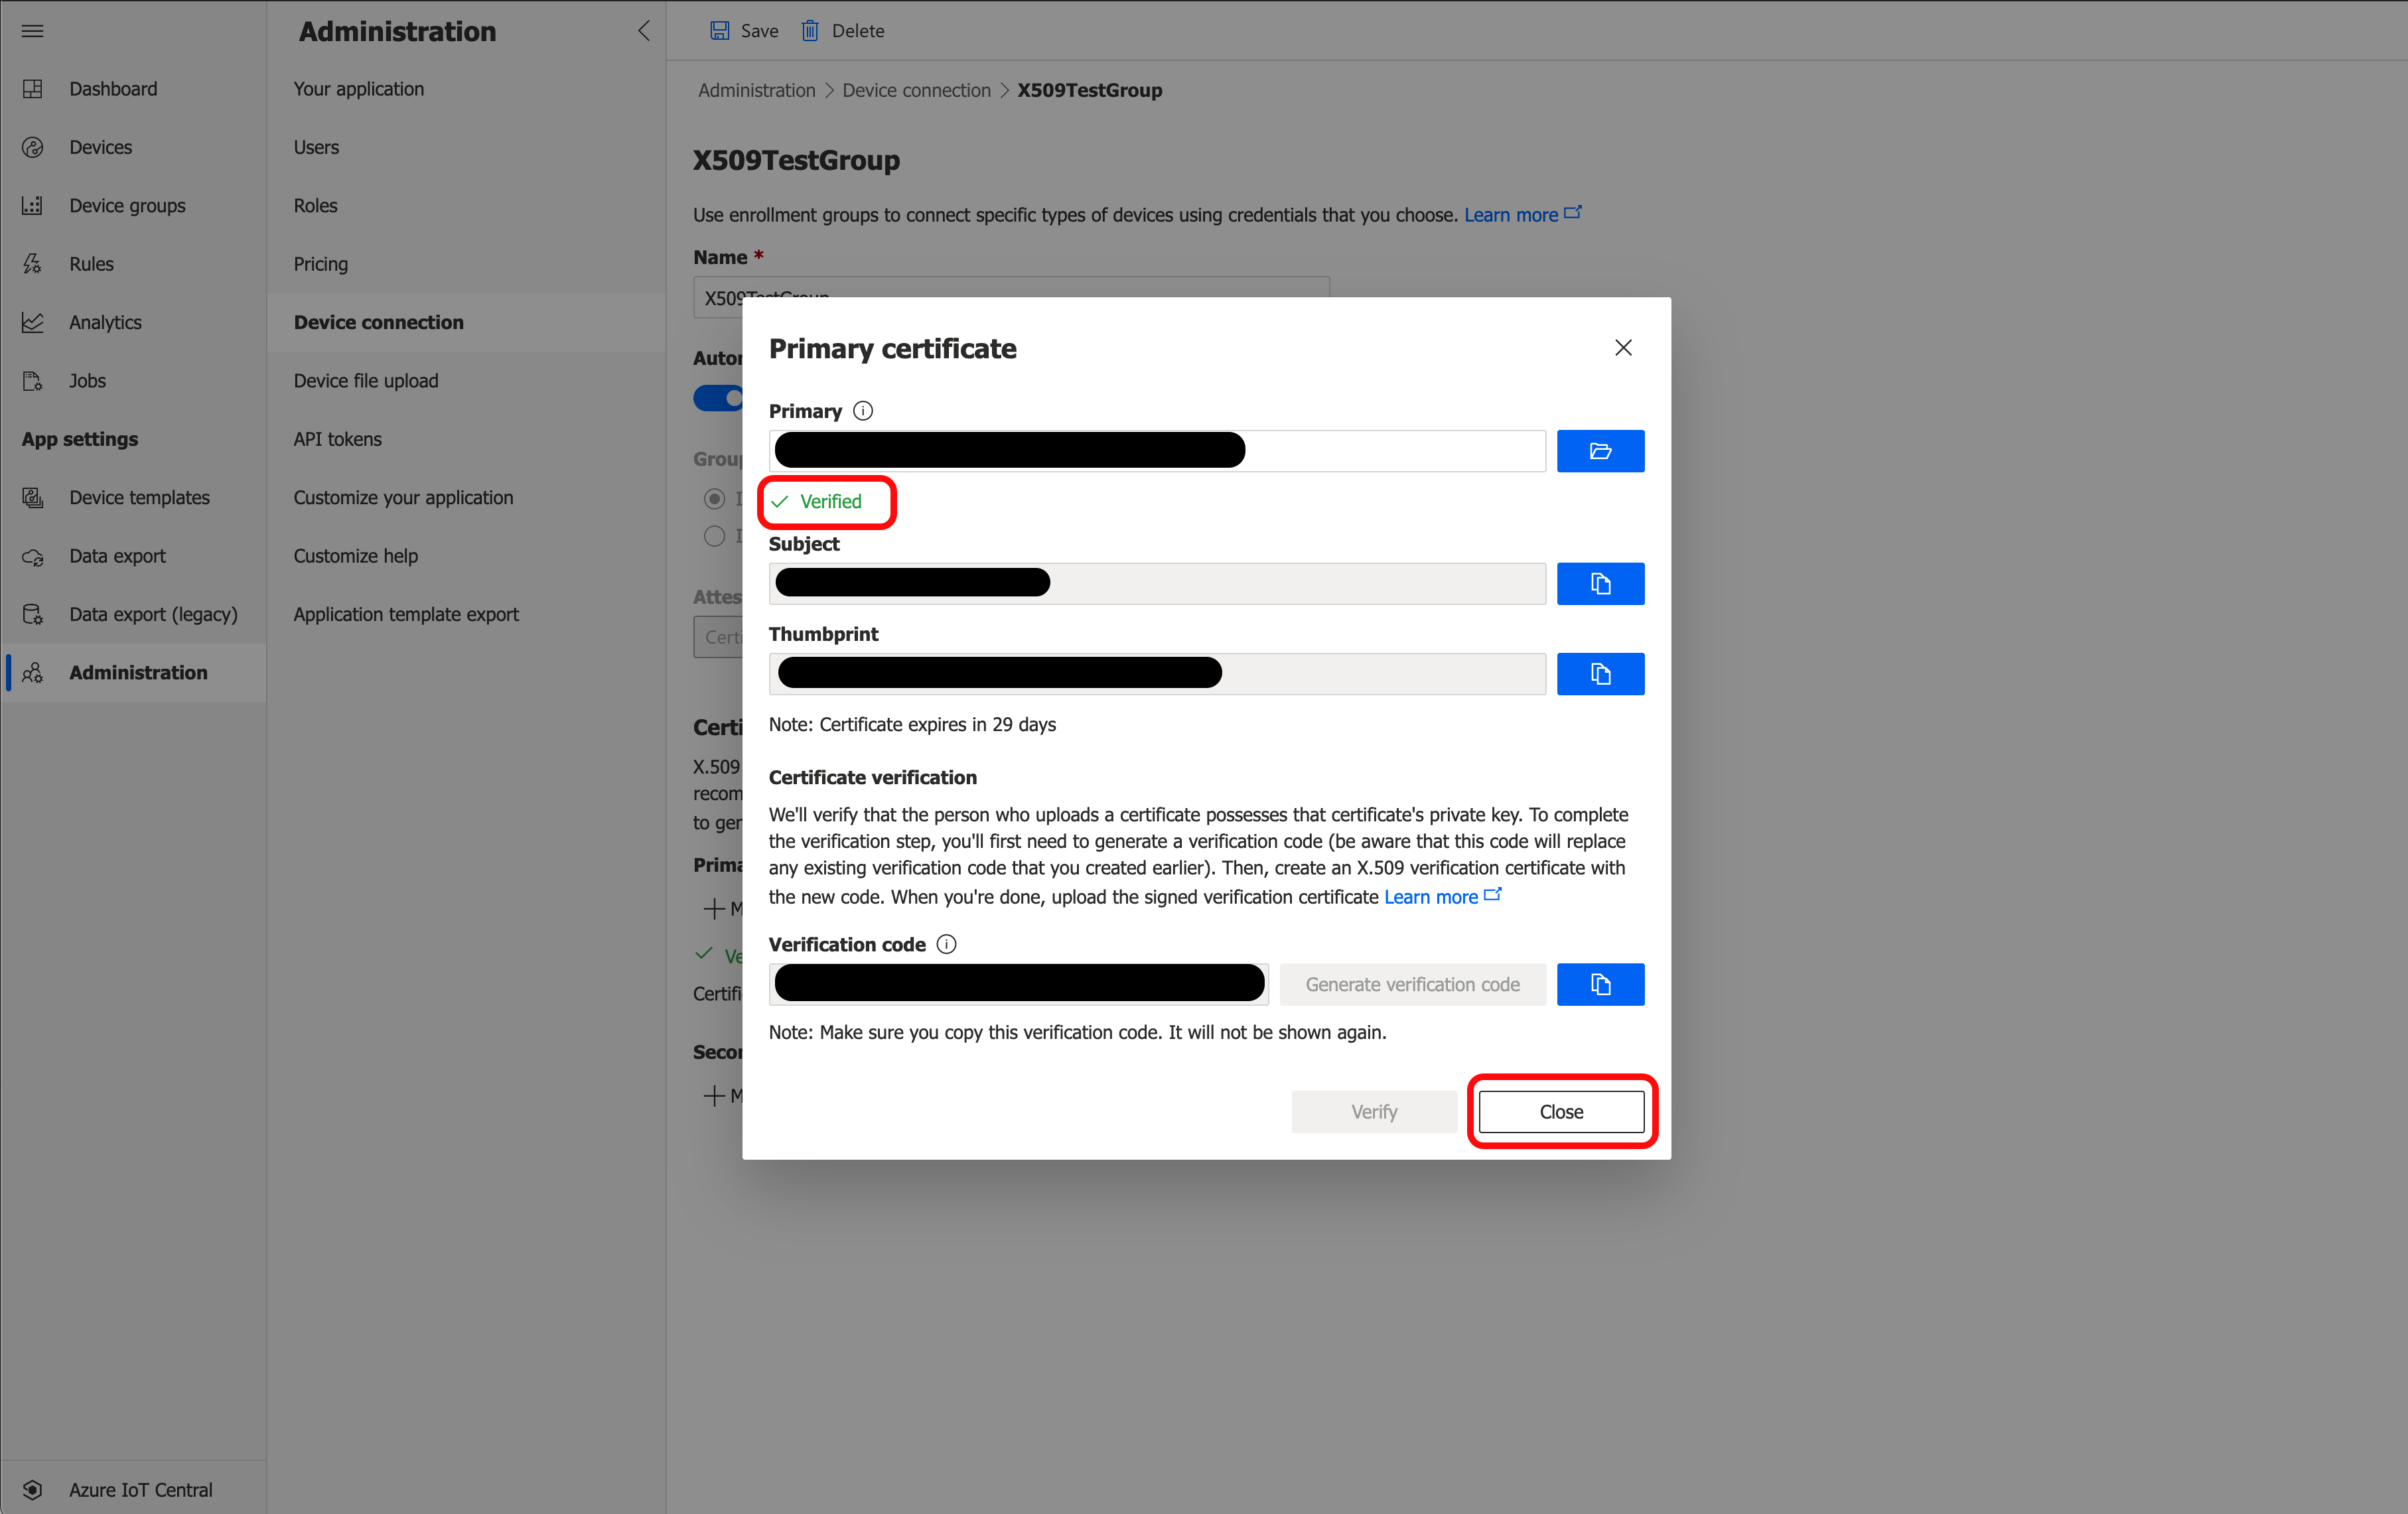
Click Close, then click Save.
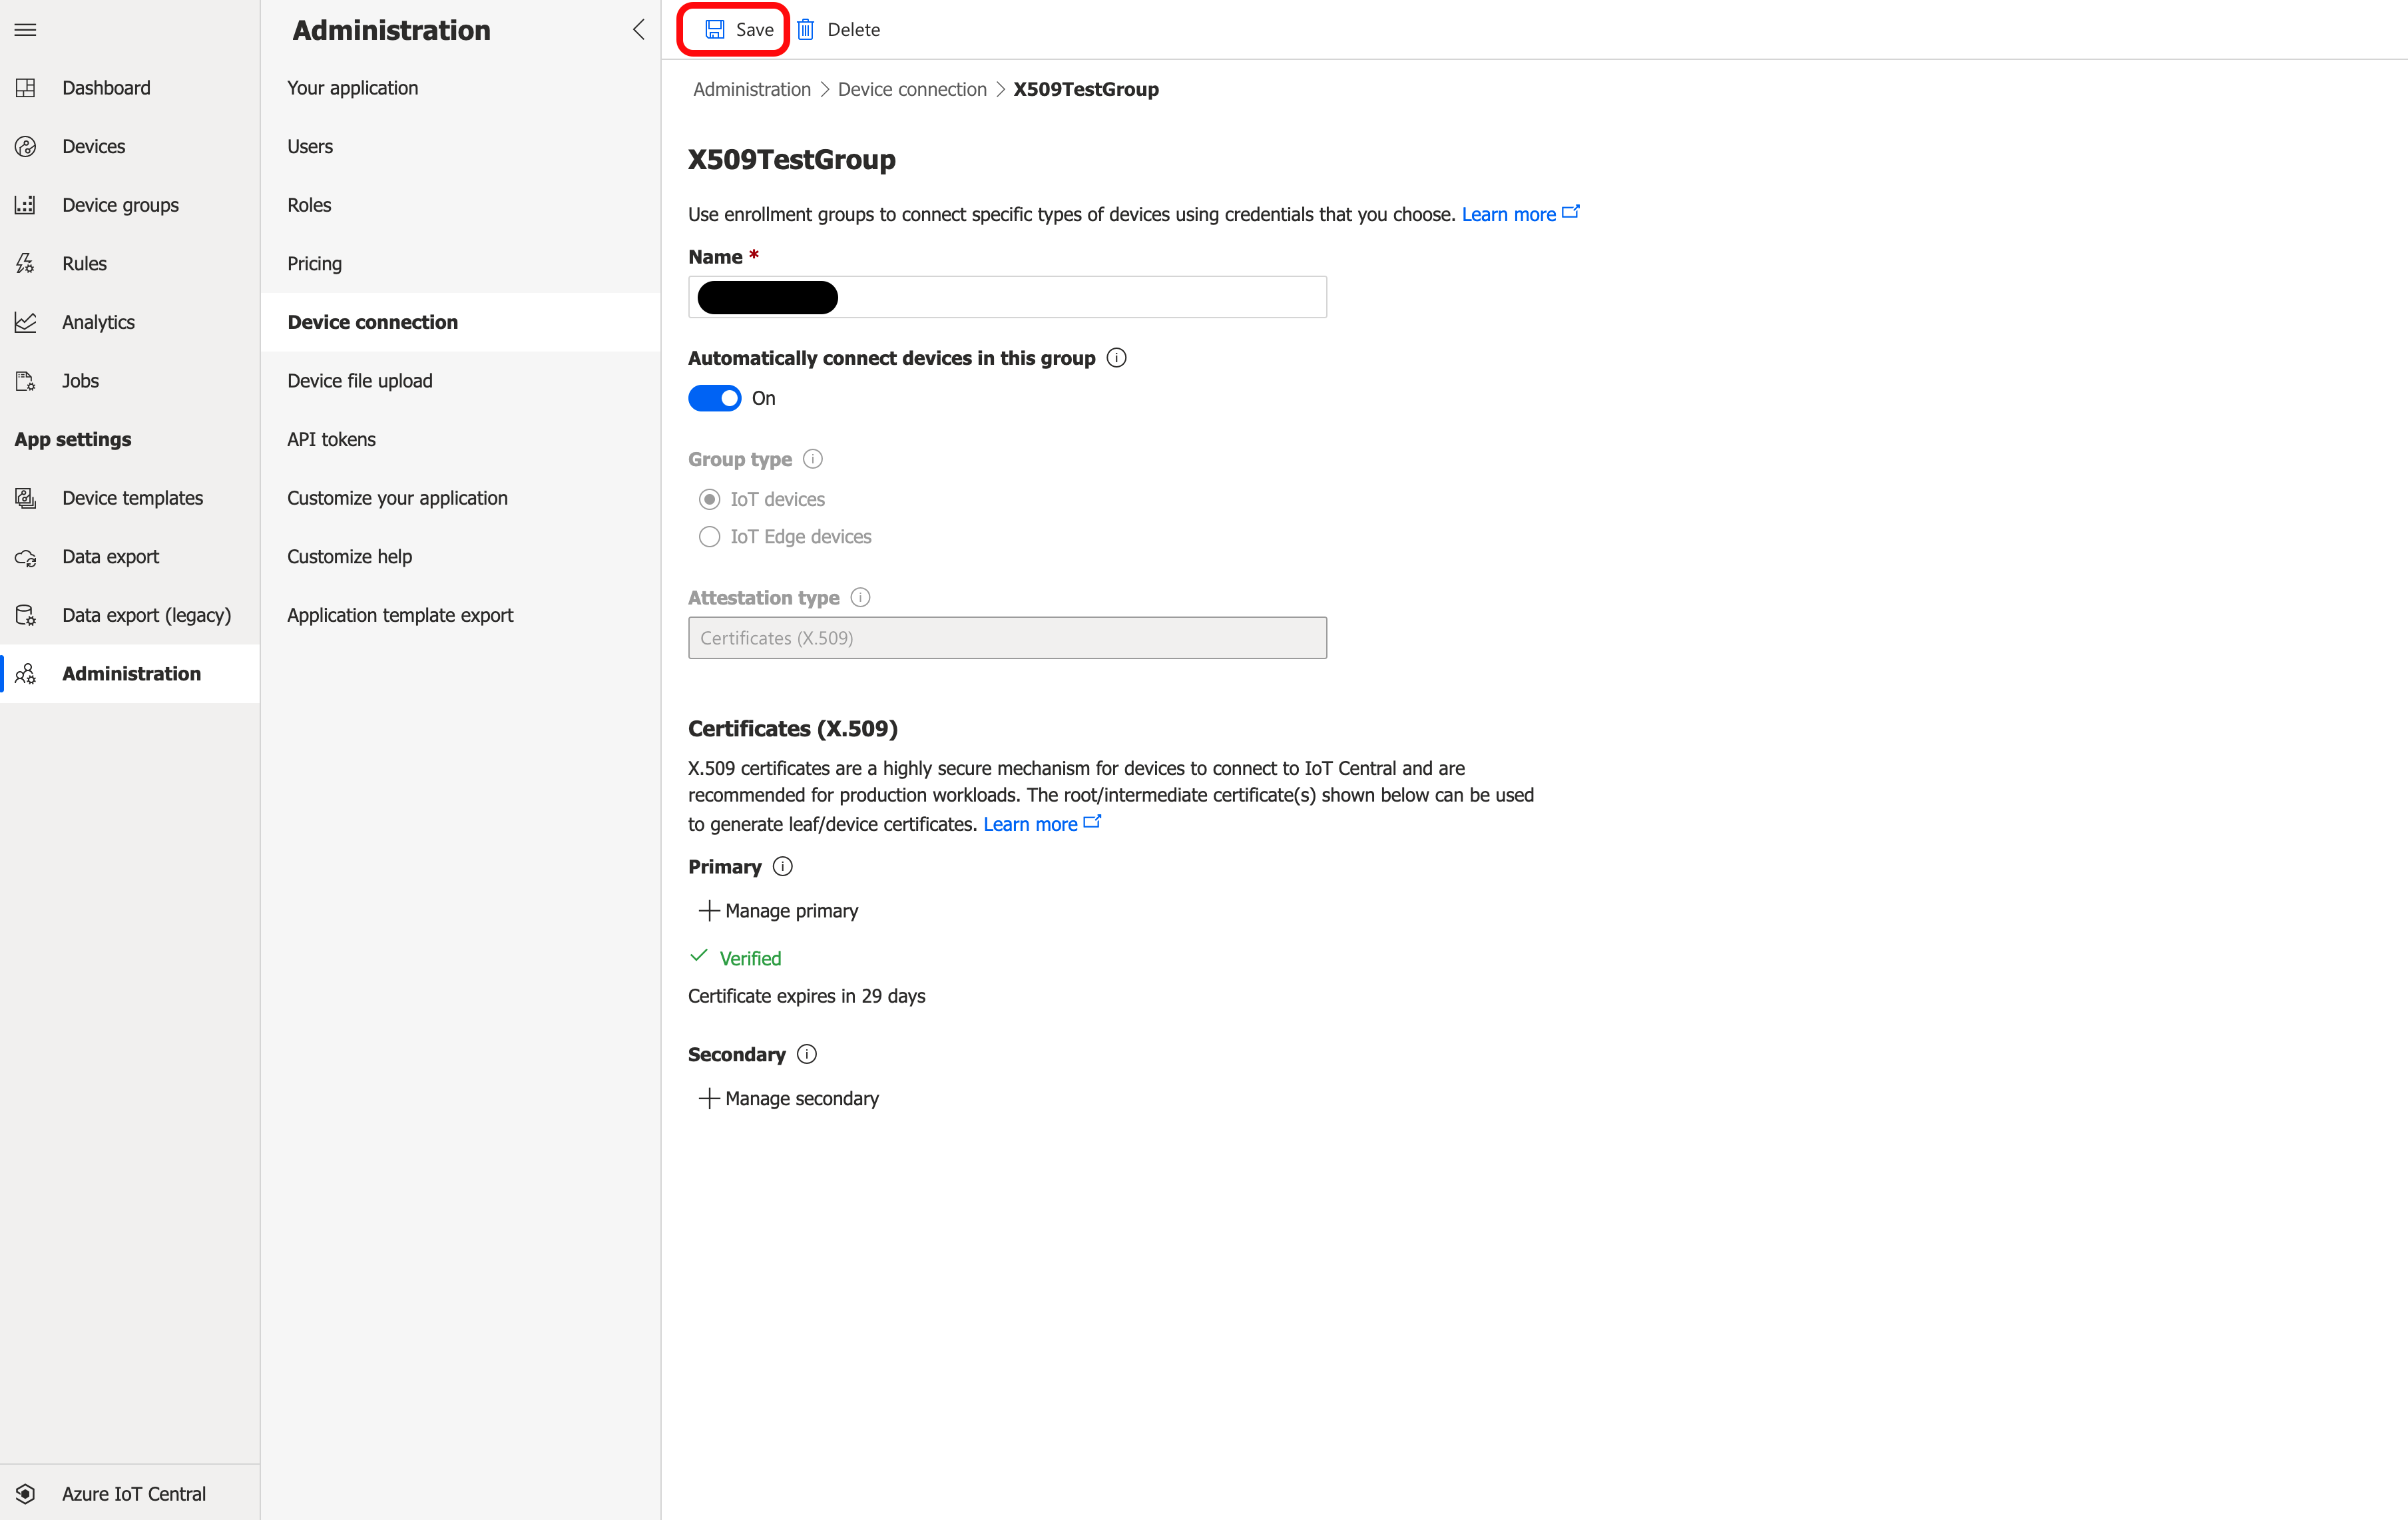
Continue At Create a X.509 cloud connection.
Create a X.509 cloud connection
In the ESF Web interface, go to the Cloud Connection section and click New Connection.
On the New Cloud Connection dialog, enter the following information:
- Cloud Connection Factory PID: AzureDpsX509
- Cloud Connection Service PID: AzureDpsX509 or other valid Cloud Connection Service PID
Click Apply.
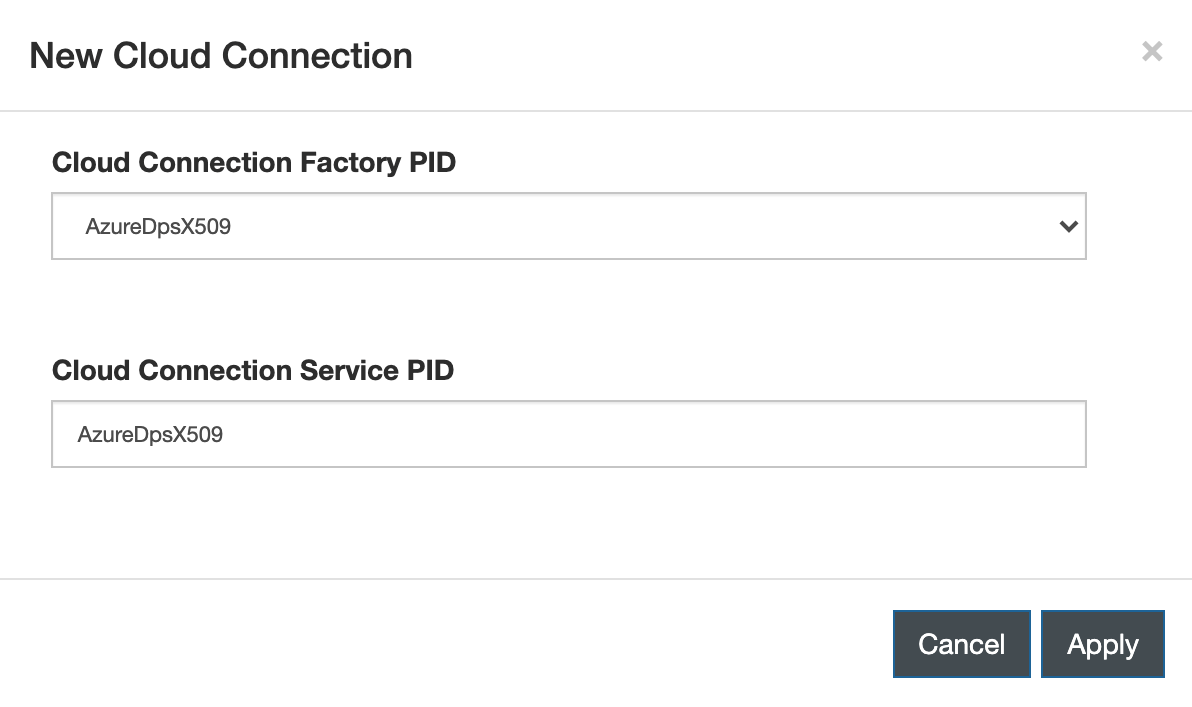
Select the new connection and go to the X509MqttDataTransport tab.
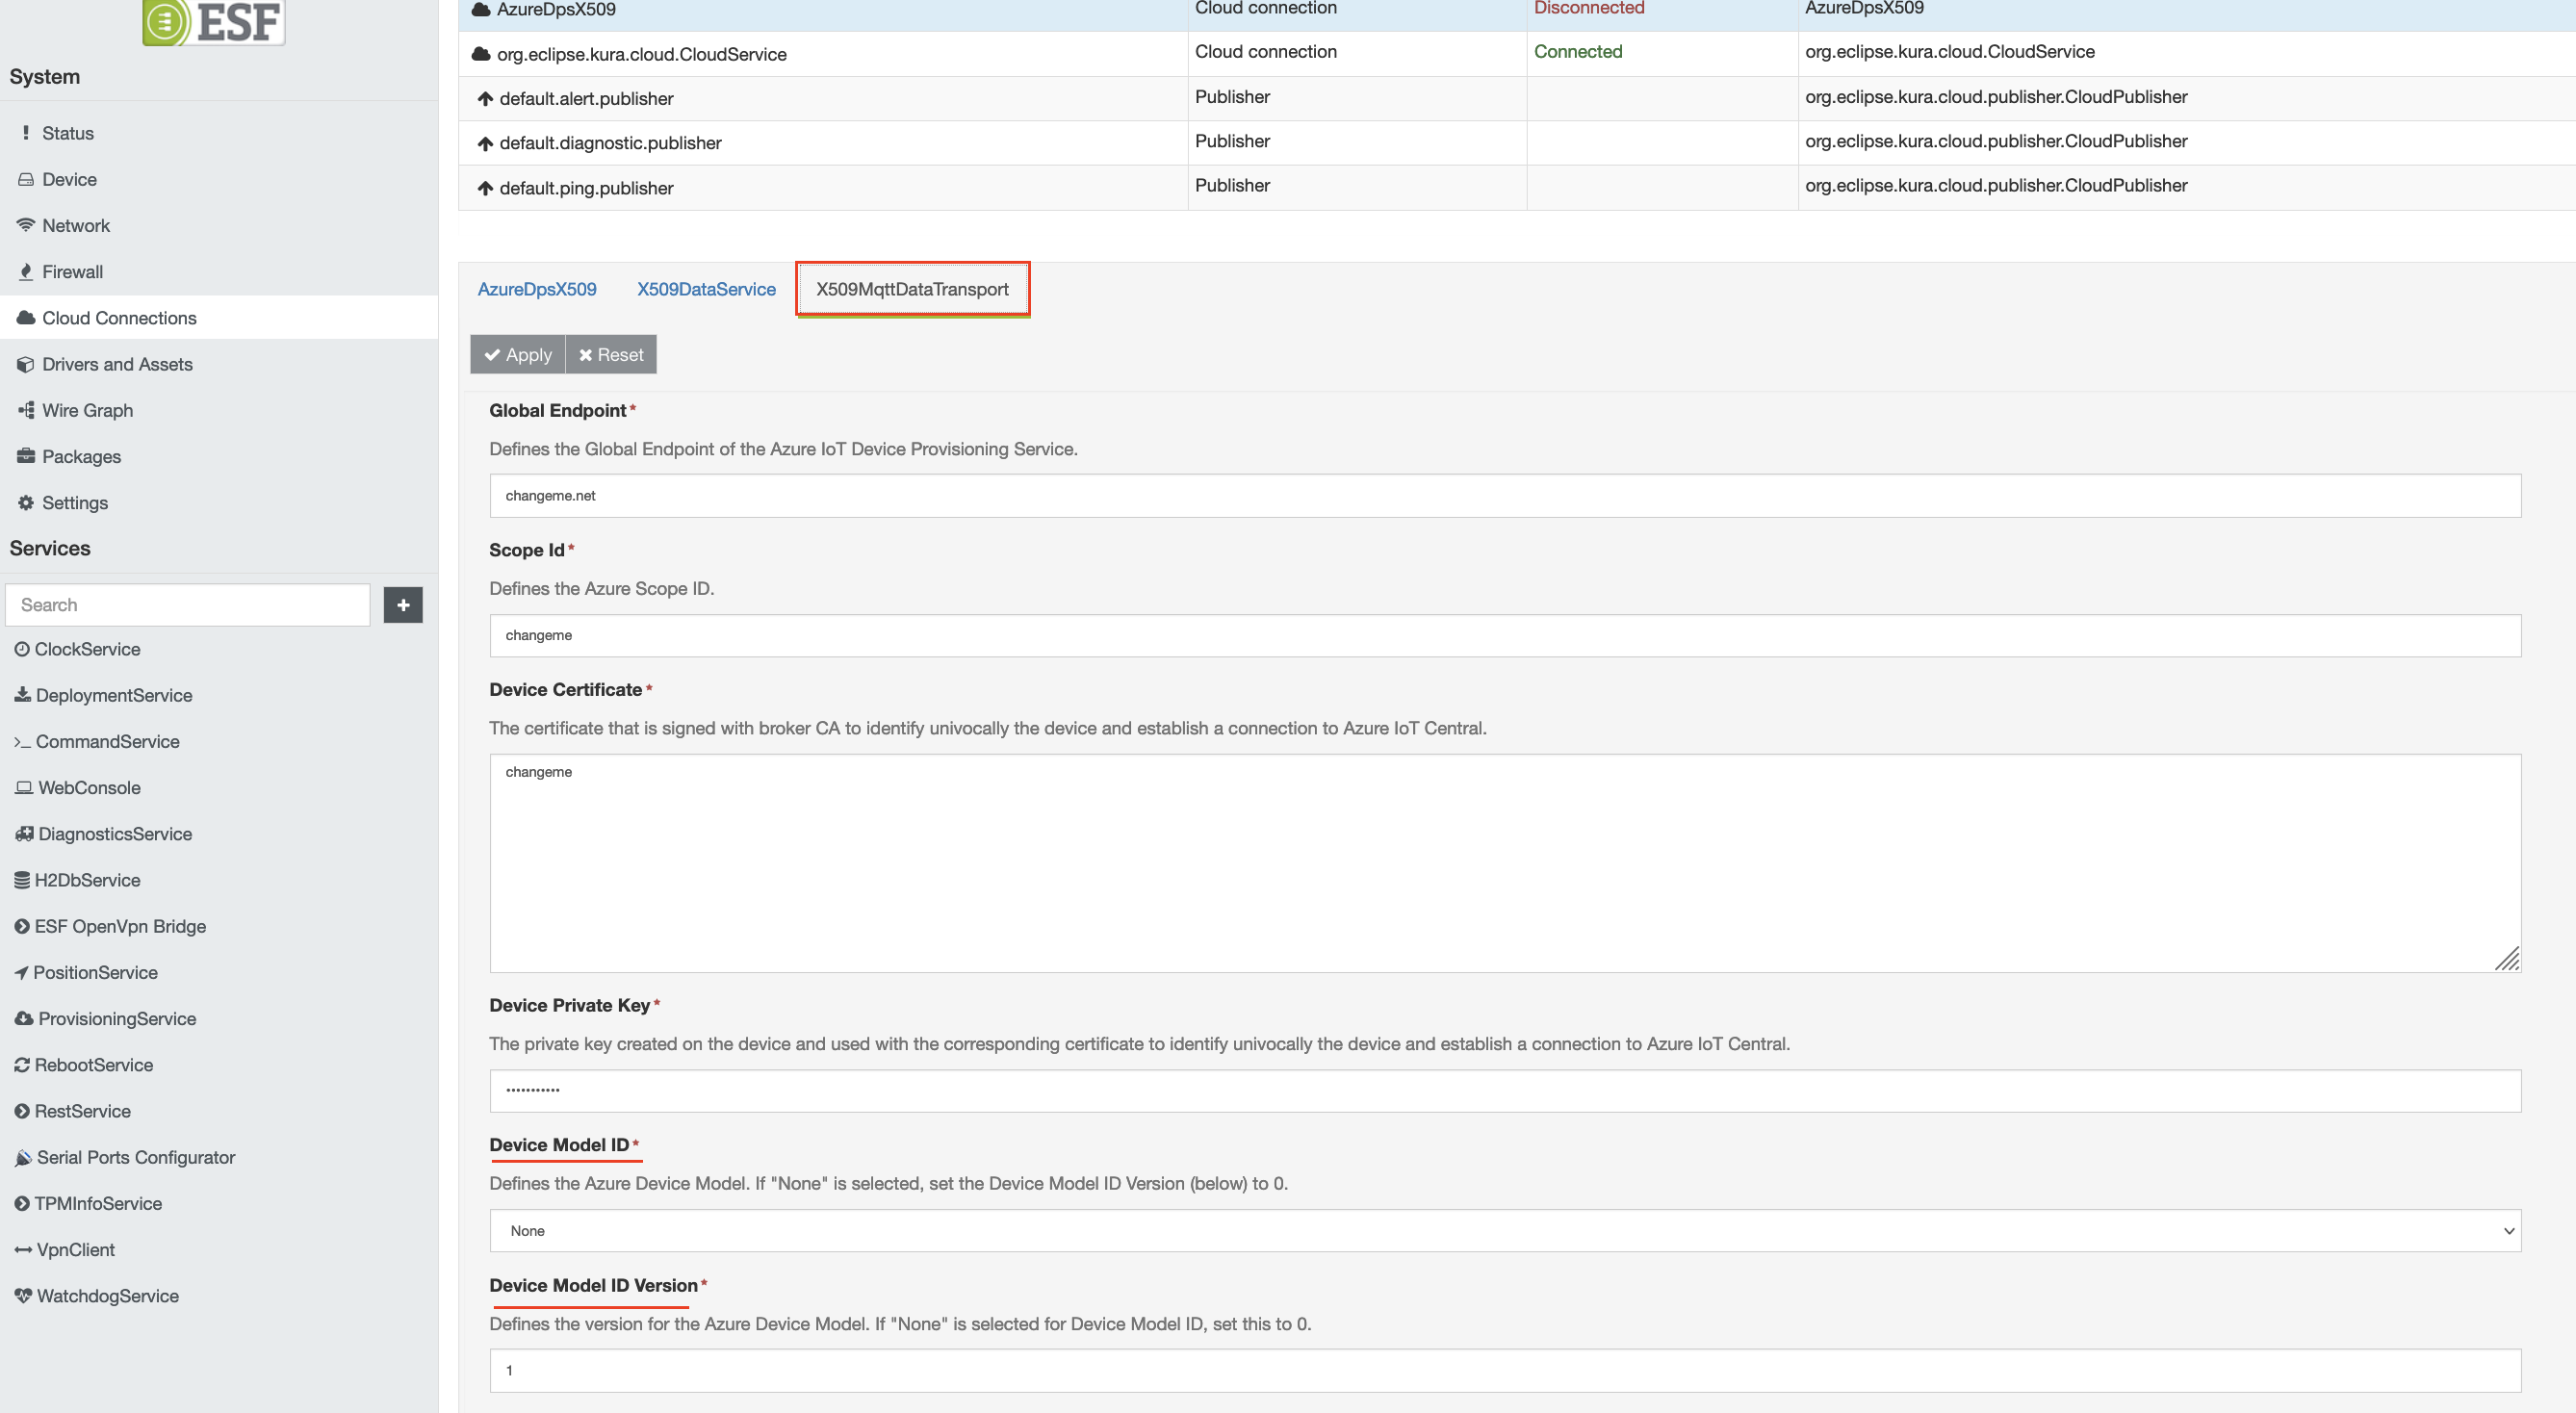
Select the appropriate Device Model ID from the list of options. If a device model does not need to be specified your application, leave the default 'None' field'. Set the 'Device Model ID Version' to the appropriate version of the Device Model ID.
Connecting to Azure IoT Portal can be accomplished in five ways:
- Start at Configure connection using IoT Hub DPS Individual Enrollment for IoT Hub DPS Individual Enrollment
- Start at Configure connection using IoT Hub DPS Enrollment Group for IoT Hub DPS Enrollment Group
- Start at Configure connection using IoT Central Individual Enrollment for IoT Central Individual Enrollment
- Start at Configure connection using IoT Central Enrollment Group for IoT Central Enrollment Group
Configure connection using IoT Hub DPS Individual Enrollment
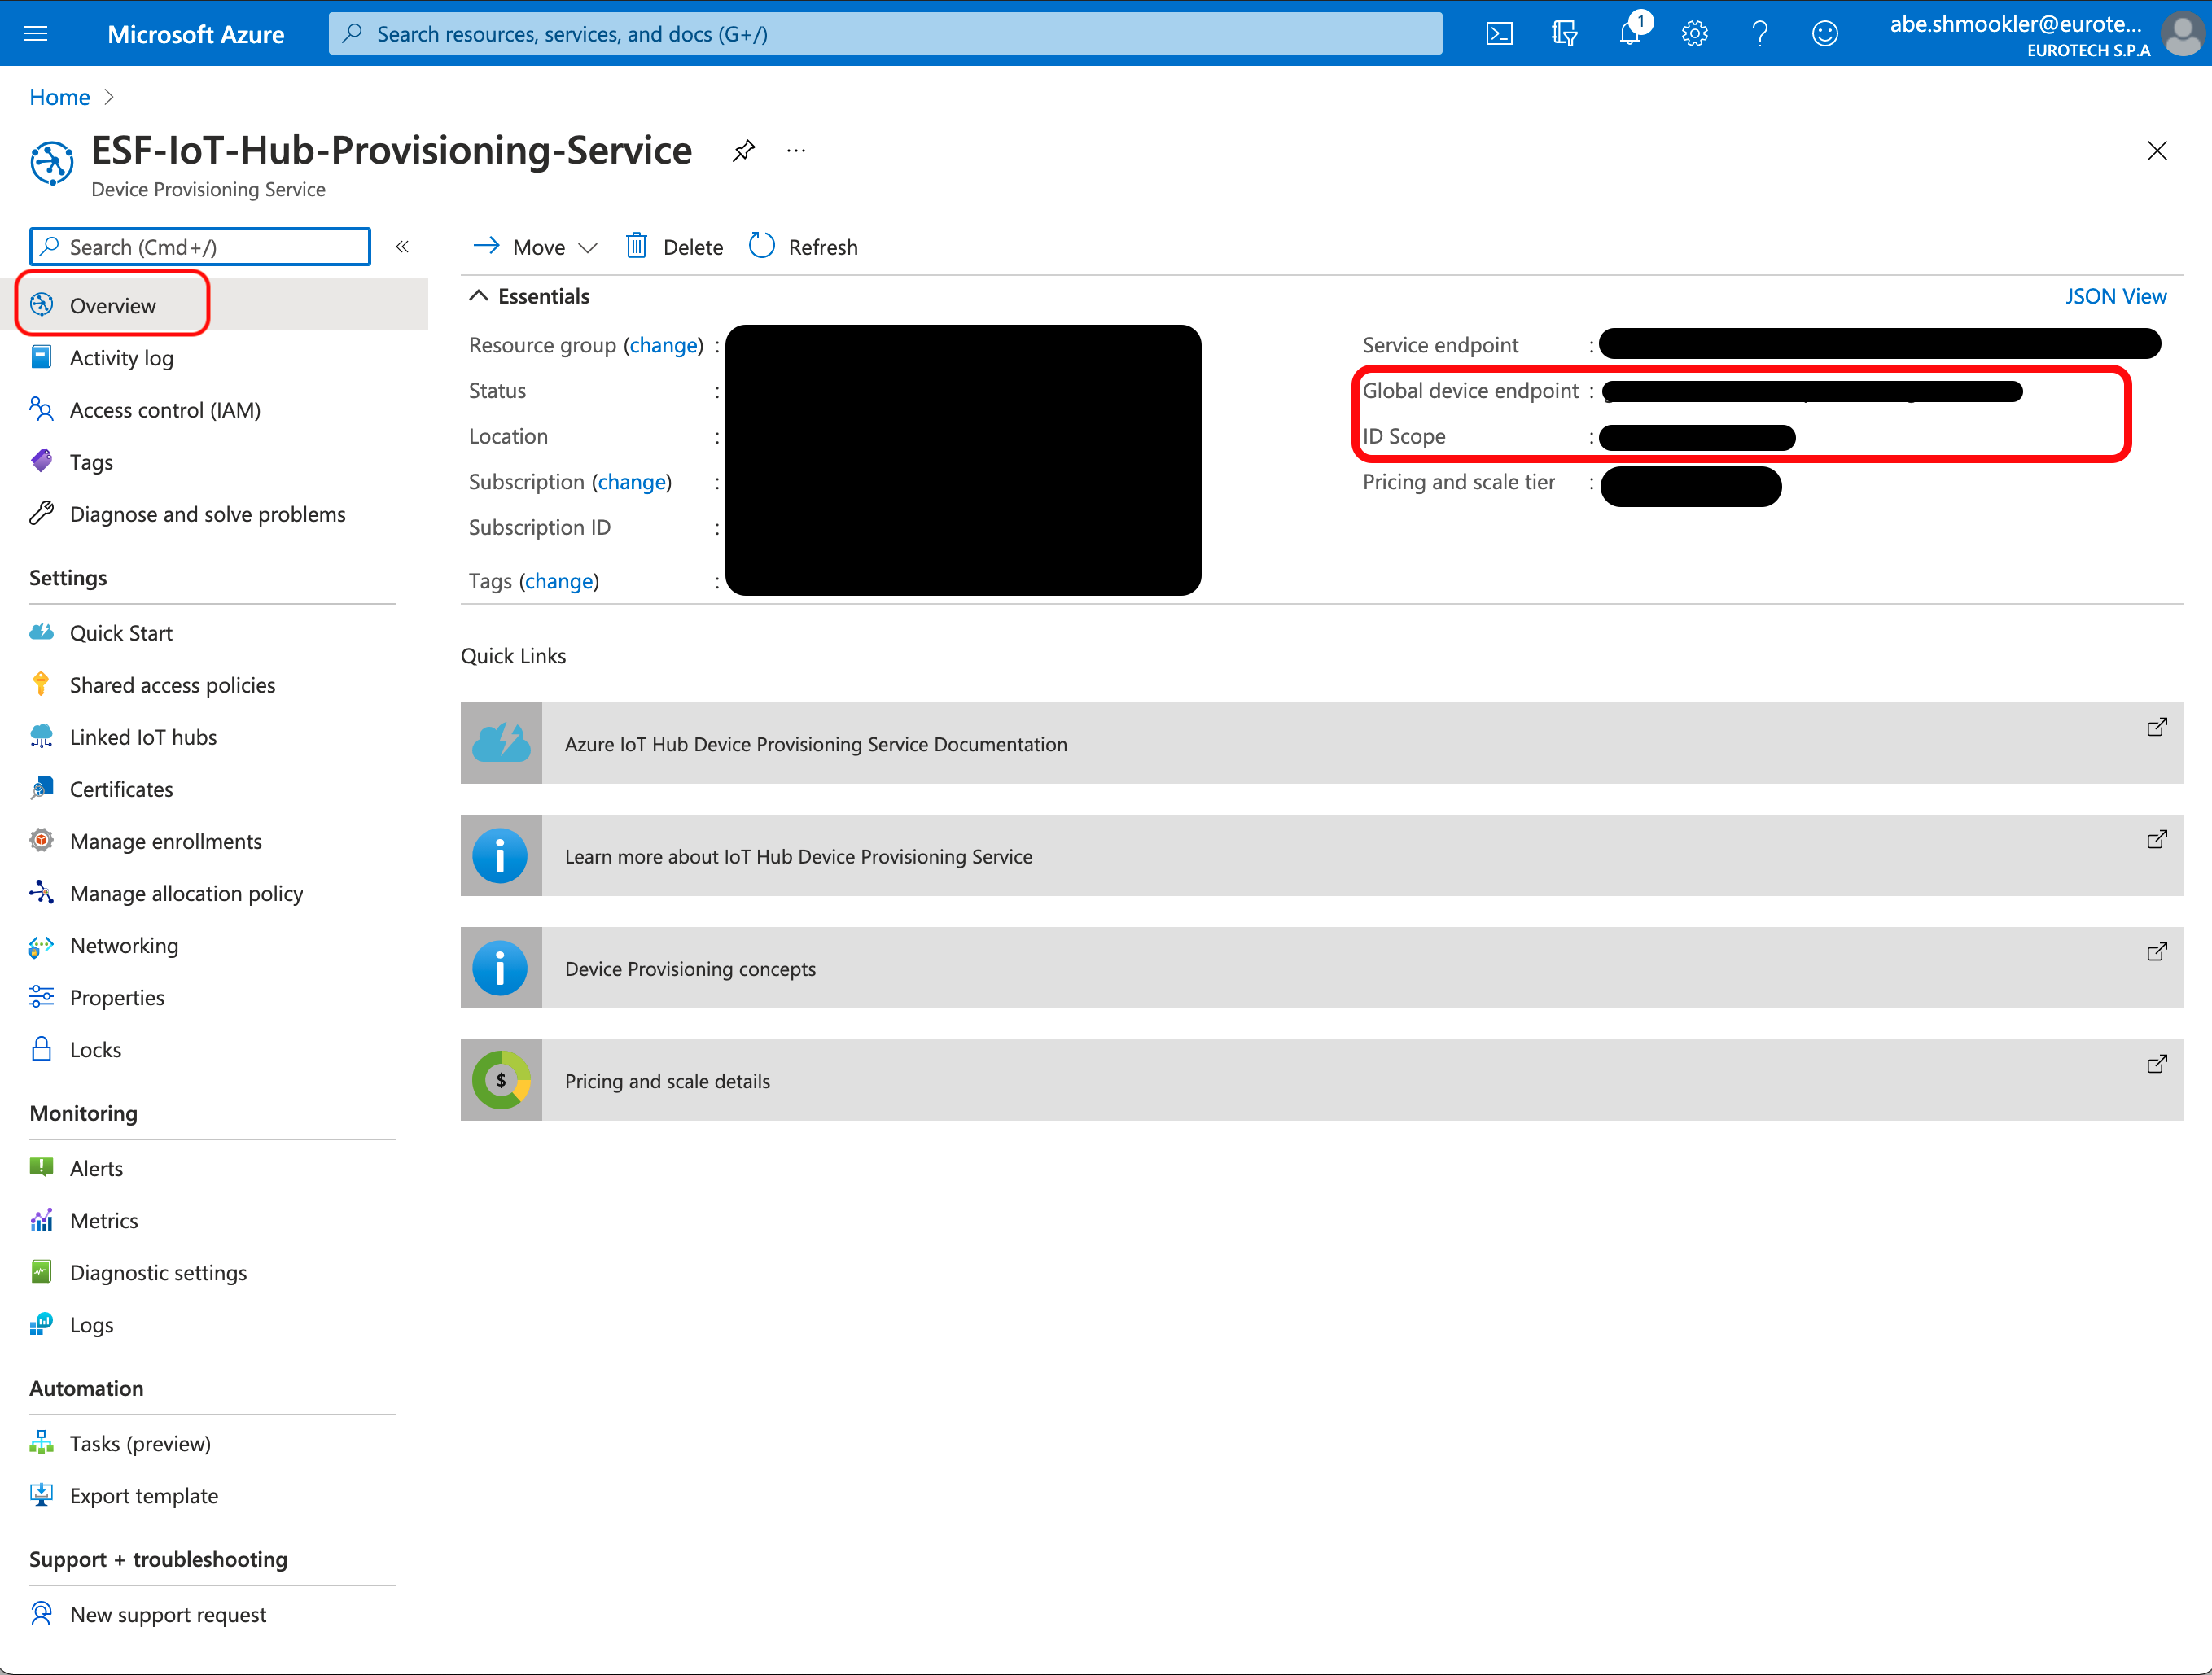
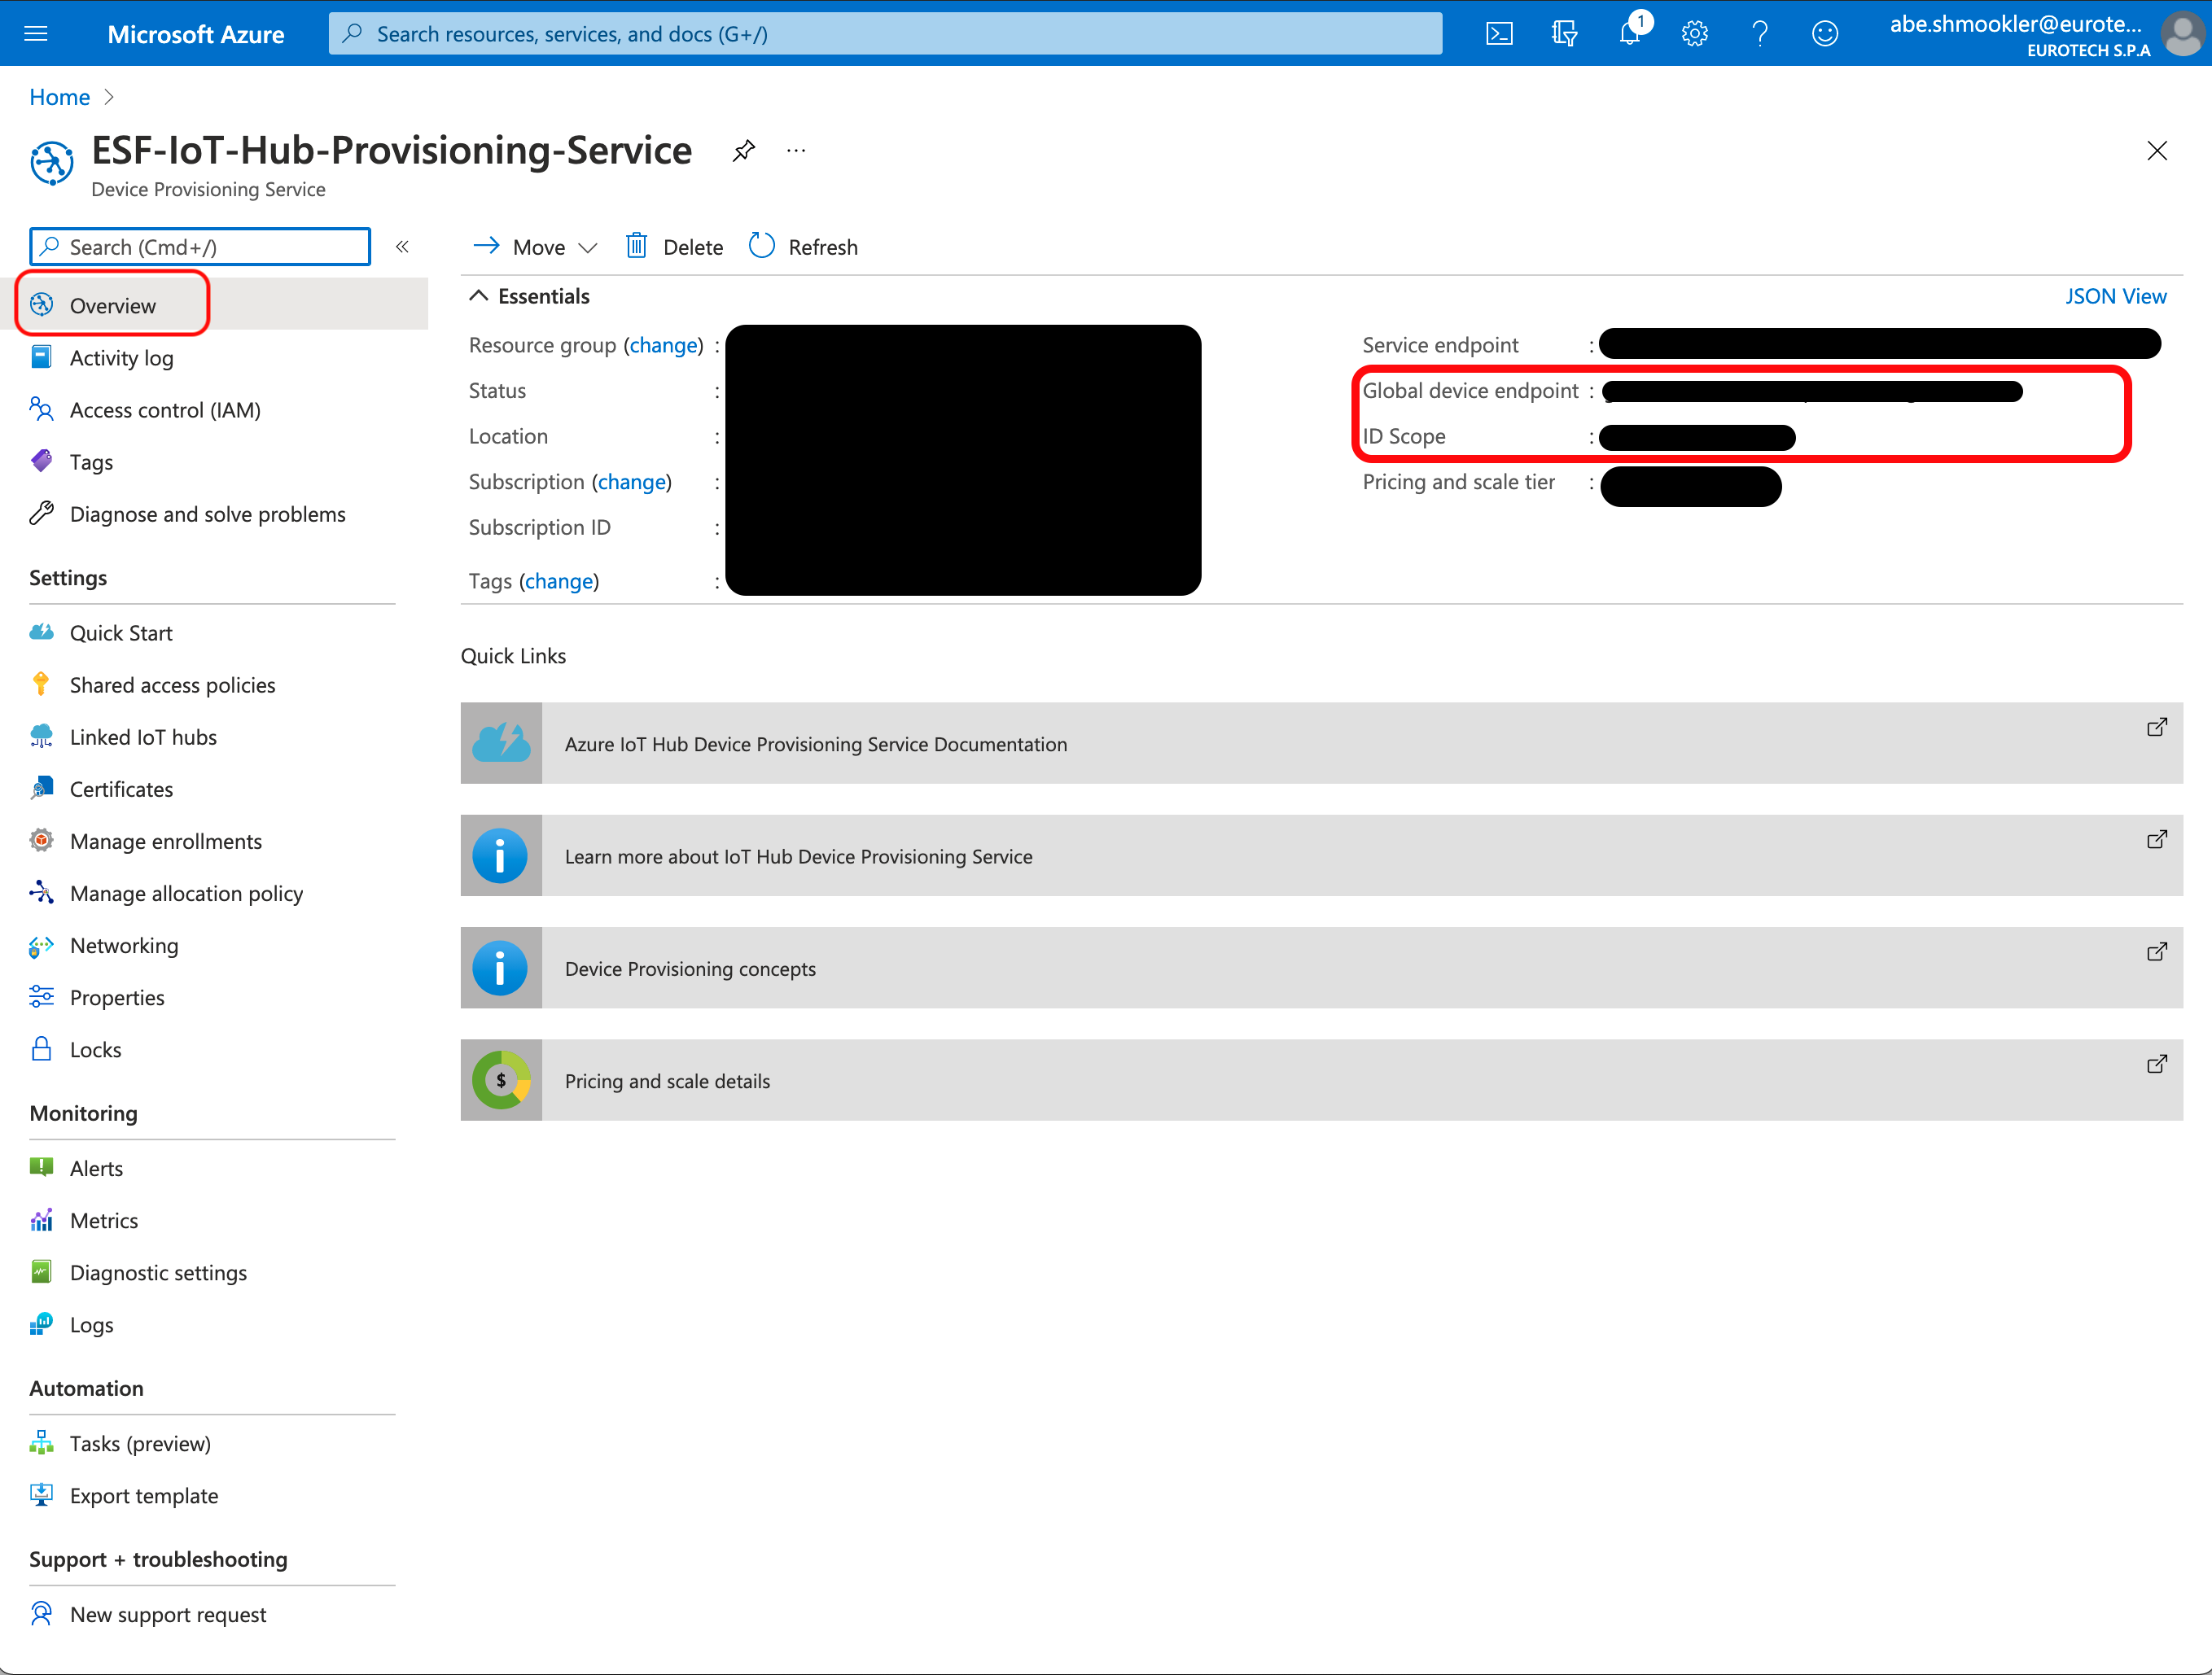
Navigate to the Overview page of the Azure DPS. Copy/paste the Global device endpoint and ID Scope into the Global Endpoint and Scope ID in ESF.
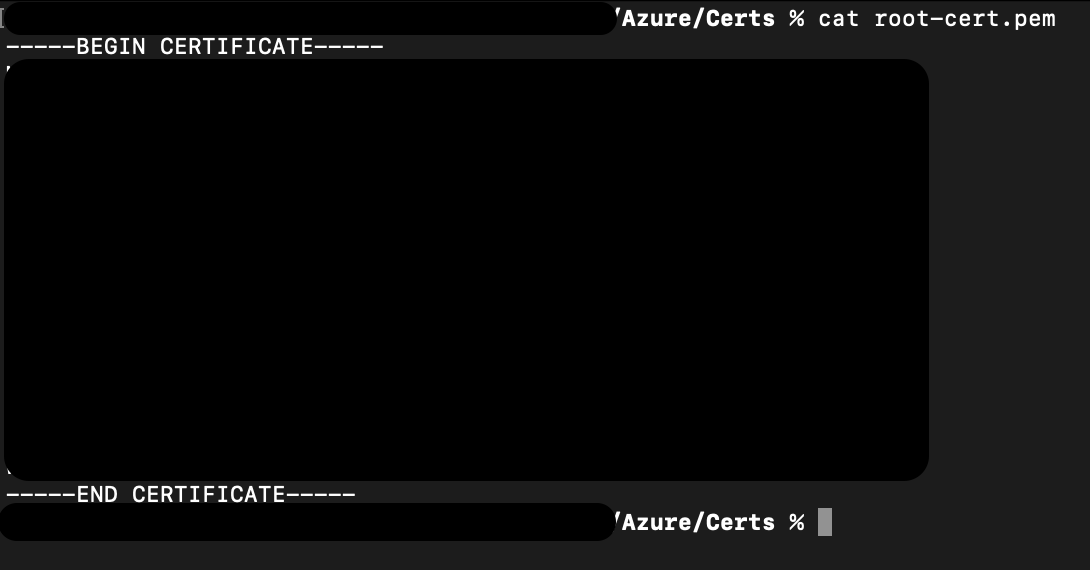
Run the following command to get the certificate.
cat root-cert.pemThe output of that command will start with "-----BEGIN CERTIFICATE-----", then have a large block of random looking text, and end with "-----END CERTIFICATE-----".
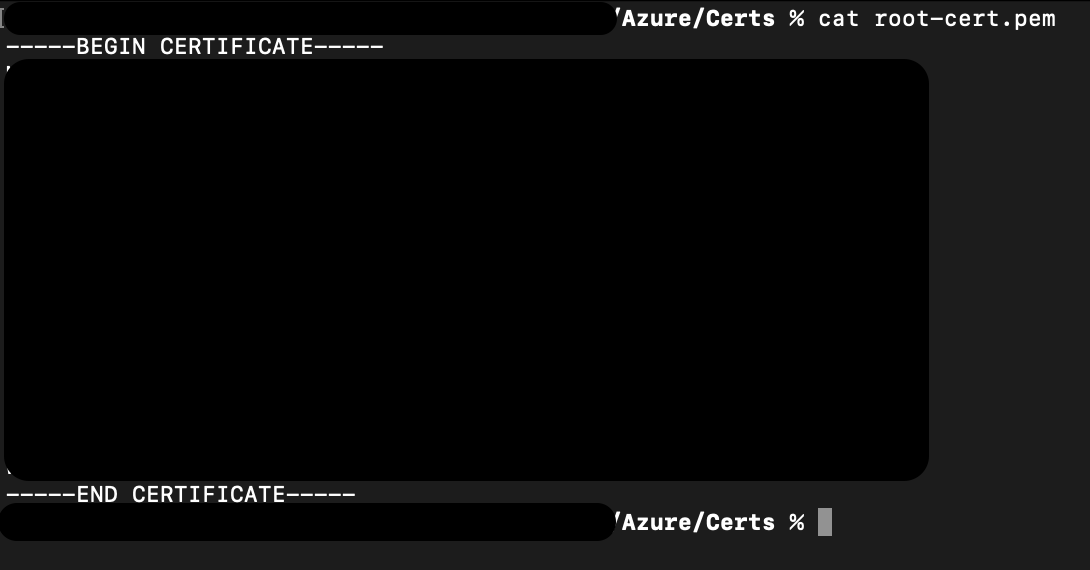
The large block of random looking text is blacked out in this image.
Copy and paste the entire output starting with "-----BEGIN" and ending with "CERTIFICATE-----". Paste this into the Device Certificate textbox in ESF.
Whitespace WarningBe careful not to copy/paste any extra whitespace characters after the last dash. If extra whitespace characters are included the connection will fail.
Run the following command to get the private key.
cat root-private-key.pemThe output of that command will start with "-----BEGIN PRIVATE KEY-----", then have a large block of random looking text, and end with "-----END PRIVATE KEY-----".
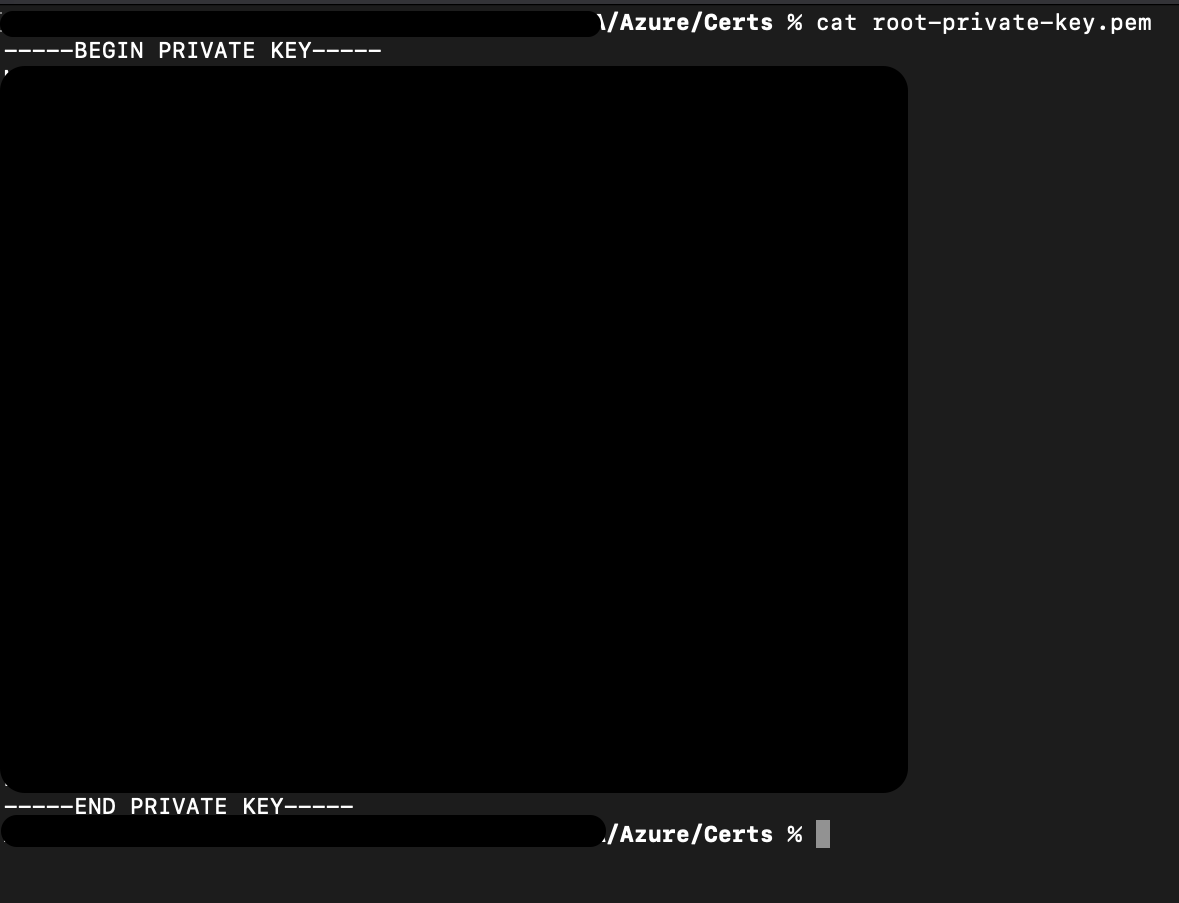
The large block of random looking text is blacked out in this image.
Copy and paste the entire output starting with "-----BEGIN" and ending with "CERTIFICATE-----". Paste this into the Device Private Key textbox in ESF.
Whitespace WarningBe careful not to copy/paste any extra whitespace characters after the last dash. If extra whitespace characters are included the connection will fail.
Click Apply.
Click the Connect/Disconnect button. The Status should change to Connected. The connection process may take up to two minutes.
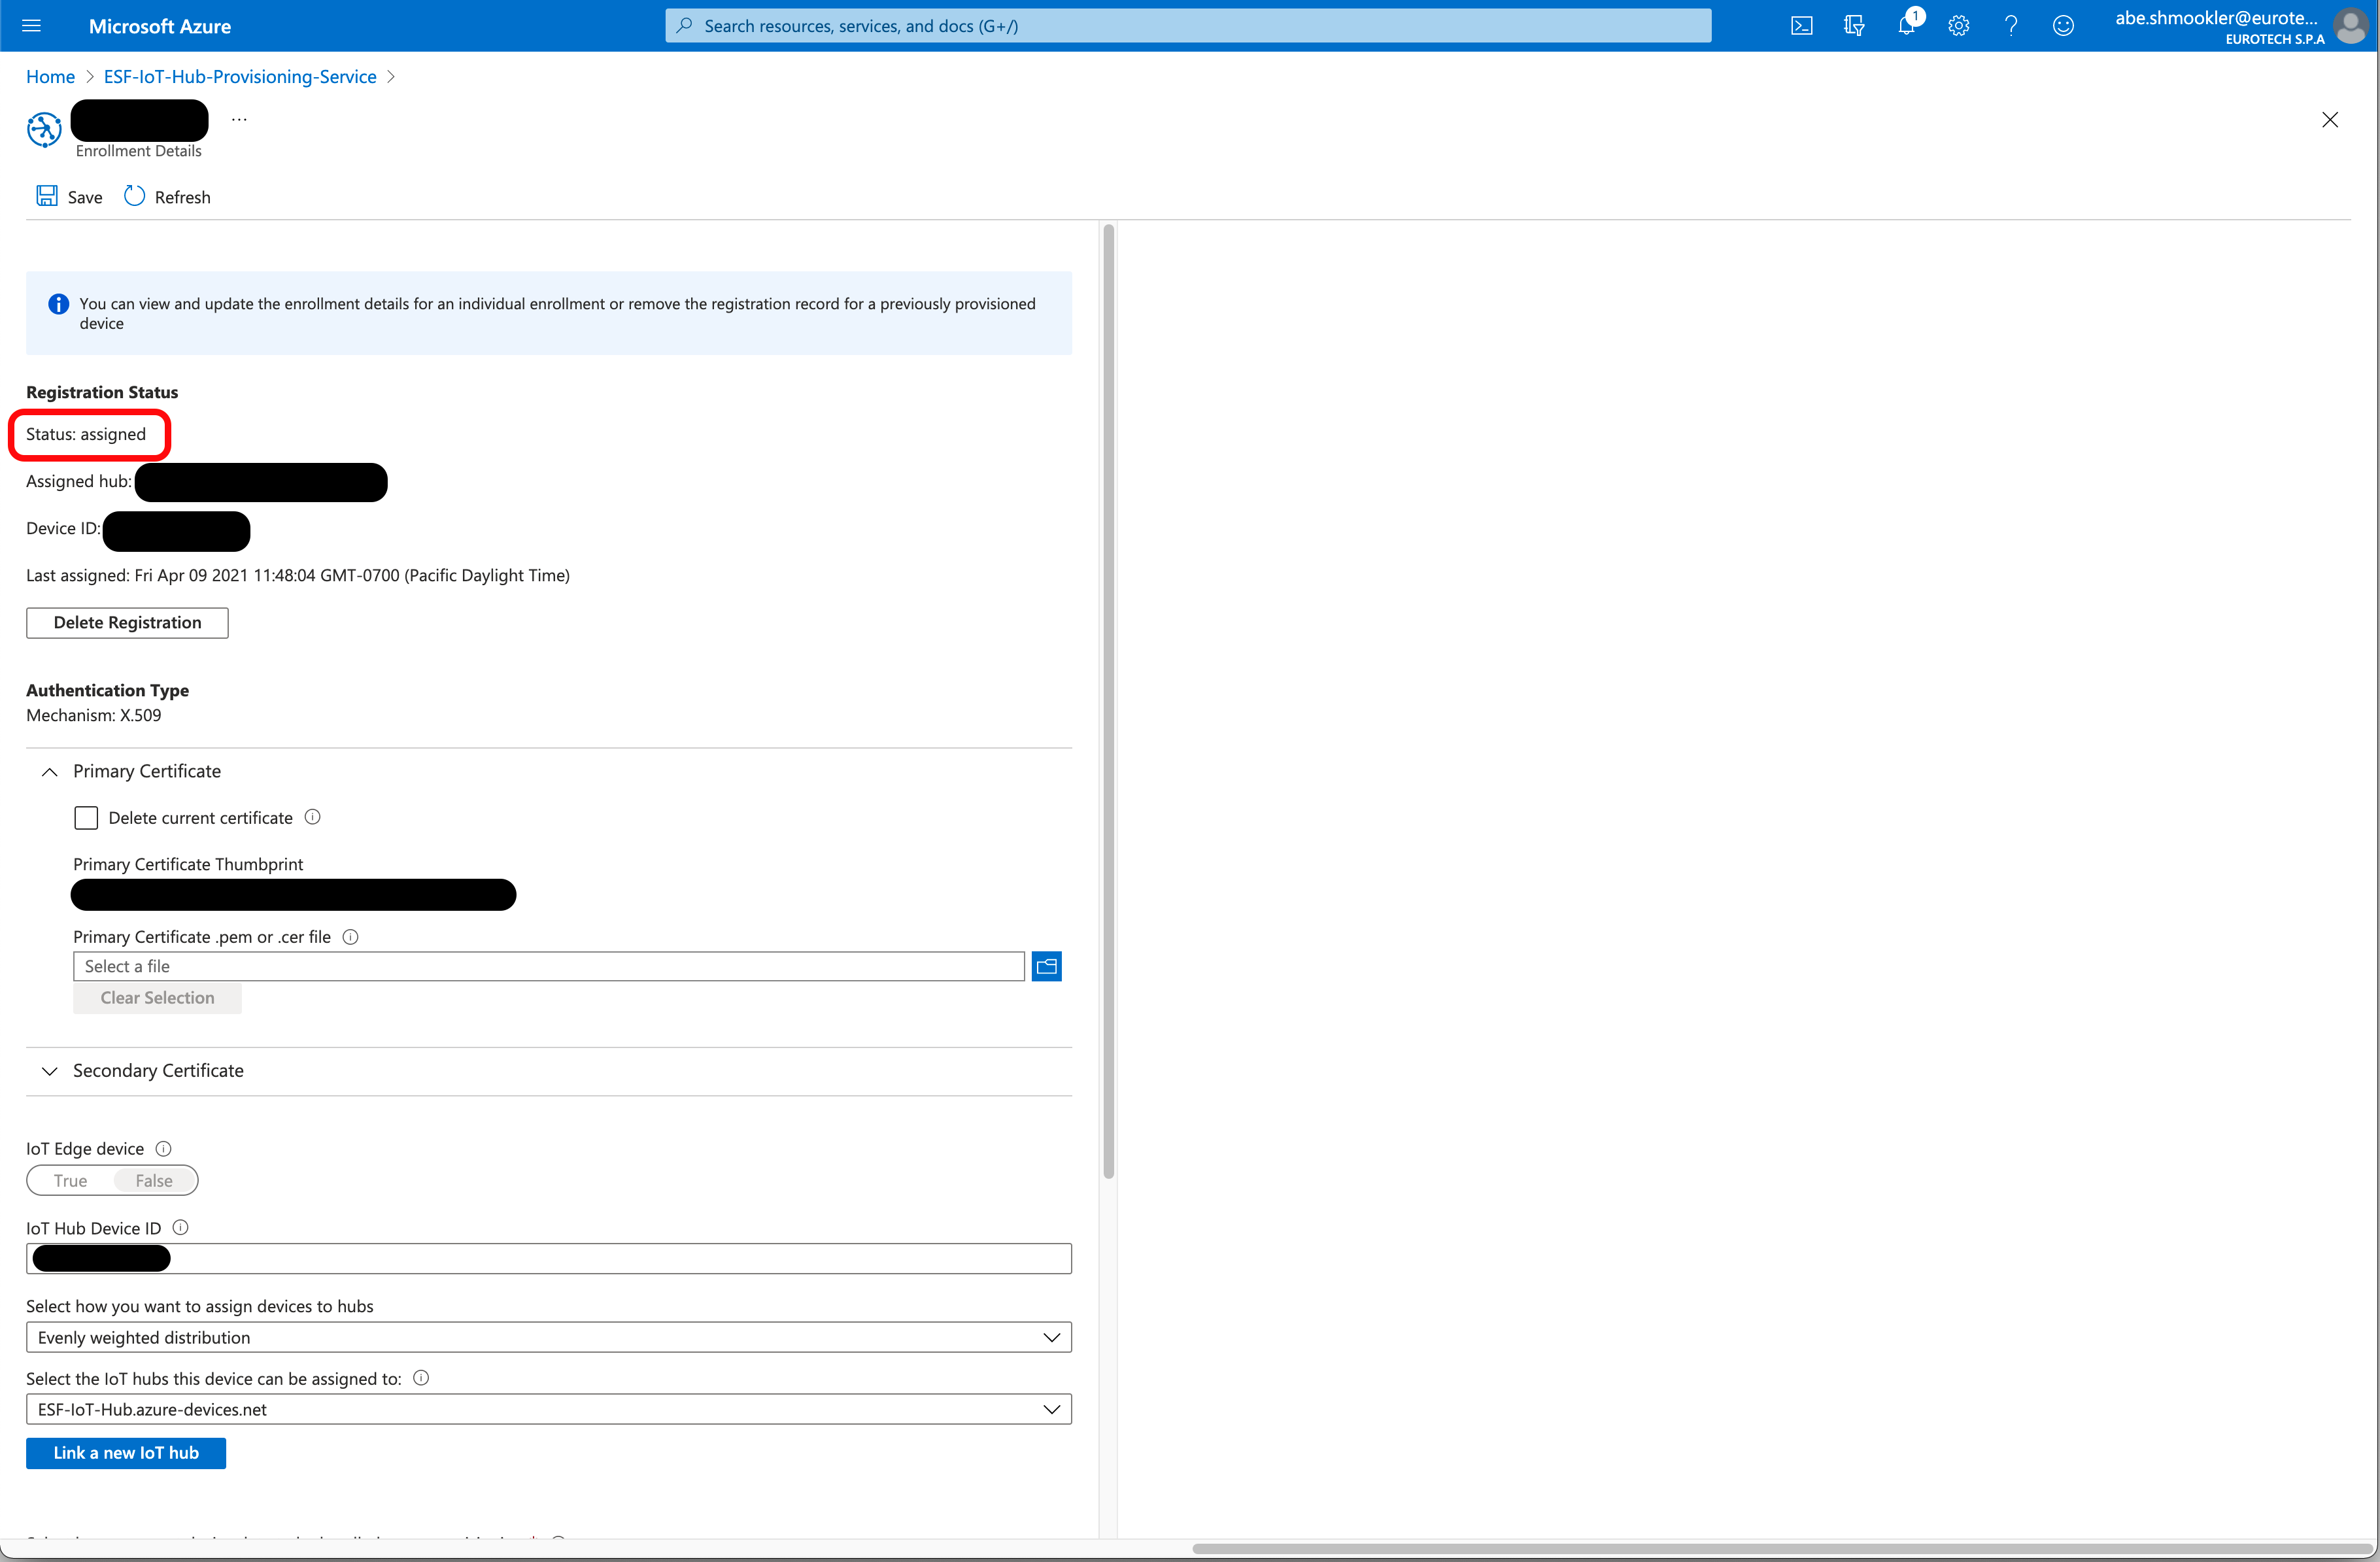
When the AzureDpsX509 is connected, navigate to the device in DPS (via Manage Enrollments/Individual Enrollments). Select your device to go to the Enrollment Details page.
In the Registration Status section, confirm that the Status is "assigned." If the Status is still "unassigned" try refreshing the page in your browser (not the Azure Portal "refresh" button).
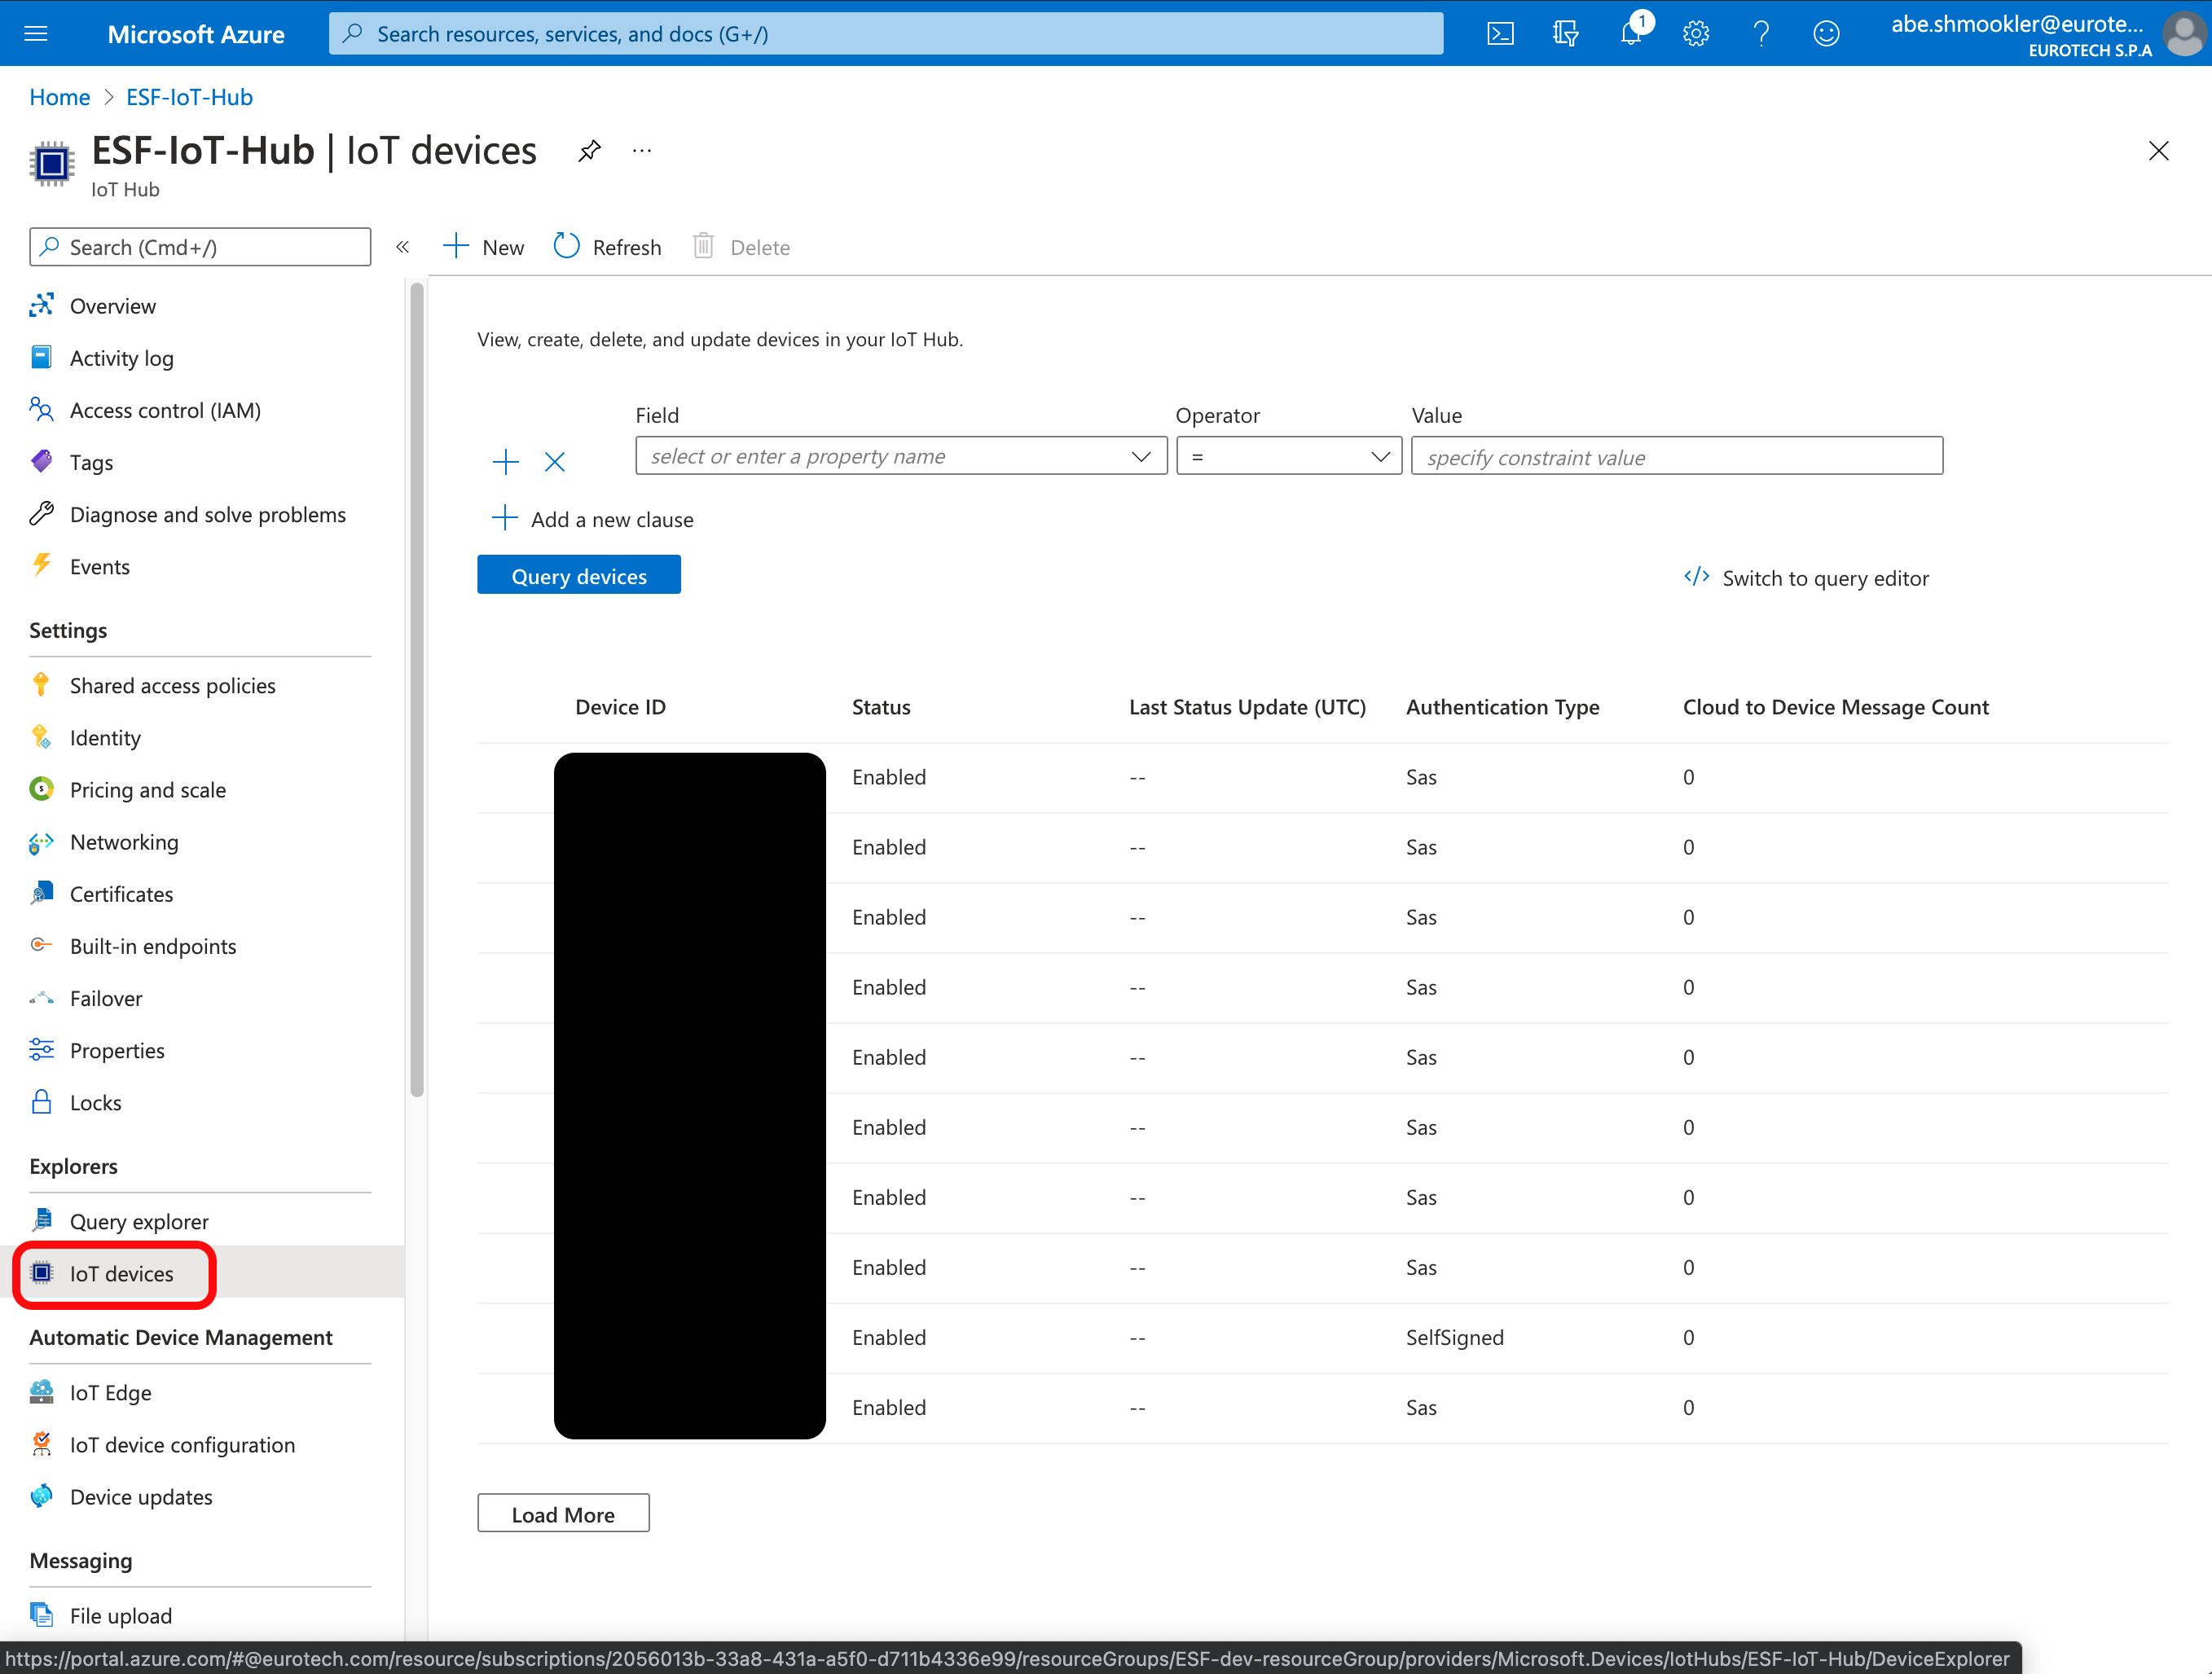
When the gateway connects for the first time, a Device will be created in the IoT Hub. Navigate to your IoT Hub in the Azure Portal. Go to the IoT Devices page and confirm the device is listed. The gateway will be listed under the Device ID you entered earlier.
The device is now connected.
Configure connection using IoT Hub DPS Enrollment Group
Open the Device Certificates section of Creating Additional Types of Certificates for Azure IoT in a new window and follow the instructions to create device certificates to use on the gateway. Continue with these instructions once you have created the device certificates.
Navigate to the Overview page of the Azure DPS. Copy/paste the Global device endpoint and ID Scope into the Global Endpoint and Scope ID in ESF.
Run the following command to get the certificate.
cat device.crtNote: This command uses a different filename than the screenshot below, but the output should be the same.
The output of that command will start with "-----BEGIN CERTIFICATE-----", then have a large block of random looking text, and end with "-----END CERTIFICATE-----".
The large block of random looking text is blacked out in this image.
Copy and paste the entire output starting with "-----BEGIN" and ending with "CERTIFICATE-----". Paste this into the Device Certificate textbox in ESF.
Whitespace WarningBe careful not to copy/paste any extra whitespace characters after the last dash. If extra whitespace characters are included the connection will fail.
Run the following command to get the private key.
cat device-private-key.pemNote: This command uses a different filename than the screenshot below, but the output should be the same.
The output of that command will start with "-----BEGIN PRIVATE KEY-----", then have a large block of random looking text, and end with "-----END PRIVATE KEY-----".
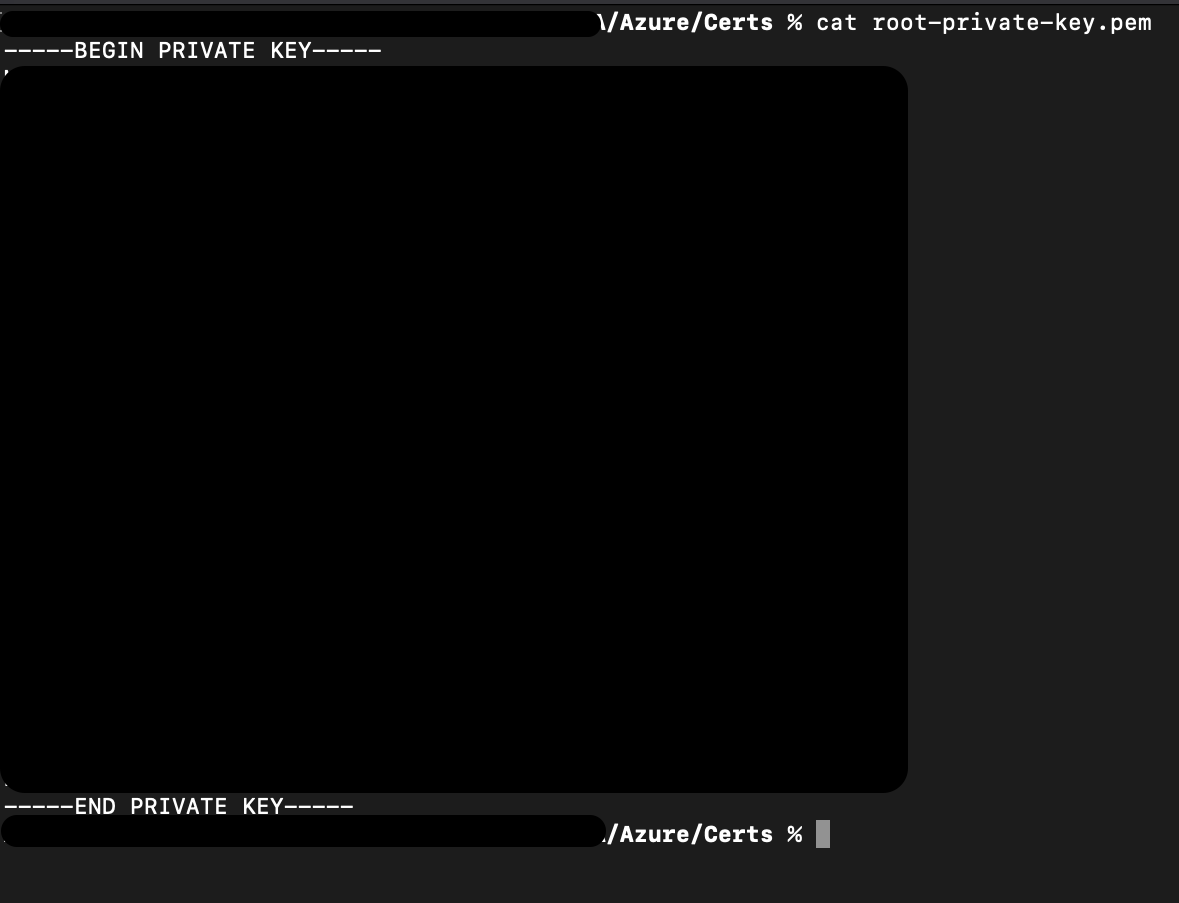
The large block of random looking text is blacked out in this image.
Copy and paste the entire output starting with "-----BEGIN" and ending with "CERTIFICATE-----". Paste this into the Device Private Key textbox in ESF.
Whitespace WarningBe careful not to copy/paste any extra whitespace characters after the last dash. If extra whitespace characters are included the connection will fail.
Click Apply.
Click the Connect/Disconnect button. The Status should change to Connected. The connection process may take up to two minutes.
When the AzureDpsX509 is connected, navigate to the Enrollment Group Details page in DPS (via Manage Enrollments/Enrollment Groups and click your Enrollment Group). Select the Registration Records tab.

Click your device to go to the Device Registration page. In the Registration Status section, confirm that the Status is "assigned." If the Status is still "unassigned" try refreshing the page in your browser (not the Azure Portal "refresh" button).
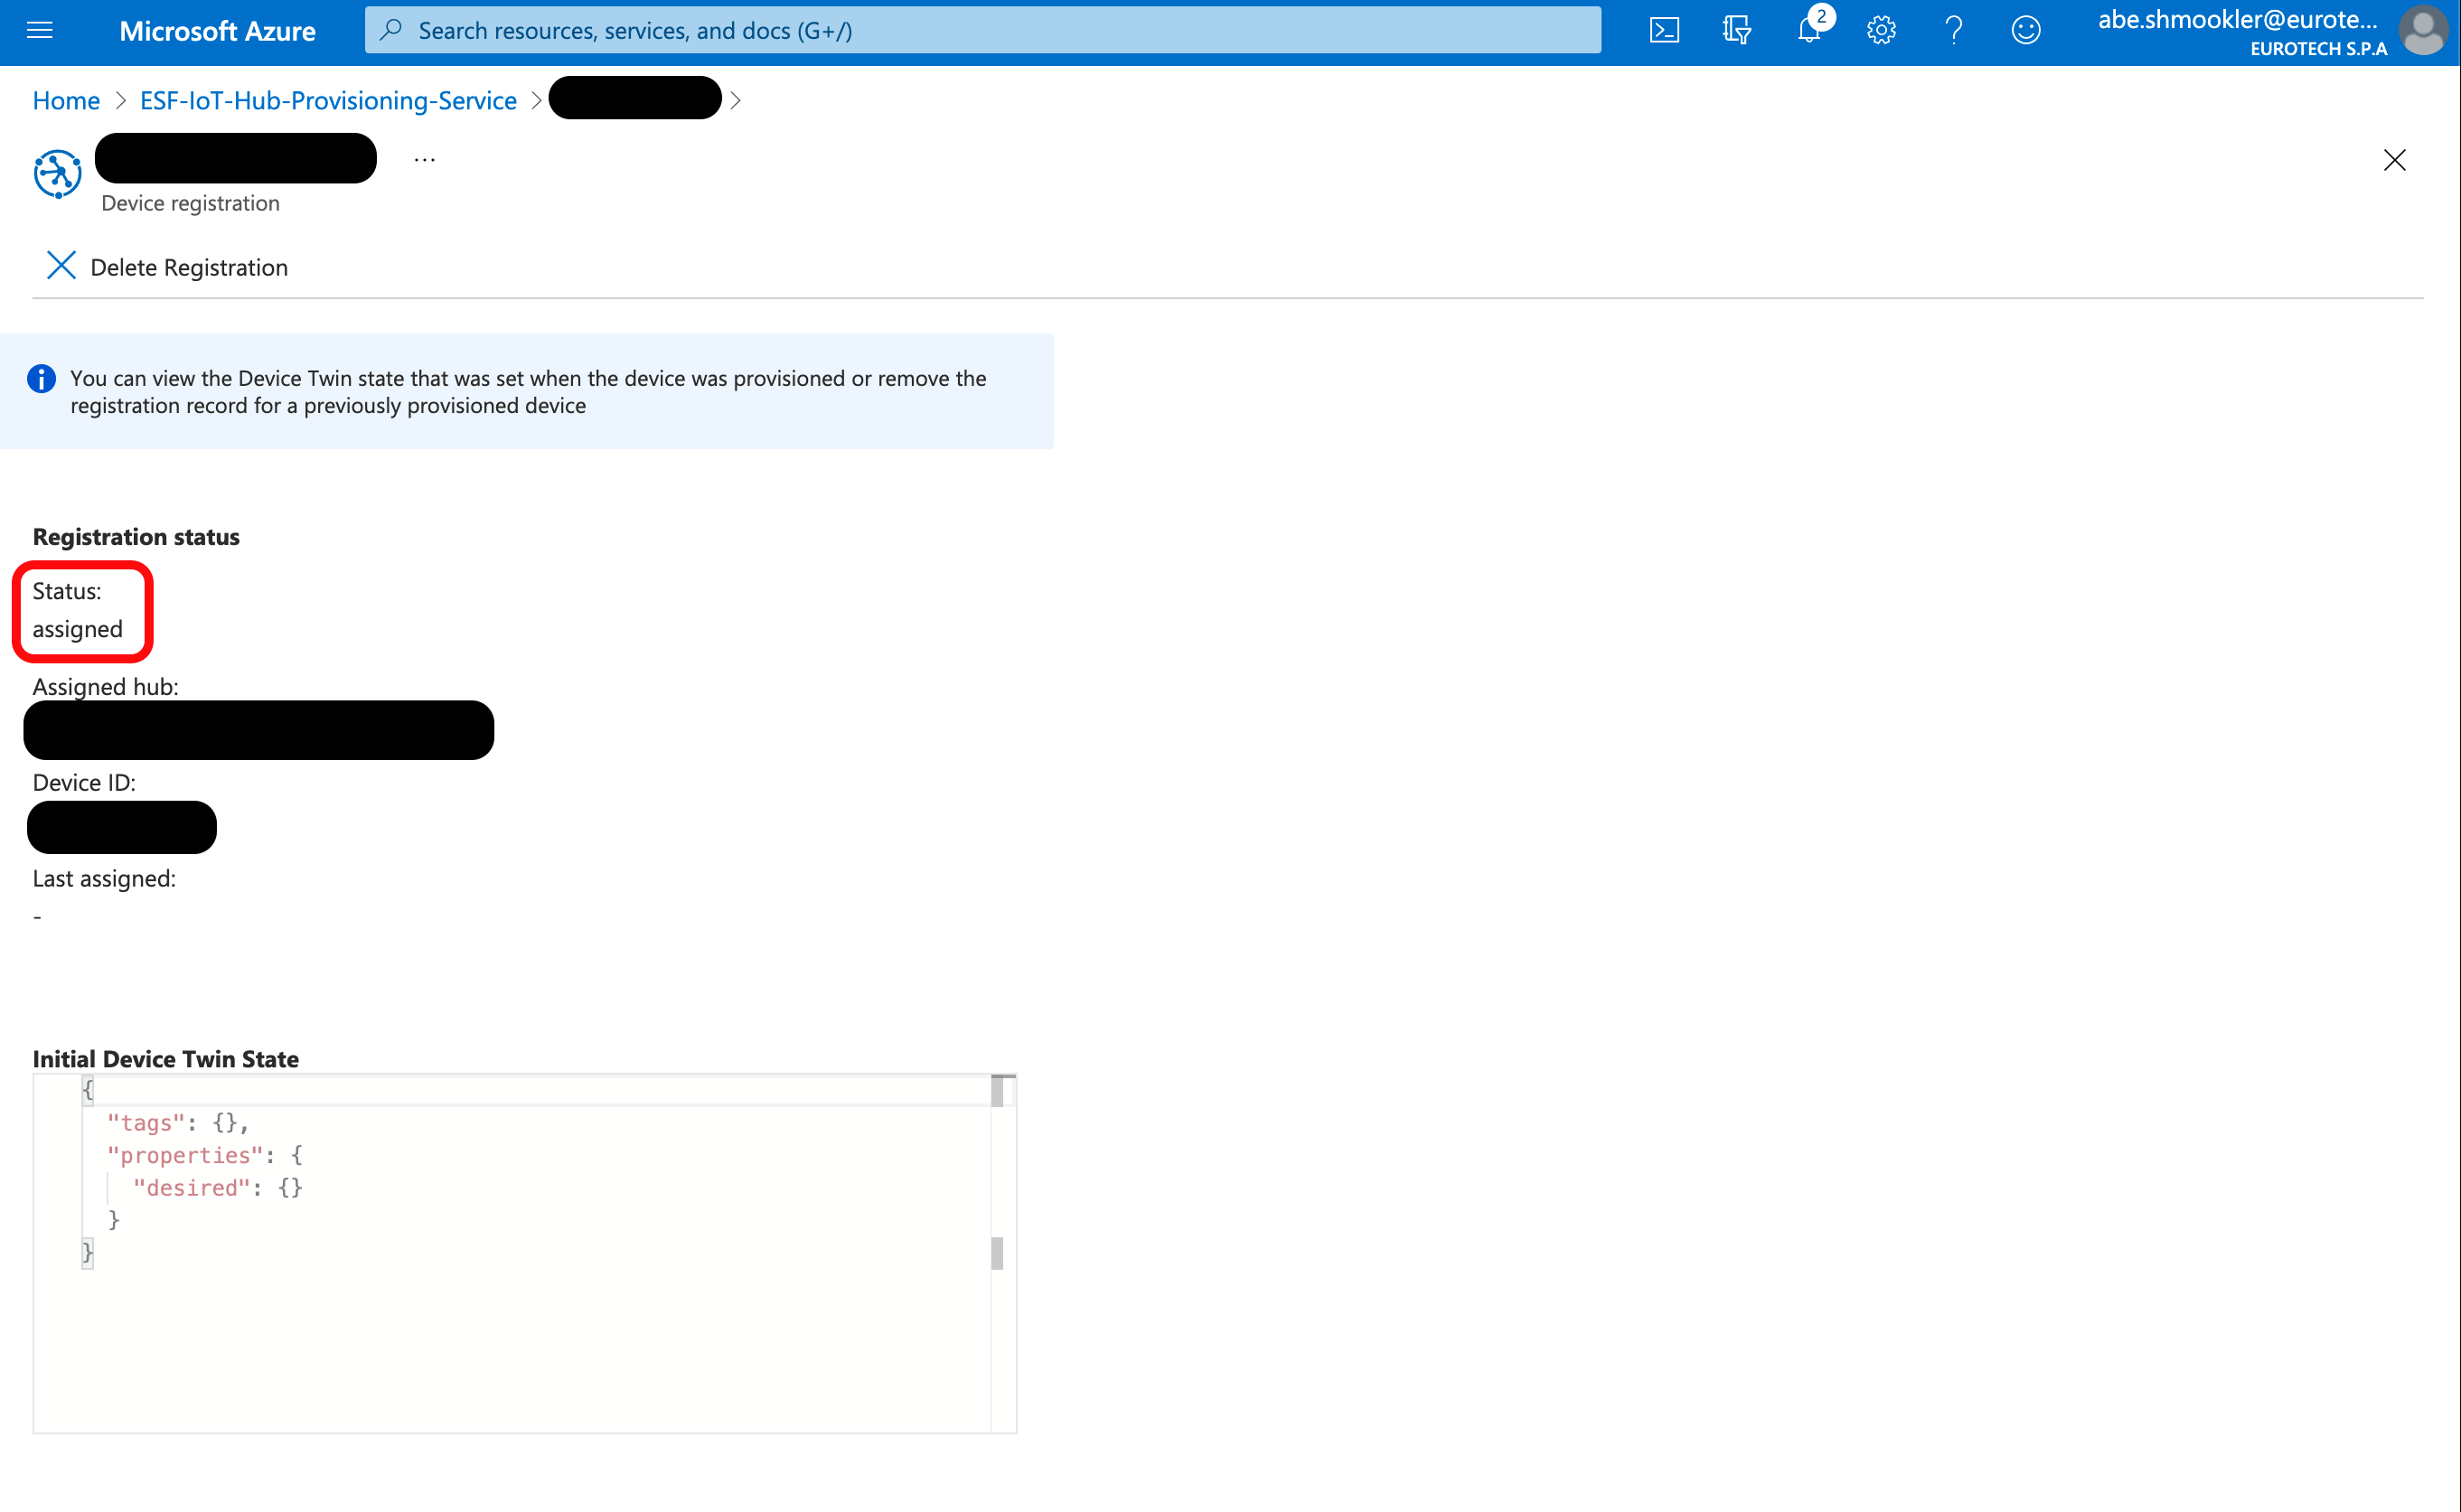
When the gateway connects for the first time, a Device will be created in the IoT Hub. Navigate to your IoT Hub in the Azure Portal. Go to the IoT Devices page and confirm the device is listed.
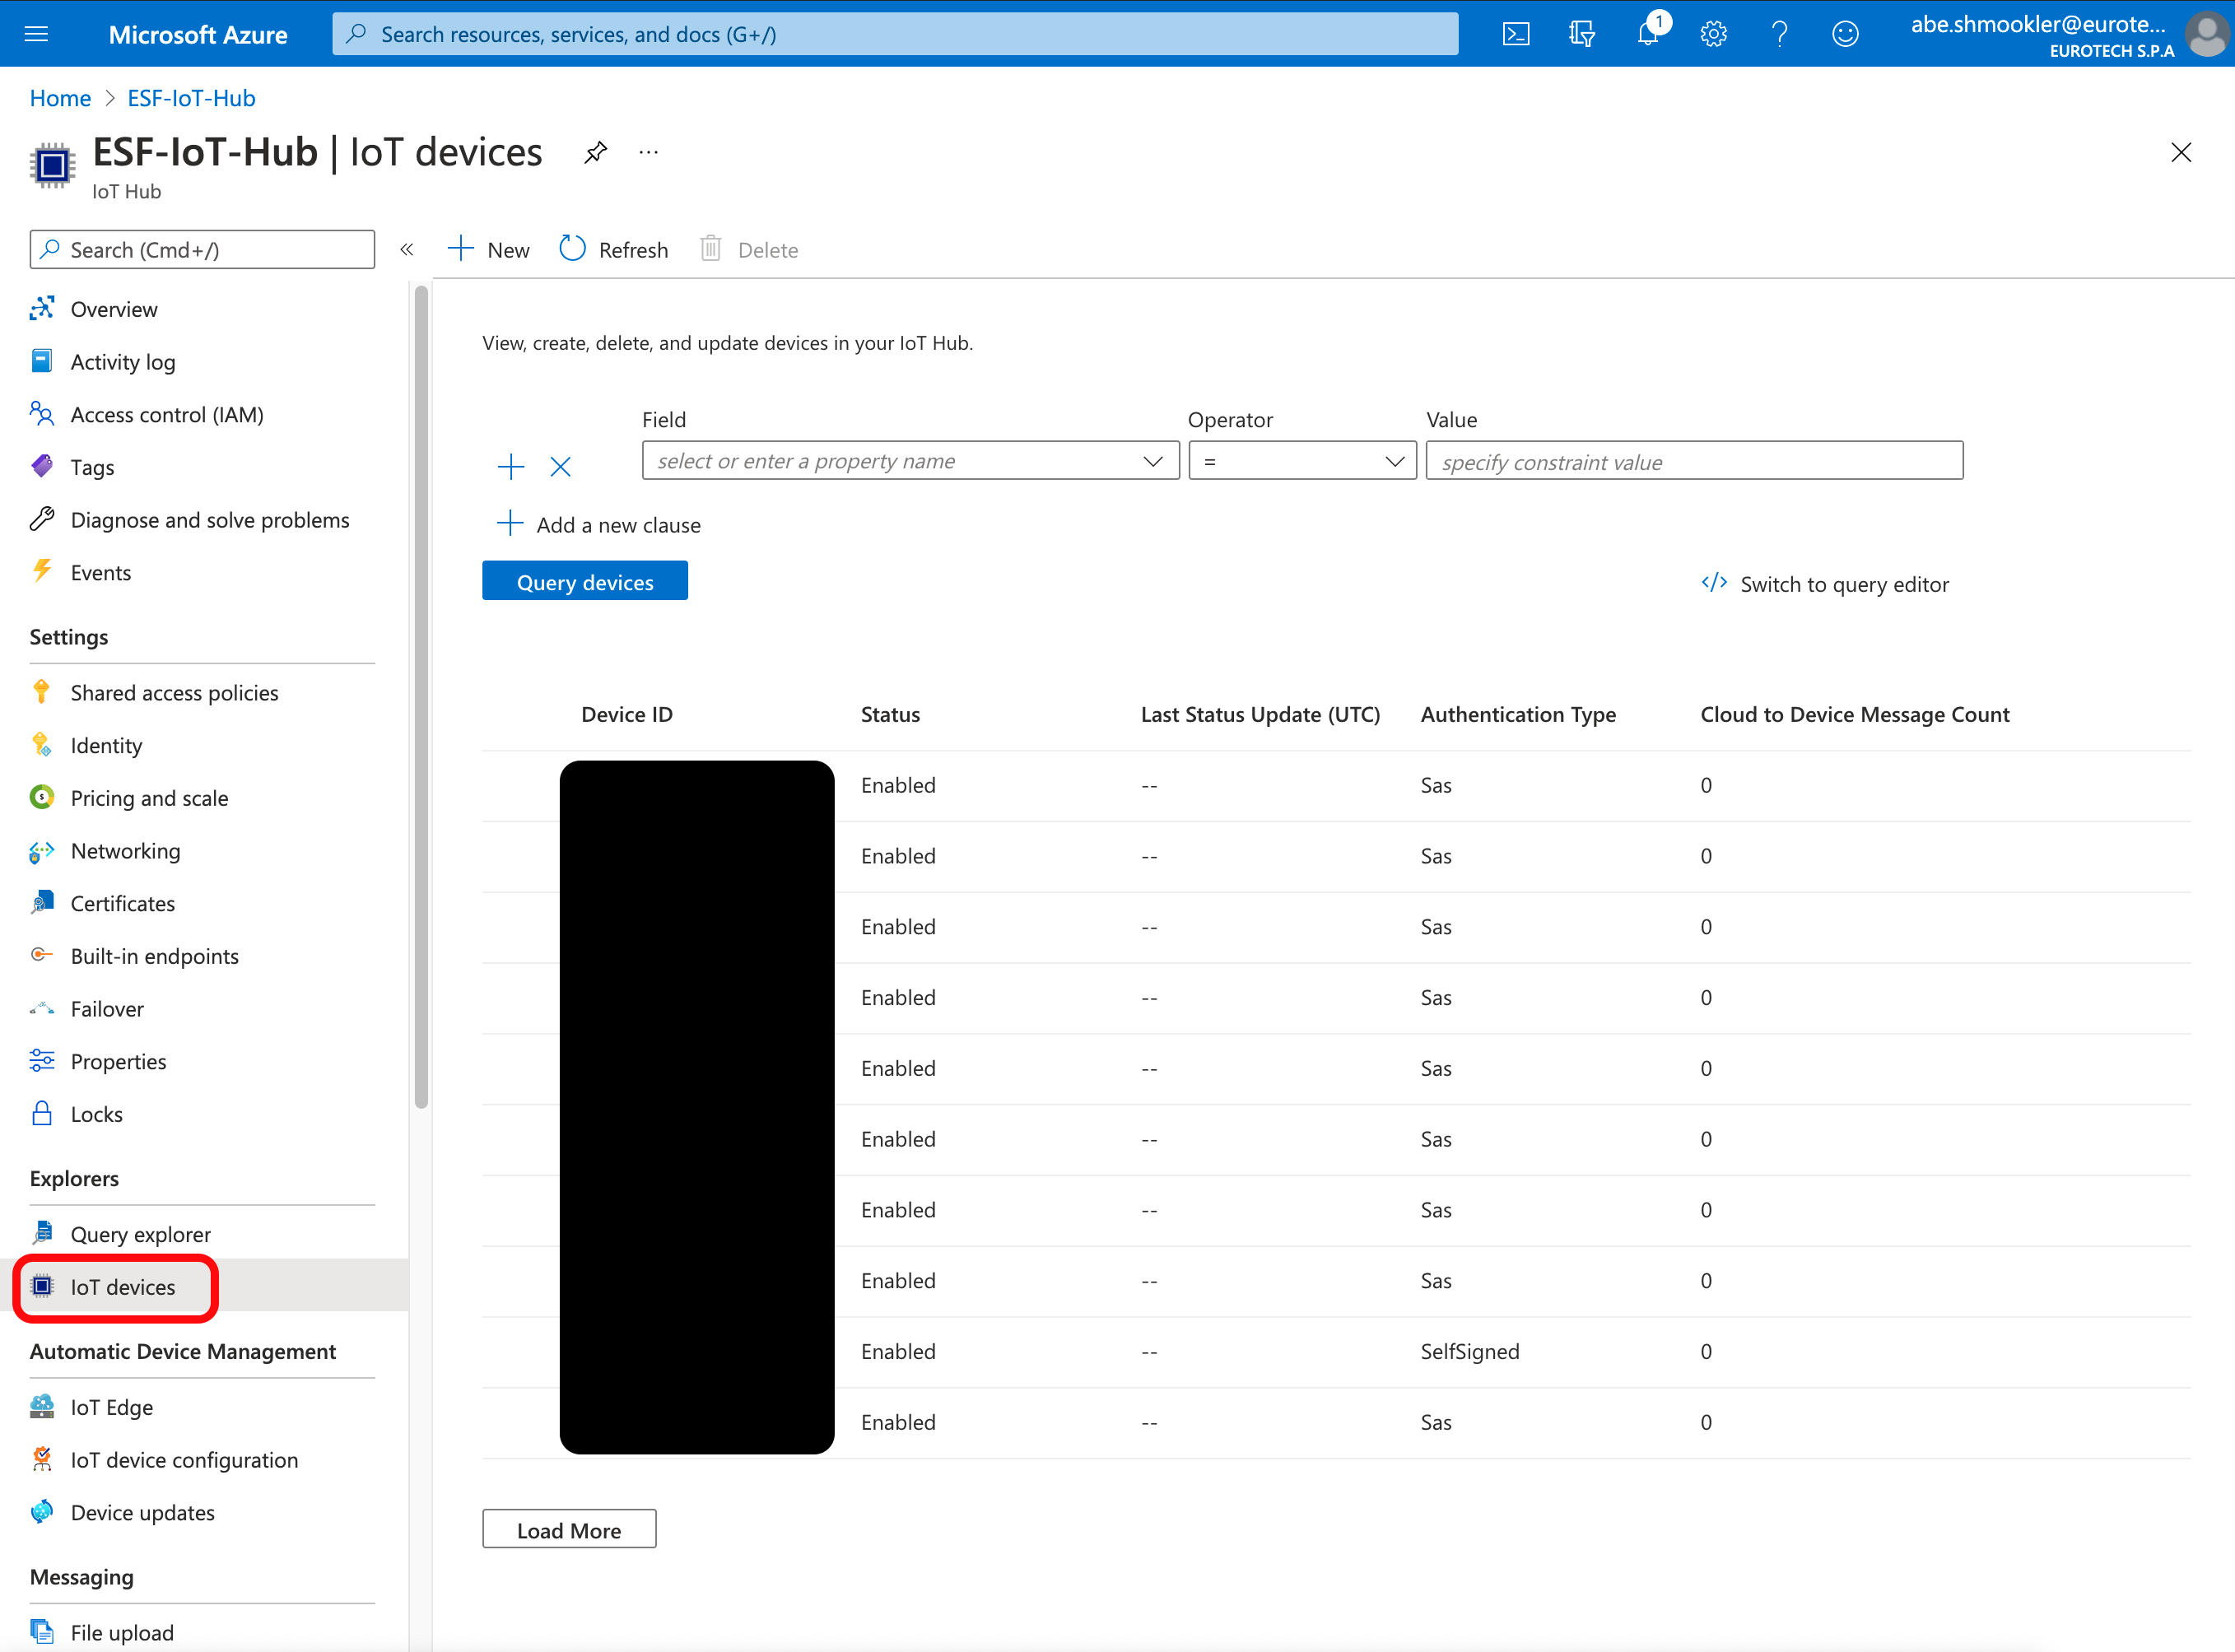
The device is now connected.
Configure connection using IoT Central Individual Enrollment
The Device Connection details page should still be open in your IoT Central Application. If not, open it by navigating to Devices/[Device Name]/Connect. Copy the ID scope into the Scope ID in ESF.
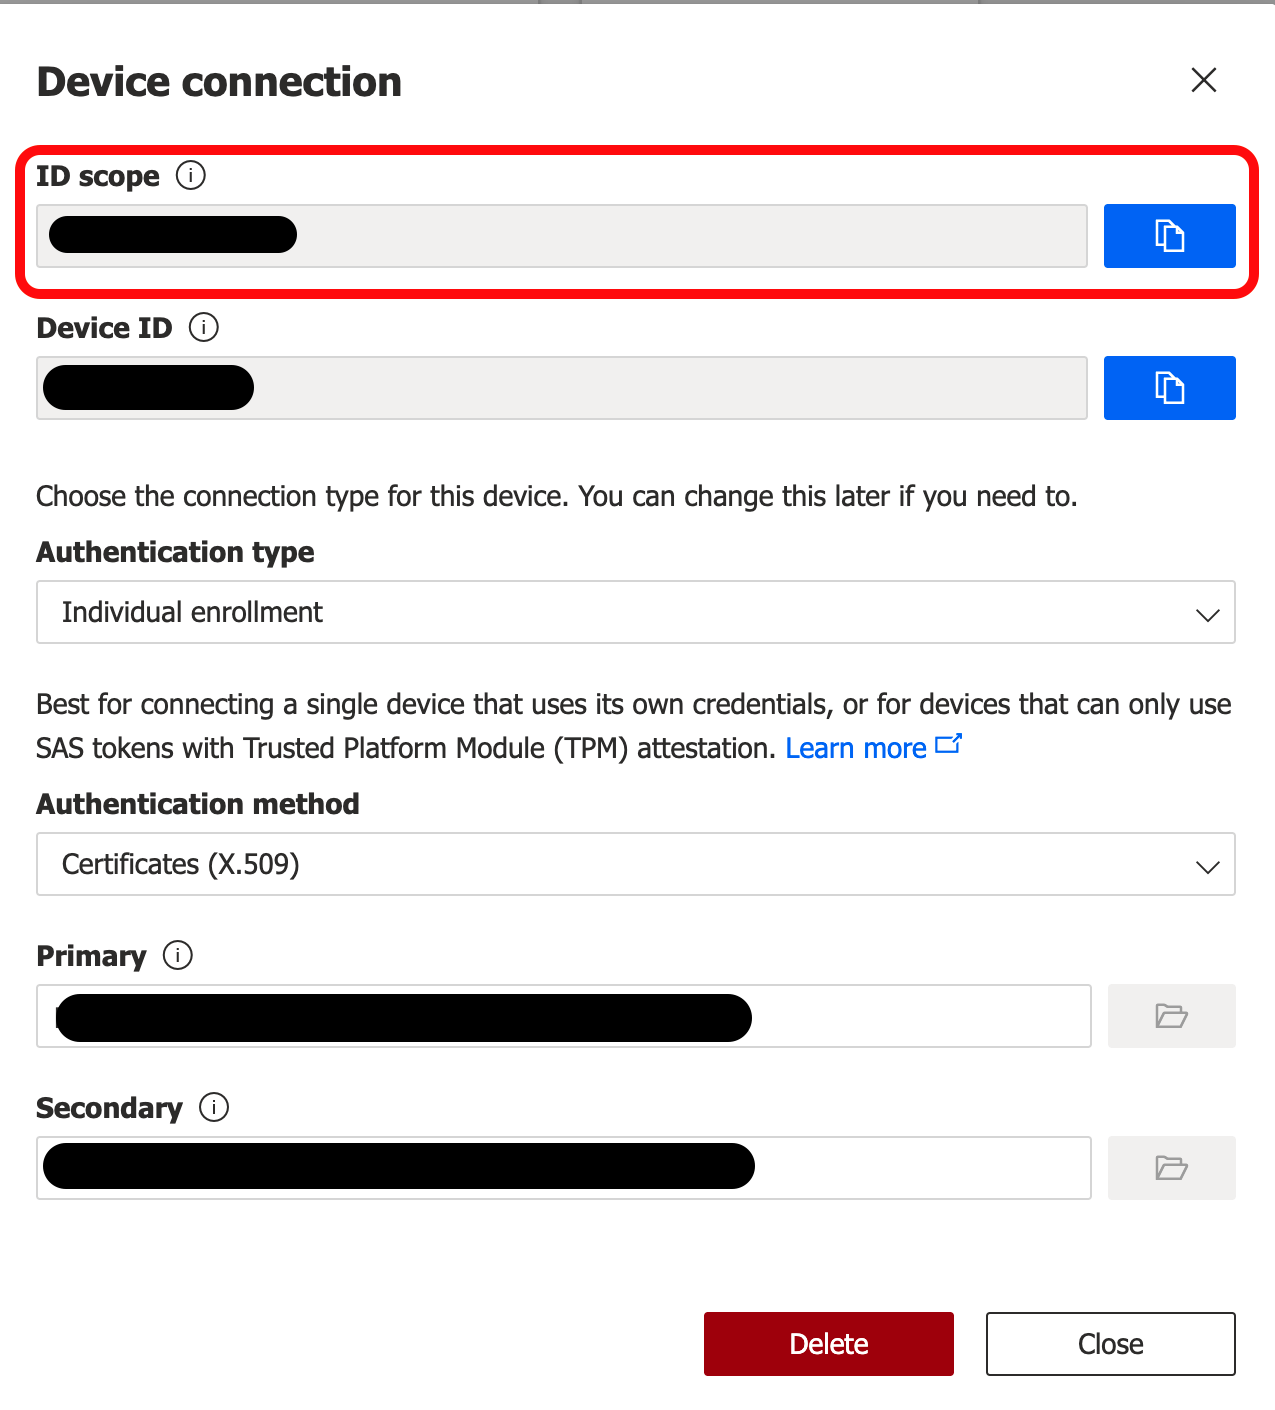
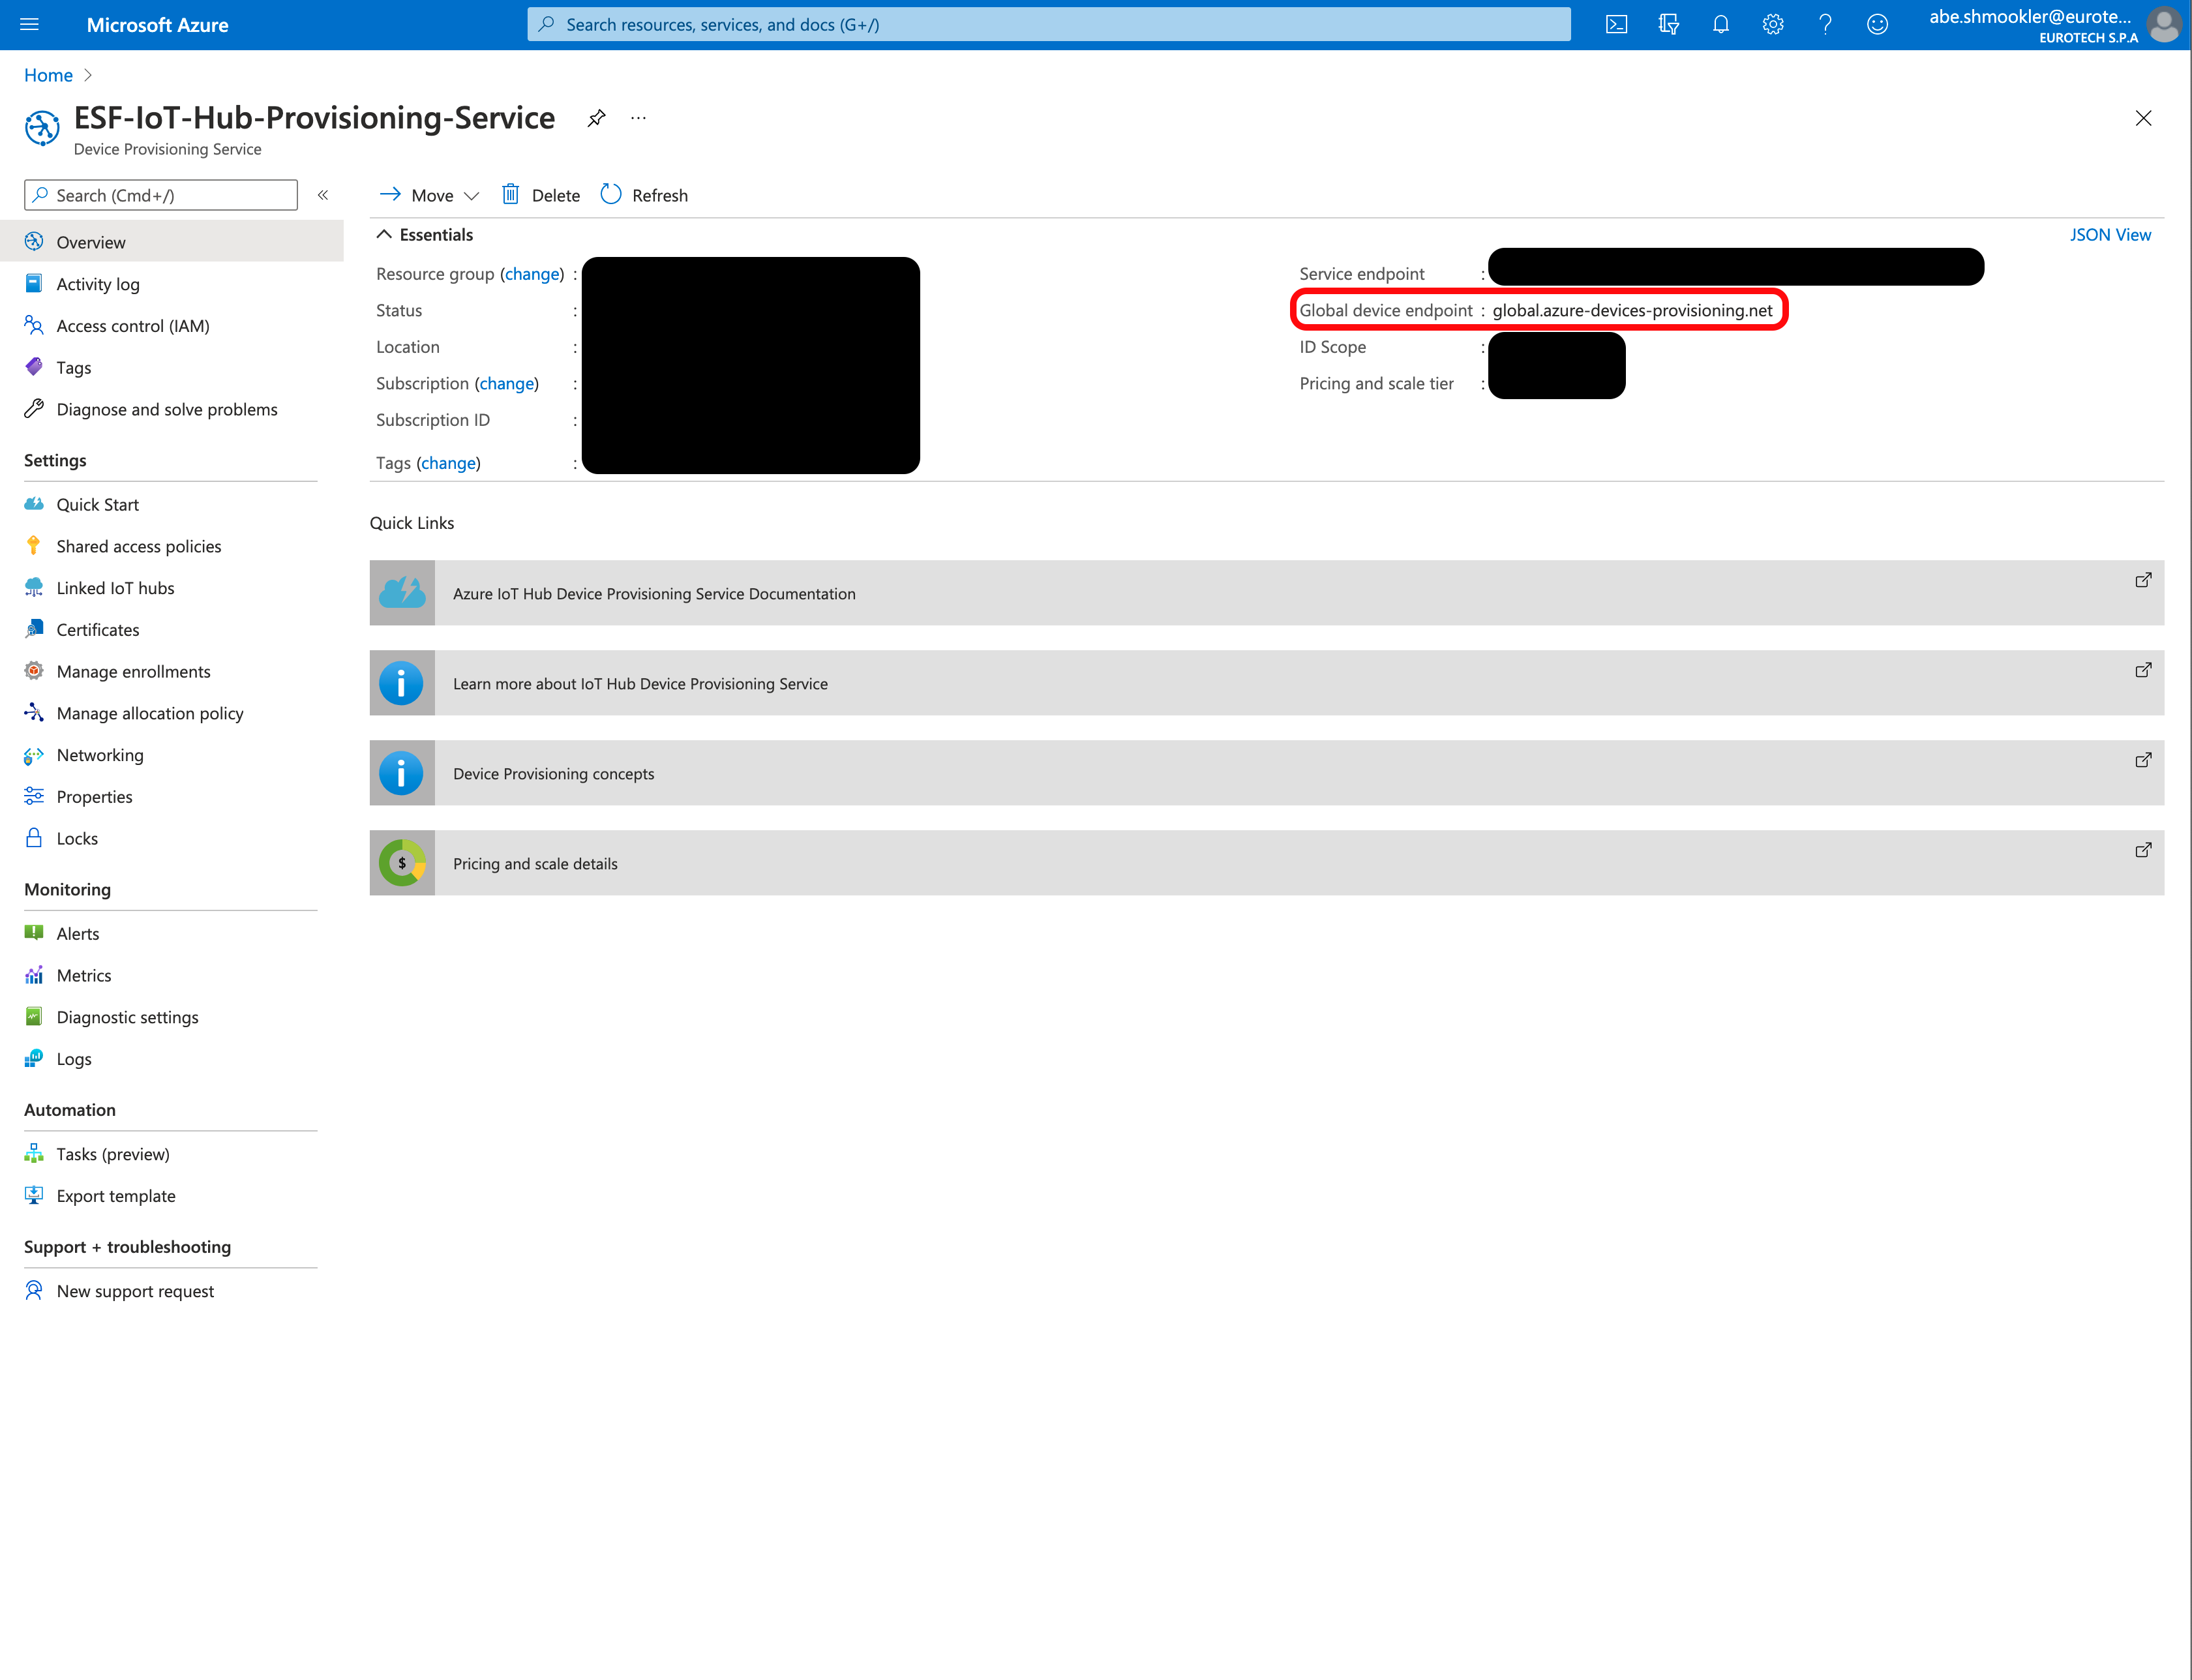
The Global Endpoint can be found in the DPS in the Azure Portal by navigating to the Overview page of your Azure DPS.
Copy/paste the Global device endpoint to the Global Endpoint in ESF.
Run the following command to get the certificate.
cat root-cert.pemThe output of that command will start with "-----BEGIN CERTIFICATE-----", then have a large block of random looking text, and end with "-----END CERTIFICATE-----".
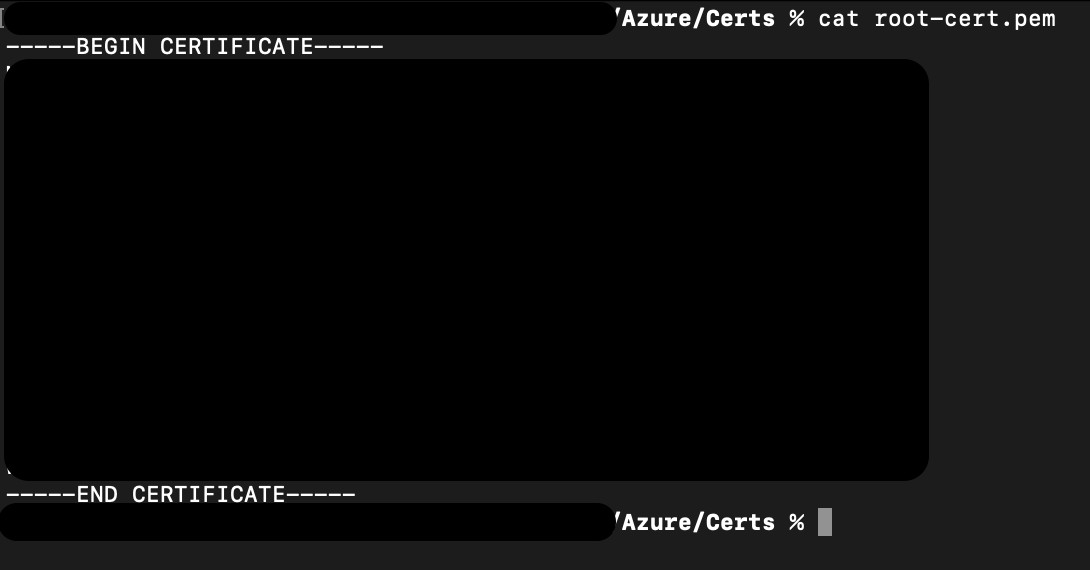
The large block of random looking text is blacked out in this image.
Copy and paste the entire output starting with "-----BEGIN" and ending with "CERTIFICATE-----". Paste this into the Device Certificate textbox in ESF.
Whitespace WarningBe careful not to copy/paste any extra whitespace characters after the last dash. If extra whitespace characters are included the connection will fail.
Run the following command to get the private key.
cat root-private-key.pemThe output of that command will start with "-----BEGIN PRIVATE KEY-----", then have a large block of random looking text, and end with "-----END PRIVATE KEY-----".
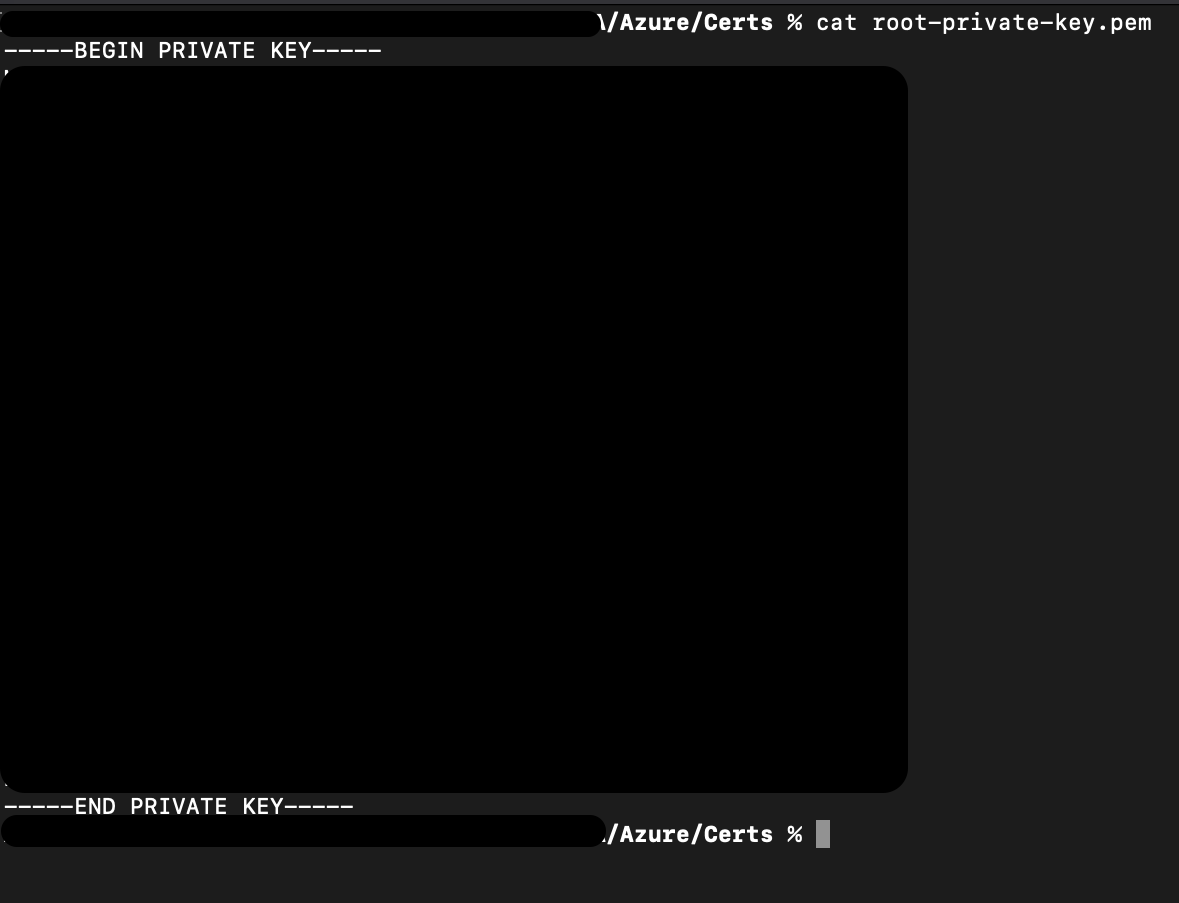
The large block of random looking text is blacked out in this image.
Copy and paste the entire output starting with "-----BEGIN" and ending with "CERTIFICATE-----". Paste this into the Device Private Key textbox in ESF.
Whitespace WarningBe careful not to copy/paste any extra whitespace characters after the last dash. If extra whitespace characters are included the connection will fail.
Click Apply.
Click the Connect/Disconnect button. The Status should change to Connected. The connection process may take up to two minutes.
When the AzureDpsX509 is connected, navigate to the Devices page in your IoT Central Application. Confirm the Device status is Provisioned.

The device is now connected.
Configure connection using IoT Central Enrollment Group
Navigate to the Device connection section of the Administration page in your IoT Central Application. Copy the ID Scope and paste it in the Scope ID in ESF.

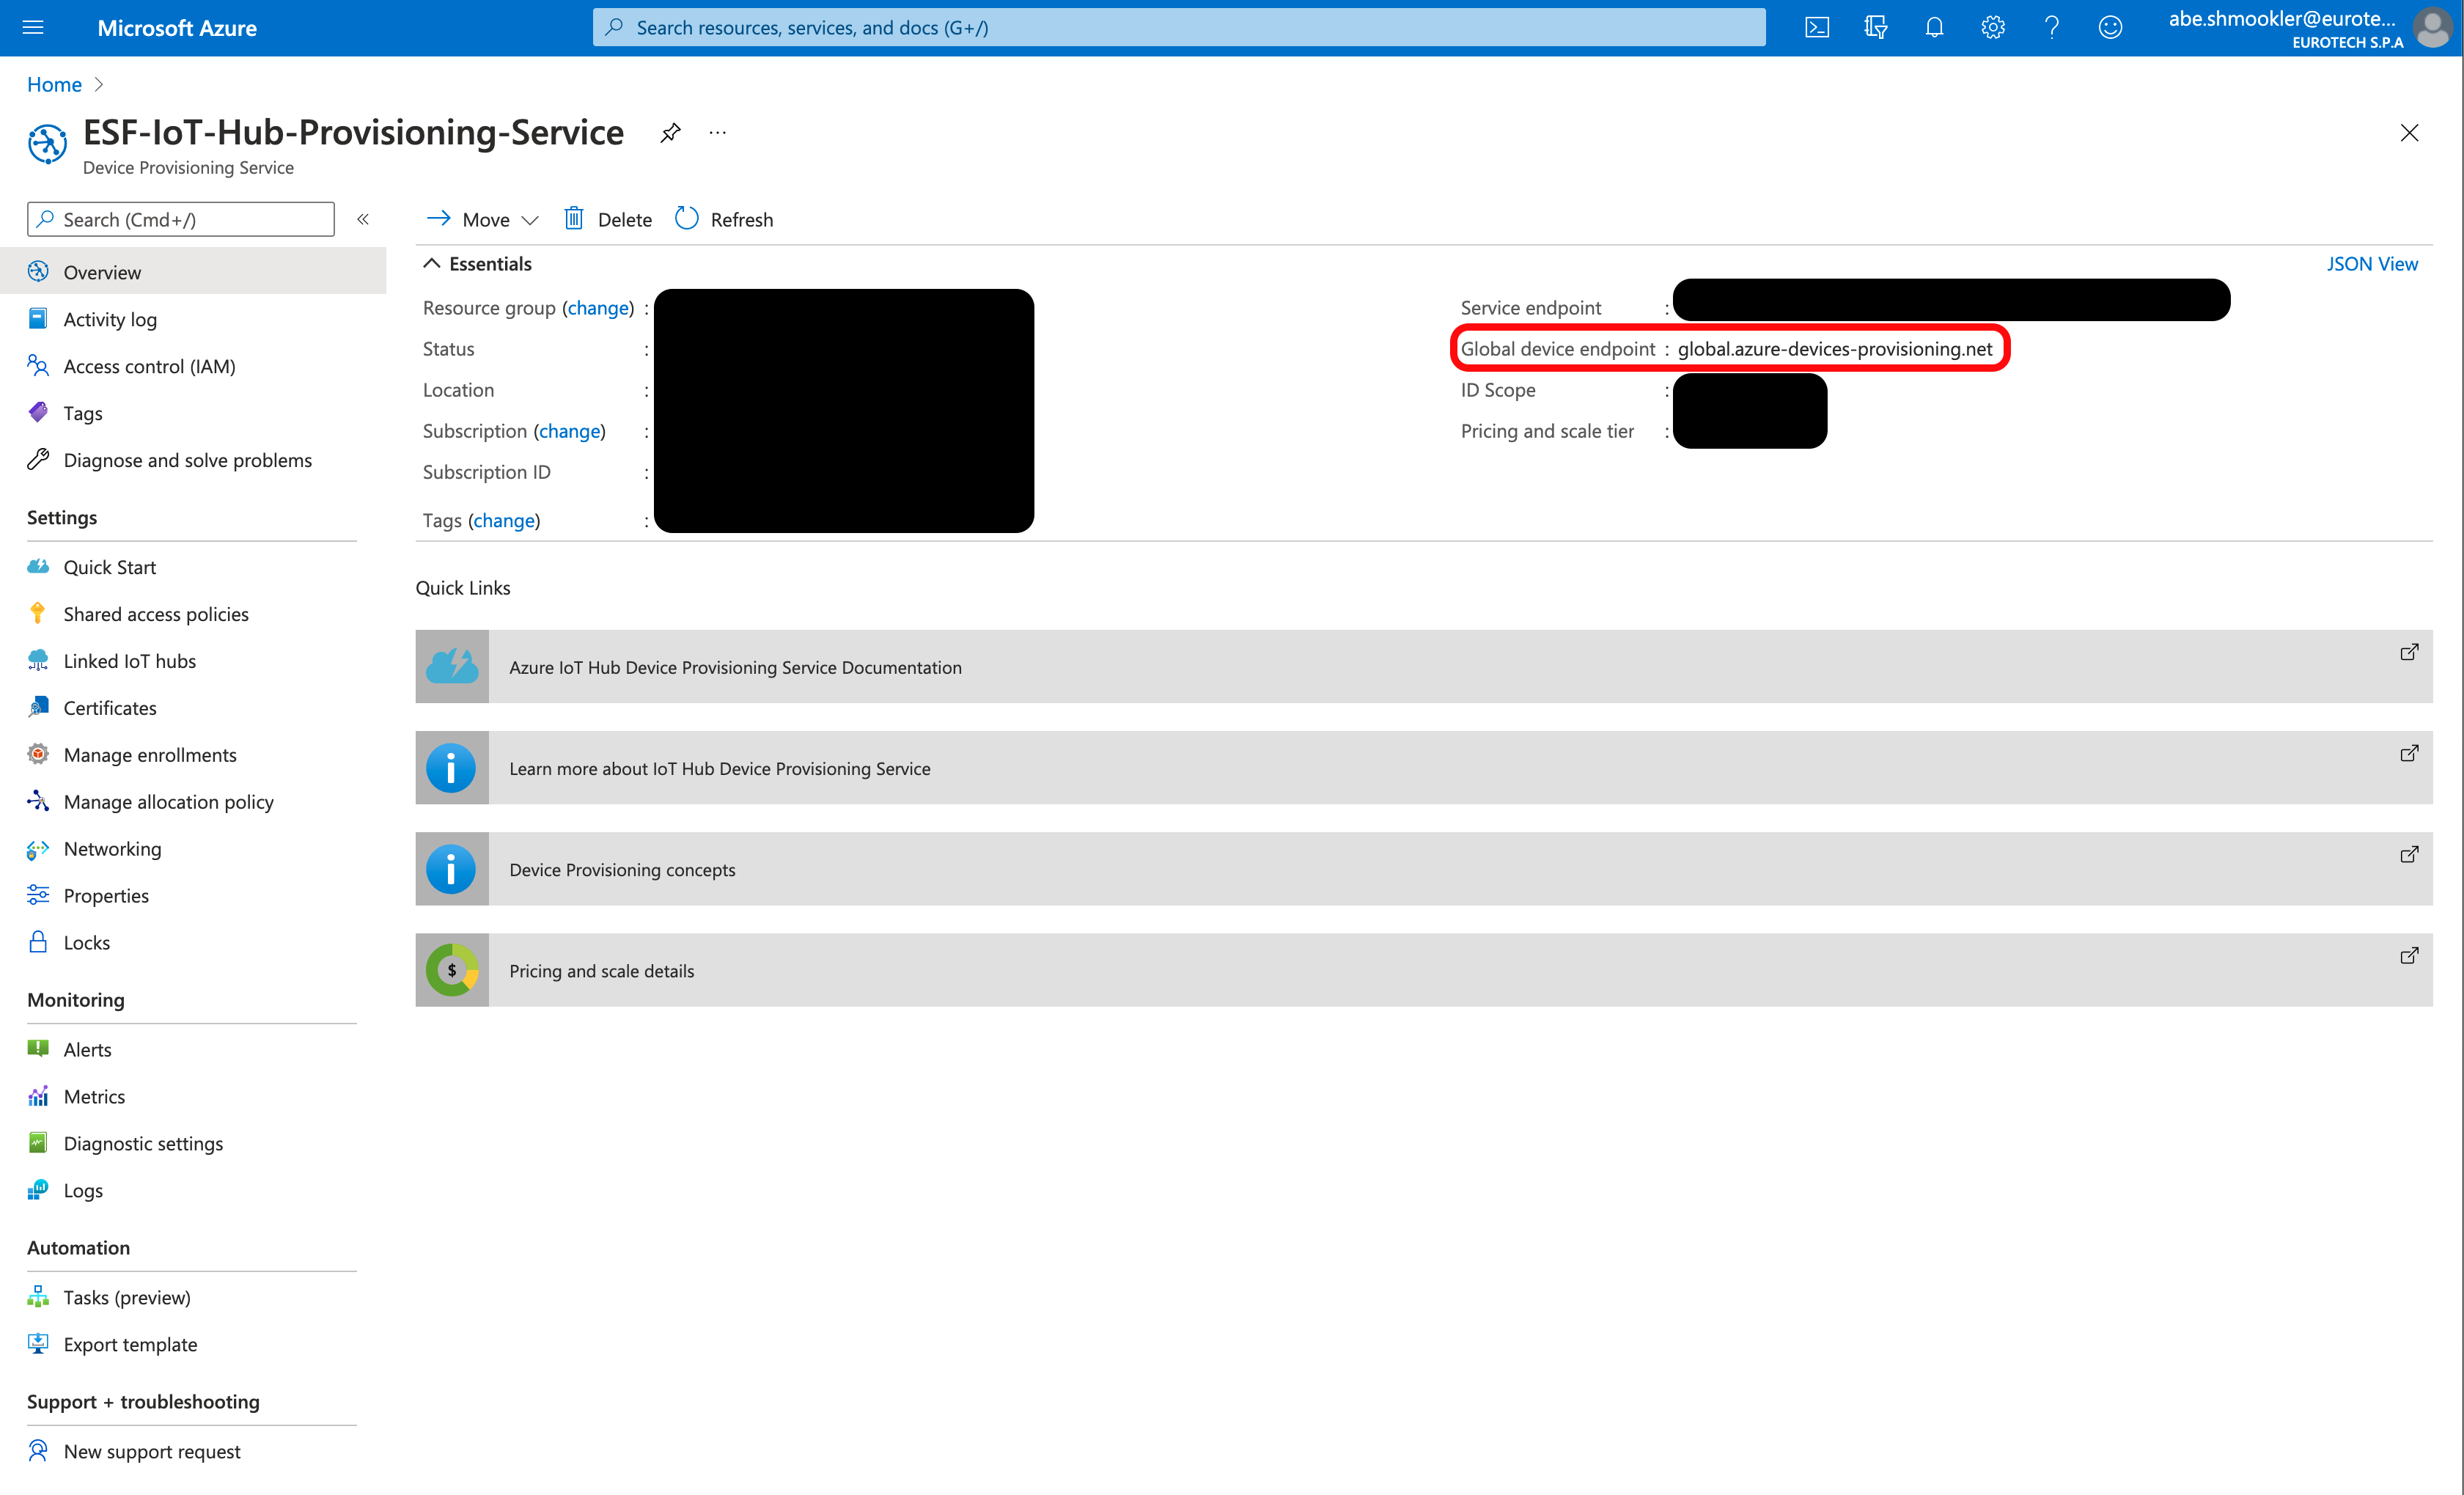
Navigate to the Overview page of the Azure DPS. Copy/paste the Global device endpoint into the Global Endpoint in ESF.
Open the Device Certificates section of Creating Additional Types of Certificates for Azure IoT in a new window and follow the instructions to create device certificates to use on the gateway. Continue with these instructions once you have created the device certificates.
Run the following command to get the certificate.
cat device.crtNote: This command uses a different filename than the screenshot below, but the output should be the same.
The output of that command will start with "-----BEGIN CERTIFICATE-----", then have a large block of random looking text, and end with "-----END CERTIFICATE-----".
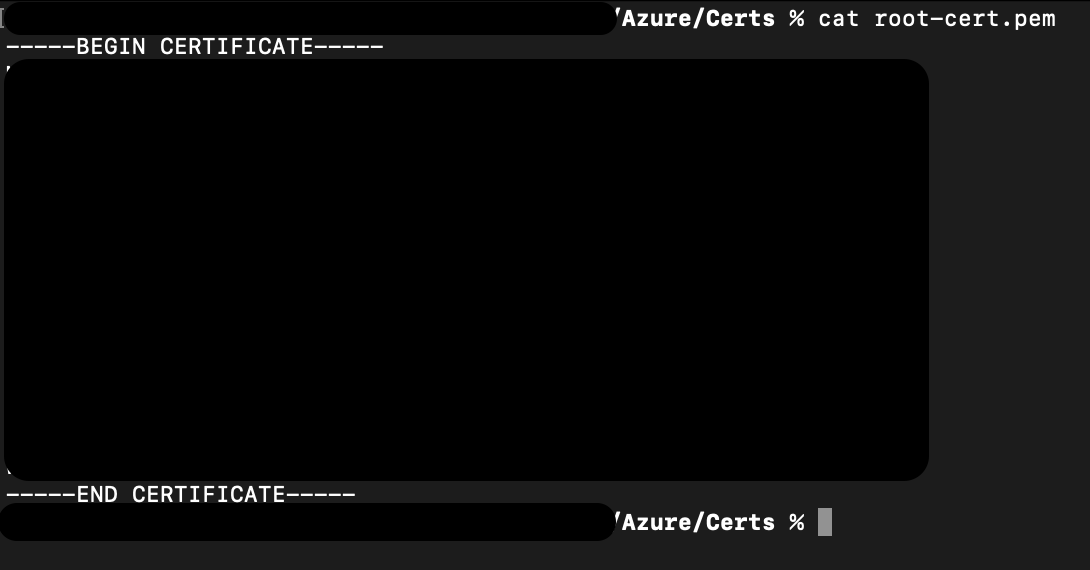
The large block of random looking text is blacked out in this image.
Copy and paste the entire output starting with "-----BEGIN" and ending with "CERTIFICATE-----". Paste this into the Device Certificate textbox in ESF.
Whitespace WarningBe careful not to copy/paste any extra whitespace characters after the last dash. If extra whitespace characters are included the connection will fail.
Run the following command to get the private key.
cat device-private-key.pemNote: This command uses a different filename than the screenshot below, but the output should be the same.
The output of that command will start with "-----BEGIN PRIVATE KEY-----", then have a large block of random looking text, and end with "-----END PRIVATE KEY-----".
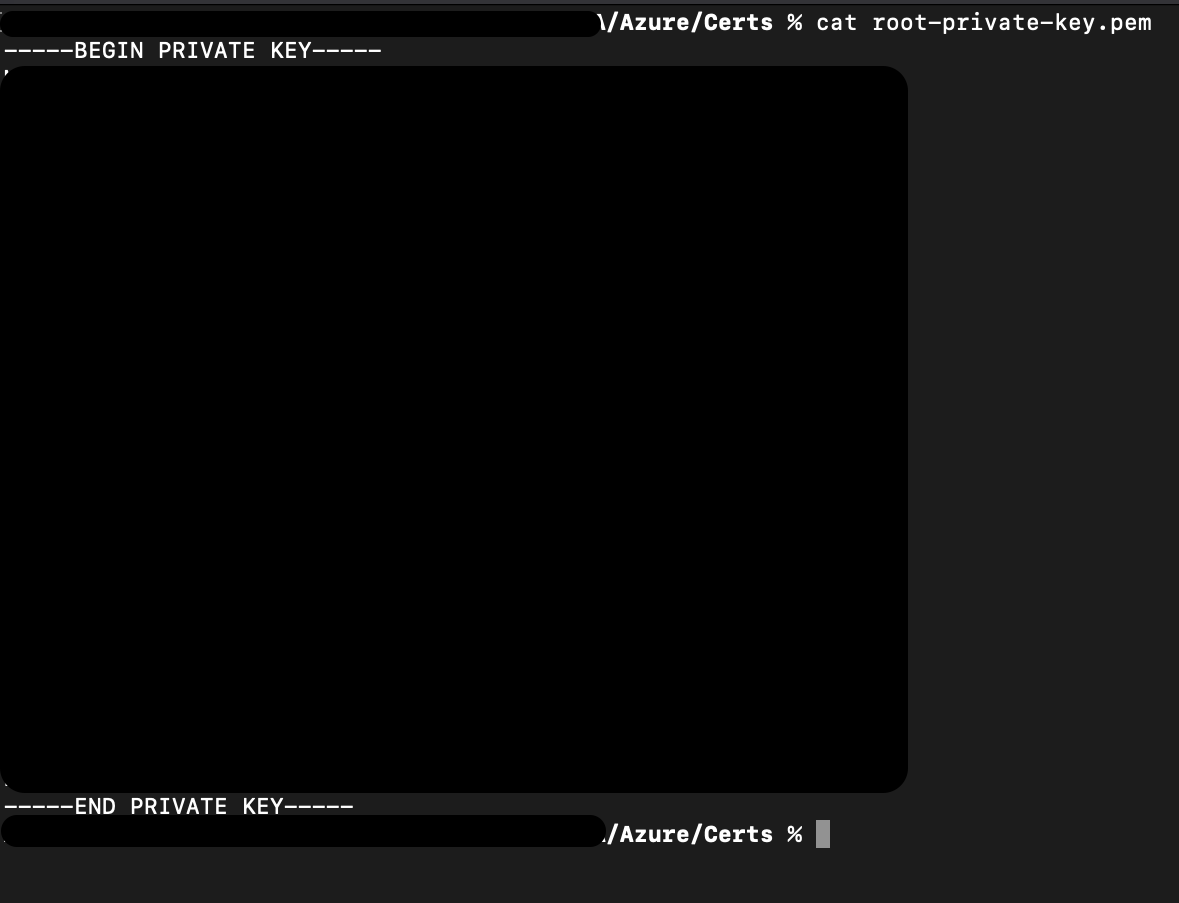
The large block of random looking text is blacked out in this image.
Copy and paste the entire output starting with "-----BEGIN" and ending with "CERTIFICATE-----". Paste this into the Device Private Key textbox in ESF.
Whitespace WarningBe careful not to copy/paste any extra whitespace characters after the last dash. If extra whitespace characters are included the connection will fail.
Click Apply.
Click the Connect/Disconnect button. The Status should change to Connected. The connection process may take up to two minutes.
When the AzureDpsX509 is connected, navigate to the Devices page in your IoT Central Application. Confirm the device is listed, and that Device status is Provisioned. If the device does not show up, refresh the page in your browser.

The device is now connected.
Updated 3 months ago
