Security Features
The ESF security enhancements improve upon the security features in ESF 3.1.x with increased levels of security and flexibility to benefit the needs of the developer.
For this reason, the applied security policy is no longer hardcoded in ESF; instead, it is externalized in the security.policy XML file. This file contains the execution modality in which ESF has to run and the different applied policies.
The security policy of ESF supports two execution modalities:
-
development mode - enables some development specific features that simplify the development process and provide remote debugging.
-
production mode - performs additional security checks; remote debugging and profiling are not allowed.
Warning!Eurotech recommends using development mode only in the early stages of software development and moving to production mode for actual deployable solutions.
The execution modality may be determined through the ESF Gateway Administration Console. In development mode, the lower part of the console displays a warning message as shown in the screen capture below.

In production mode, no warning messages are displayed.

Security Policy File
Definition
By default, the security policy file is located in this path: /opt/eurotech/esf/kura/security.policy.
The following XML file shows the default security policy of a newly installed copy of ESF:
<?xml version="1.0" encoding="UTF-8"?>
<esf:security xmlns:esf="http://eurotech.com/esf/2.0" version="1">
  <esf:properties>
    <esf:property>
      <esf:name>permit-debug</esf:name>
      <esf:value>true</esf:value>
    </esf:property>
  </esf:properties>
  <esf:policies>
    <esf:policy>
      <esf:access>ALLOW</esf:access>
      <esf:permissions>
        <esf:permission>
          <esf:name>java.security.AllPermission</esf:name>
          <esf:values>
            <esf:value>
              *
            </esf:value>
            <esf:value>
              *
            </esf:value>
          </esf:values>
        </esf:permission>
      </esf:permissions>
      <esf:name>
        All permissions to everyone
      </esf:name>
    </esf:policy>
  </esf:policies>
</esf:security>
Various fields used to create a security policy are described in the sections that follow.
Properties Element
The properties element represents the node element where one or more property elements can be appended.
The property element is composed of a name and value element. The supported property element is shown below.
<esf:property>
  <esf:name>permit-debug</esf:name>
  <esf:value>true</esf:value>
</esf:property>
This property node contains a name string with a permit-debug value and a value element that can be one of the following:
-
true - specifies that ESF should be started in development mode
-
false - specifies that ESF should be started in production mode with all the security checks enabled
Policies Element
To be compliant with the ESF security policy definition, the policies element must contain one or more policy elements, as shown below.
<esf:policy>
  <esf:access>ALLOW</esf:access>
  <esf:permissions>
    <esf:permission>
      <esf:name>java.security.AllPermission</esf:name>
      <esf:values>
        <esf:value>
          *
        </esf:value>
        <esf:value>
          *
        </esf:value>
      </esf:values>
    </esf:permission>
  </esf:permissions>
  <esf:name>
    All permissions to everyone
  </esf:name>
</esf:policy>
Each policy element has to contain the following child elements:
- access - required node
- conditions - not mandatory node
- permissions - required node
- name - required node
Access Element
The access child element defines the access rule as ALLOW or DENY.
- ALLOW - corresponds to the normal case of saying what is allowed
- DENY - to say what isn’t allowed
Conditions Element
The conditions is a node that specifies the bounds of the rule: the security policy will be applied only to the bundles that match the contained condition. Each conditions node contains one or more condition elements that specify the effective condition.
The condition element contains two children elements:
- name - specifies the name of the standard condition to be used. The OSGi standard specifies two conditions: BundleSignerCondition and BundleLocationCondition.
- value - specifies the effective condition that has to be applied.
The BundleSignerCondition is satisfied when the related bundle is signed with a certificate that matches what in the value element.
The BundleLocationCondition matches the argument in the value element against the location of the bundle. Bundle location matching provides many of the advantages of signing without the overhead. However, using locations as the authenticator requires secure locations that cannot be spoofed.
An example of condition:
<esf:conditions>
	<esf:condition>
  	<esf:name>
    	BundleSignerCondition
    </esf:name>
    <esf:value>
    	"CN=Common Name, OU=Organization Unit, O=Organization, L=Ottawa, ST=Ontario, C=Country; CN=CA common name, OU=CA Organization Unit, O=CA Organization, C=US;-"
    </esf:value>
	</esf:condition>
</esf:conditions>
The value element is composed by two arguments: the first is a string that represents a matching Distinguished Name (DN). The second argument is optional, if used, it must be an exclamation mark (’!’). The exclamation mark indicates that the result for this condition must be reversed.
The DN value is used to match the one used to sign the bundles and can contain the description of the complete chain of certificates used to sign the bundle. Each certificate of the chain is separated from the others using a semicolon. The usage of wildcards is supported.
Order of certificates in the value element is important: reversing it indicates the opposite signing relationship.
Two wildcards are supported:
- the star (*)
- the hyphen (-)
The start wildcard can be used as part of the right-hand argument of an attribute, such as:
CN=*,O=Organization,C=ITThis matches all the certificates that have every common name (CN) and the correspondent Organization and Country value.
When used alone, the star wildcard matches at most one certificate. For example:
*;CN=Common Name,O=Organization,C=ITThe hyphen wildcard matches zero or more certificates.
Permissions Element
The permissions element contains one or more permission rules that are explicitly defined in the value element contained. The permission element can contain a java permission or an OSGi-related permission. This value must be provided without starting and ending parenthesis in a format that is similar to the default Java policy syntax.
Each permission requires a permission name (e.g., java.security.AllPermission) and one values node to be supplied. The values node may contain one or more value elements depending on the permission definition. Typically, the first value is named Target Name and specifies what the permission will allow or deny.
Another parameter may specify the operation (i.e., read, write, etc.) that will be permitted or denied by the rule.
Java supports several security checks that the developer can specify. Following, a list of them:
- java.security.AllPermission
- java.security.SecurityPermission
- java.security.UnresolvedPermission
- java.awt.AWTPermission
- java.io.FilePermission
- java.io.SerializablePermission
- java.lang.reflect.ReflectPermission
- java.lang.RuntimePermission
- java.net.NetPermission
- java.net.SocketPermission
- java.sql.SQLPermission
- java.util.PropertyPermission
- java.util.logging.LoggingPermission
- javax.net.ssl.SSLPermission
- javax.security.auth.AuthPermission
- javax.security.auth.PrivateCredentialPermission
- javax.security.auth.kerberos.DelegationPermission
- javax.security.auth.kerberos.ServicePermission
- javax.sound.sampled.AudioPermission
More details about the Java security permissions are available here.
The OSGi specification defines a few custom permissions, that can be grouped by the layers of the OSGi framework.
Layer | Permission(s) |
|---|---|
Module |
|
Lifecycle |
|
Services |
|
All the OSGi-specific permissions follow the same pattern of name and actions used by Java. For further details on the OSGi permissions, please refer to the official OSGi documentation.
Policy Generation
Prevent External Malicious AttacksCustom security policies should be created in order to prevent external malicious attacks from unsigned bundles that can be installed on field devices. The policy should be as strict as possible in order to reduce the effects of malicious bundles on targeted system(s).
This Eurotech security policy example may be downloaded and used as a starting-point for the creation of custom policies:
Eurotech recommends creating security policies that only allow the execution of signed bundles.
Policy Change
The security policy file currently used by ESF is available at /opt/eurotech/esf/kura/security.policy
To change the current security policy the steps to do are (with ESF running):
- overwrite the current policy file at /opt/eurotech/esf/kura/security.policy with the new security policy file;
- using the ESF Gateway Administration Console, the policy file fingerprint must be reloaded (more info below). This feature is available by selecting the Settings option in the Systems area of the console and selecting the Security Options tab, and then clicking on the Reload fingerprint button provided in the Security Policy area;
- stop and restart ESF.
A backup copy of the default security policy is available at /opt/eurotech/esf/security/policy_backup/
Consistency Check
During boot initialization, ESF validates the security policy file. In order to be accepted, the file must be compliant with the following XML Schema:
<?xml version="1.0" encoding="UTF-8"?>
<xs:schema attributeFormDefault="unqualified" elementFormDefault="qualified" targetNamespace="http://eurotech.com/esf/2.0" xmlns:xs="http://www.w3.org/2001/XMLSchema">
  <xs:element name="security">
    <xs:complexType>
      <xs:sequence>
        <xs:element name="properties">
          <xs:complexType>
            <xs:sequence>
              <xs:element name="property">
                <xs:complexType>
                  <xs:sequence>
                    <xs:element type="xs:string" name="name"/>
                    <xs:element type="xs:string" name="value"/>
                  </xs:sequence>
                </xs:complexType>
              </xs:element>
            </xs:sequence>
          </xs:complexType>
        </xs:element>
        <xs:element name="policies">
          <xs:complexType>
            <xs:sequence>
              <xs:element name="policy" maxOccurs="unbounded" minOccurs="0">
                <xs:complexType>
                  <xs:sequence>
                    <xs:element type="xs:string" name="access"/>
                    <xs:element name="conditions" minOccurs="0">
                      <xs:complexType>
                        <xs:sequence>
                          <xs:element name="condition">
                            <xs:complexType>
                              <xs:sequence>
                                <xs:element type="xs:string" name="name"/>
                                <xs:element type="xs:string" name="value"/>
                              </xs:sequence>
                            </xs:complexType>
                          </xs:element>
                        </xs:sequence>
                      </xs:complexType>
                    </xs:element>
                    <xs:element name="permissions">
                      <xs:complexType>
                        <xs:sequence>
                          <xs:element name="permission" maxOccurs="unbounded" minOccurs="0">
                            <xs:complexType>
                              <xs:sequence>
                                <xs:element type="xs:string" name="name"/>
                                <xs:element name="values">
                                  <xs:complexType>
                                    <xs:sequence>
                                      <xs:element type="xs:string" name="value" maxOccurs="unbounded" minOccurs="0"/>
                                    </xs:sequence>
                                  </xs:complexType>
                                </xs:element>
                              </xs:sequence>
                            </xs:complexType>
                          </xs:element>
                        </xs:sequence>
                      </xs:complexType>
                    </xs:element>
                    <xs:element type="xs:string" name="name"/>
                  </xs:sequence>
                </xs:complexType>
              </xs:element>
            </xs:sequence>
          </xs:complexType>
        </xs:element>
      </xs:sequence>
      <xs:attribute type="xs:byte" name="version"/>
    </xs:complexType>
  </xs:element>
</xs:schema>
If errors are detected, an exception is thrown and the framework shuts down.
It is recommended that the security policy file is verified against the provided XML Schema. Linux systems may use xmllint for this purpose as shown below.
xmllint --schema <xml schema>.xsd <security policy file>.xmlStartup Checks
ESF security enhancements add the following checks that are performed at startup:
-
Policy file fingerprint
-
Startup command line fingerprint
-
Command line blocked parameters
These checks are performed when ESF is operating in production mode.
Policy File Fingerprint
The policy file fingerprint is calculated by ESF at first boot in production mode. If the applied security policy has to be changed, it (located at the path /opt/eurotech/esf/kura/security.policy) must be updated with ESF running.
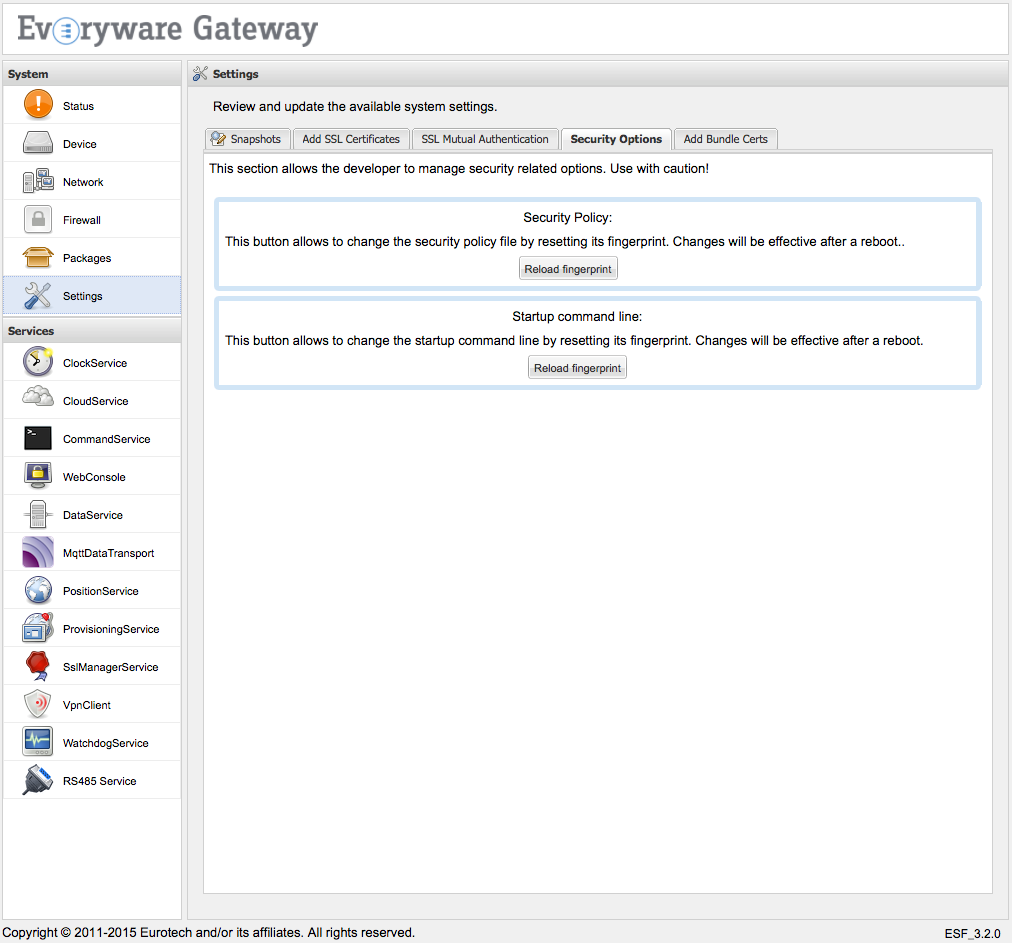
Next, using the ESF Gateway Administration Console, the policy file fingerprint must be reloaded as shown in the screen capture below.
This feature is available by selecting the Settings option in the Systems area of the console and selecting the Security Options tab, and then clicking on the Reload fingerprint button provided in the Security Policy area.

Startup Command Line Fingerprint
When ESF runs in production mode, it verifies the consistency of the command used to start it.
At first boot in production mode, ESF determines the hash of the startup command line and uses this value as a reference to compare the fingerprints obtained at subsequent startups.
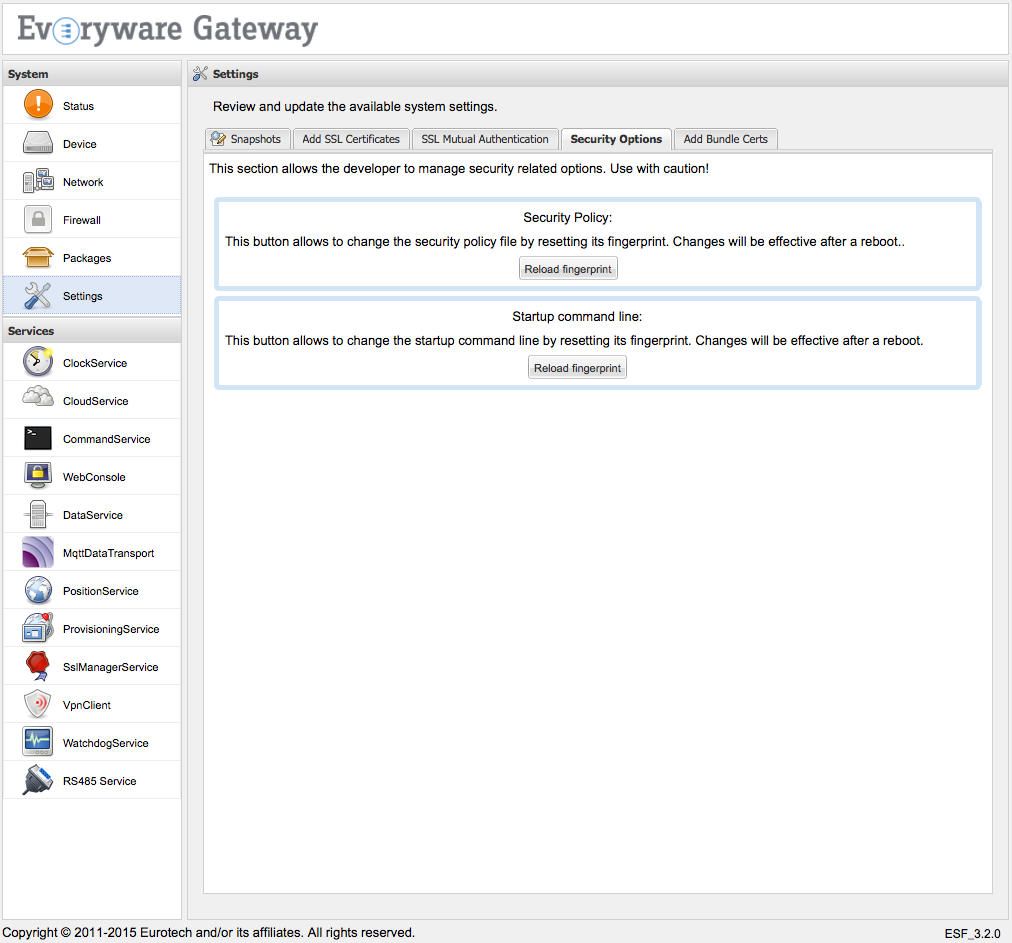
Using the ESF Gateway Administration Console, the startup command line fingerprint may be reloaded as shown in the screen capture below.
This feature is available by selecting the Settings option in the Systems area of the console and selecting the Security Options tab, and then clicking on the Reload fingerprint button provided in the Startup command line area.

Command Line Denied Parameters in Production Mode
ESF performs checks on the start script to protect against placement of profilers, as well as to safe-guard information about its design and operations and memory storage. For this purpose, ESF performs the following parameter checks when operating in production mode:
-
HeapDumpPath - is set to /dev/null
-
-Xdebug - is not defined
-
-Xrunjdwp - is not defined
-
-Xbootclasspath: - is not defined
-
-XX:StartFlightRecording - is not defined
-
-agentlib: - is not defined
-
-agentpath: - is not defined
-
-verbose - is not defined
ESF Gateway Administration Console (Web UI) Security Improvements
The ESF Gateway Administration Console features that prevent security breaches are described in the following sections.
Arbitrary File Write
ESF sanitizes extracted file names to block directory traversal attacks and guard against security attacks through file uploads using custom and malicious ZIP files .
ESF protects against DOS attacks through file uploads by providing the ability to configure a maximum size of the extracted content of 100 MB and a maximum number of 1024 extracted files. These settings may be configured in the kura.properties file using the following parameters:
-
file.command.zip.max.size (size specified in MB)
-
file.command.zip.max.number
XSS on User and System Data
ESF sanitizes data to guard against XSS attacks and checks data that is fetched from the operating system.
Hidden Web Passwords
ESF prevents the transfer of password values to the client browser. This feature may also defend against brute force attacks based on knowledge of password size.
XSRF (Cross-site Request Forgeries) Attacks
ESF checks all Gateway Administration Console interactions using XSRF tokens. These single-use tokens are session related and are checked prior to every user interaction on the device side.
Customer Certificates and Bundle Signing
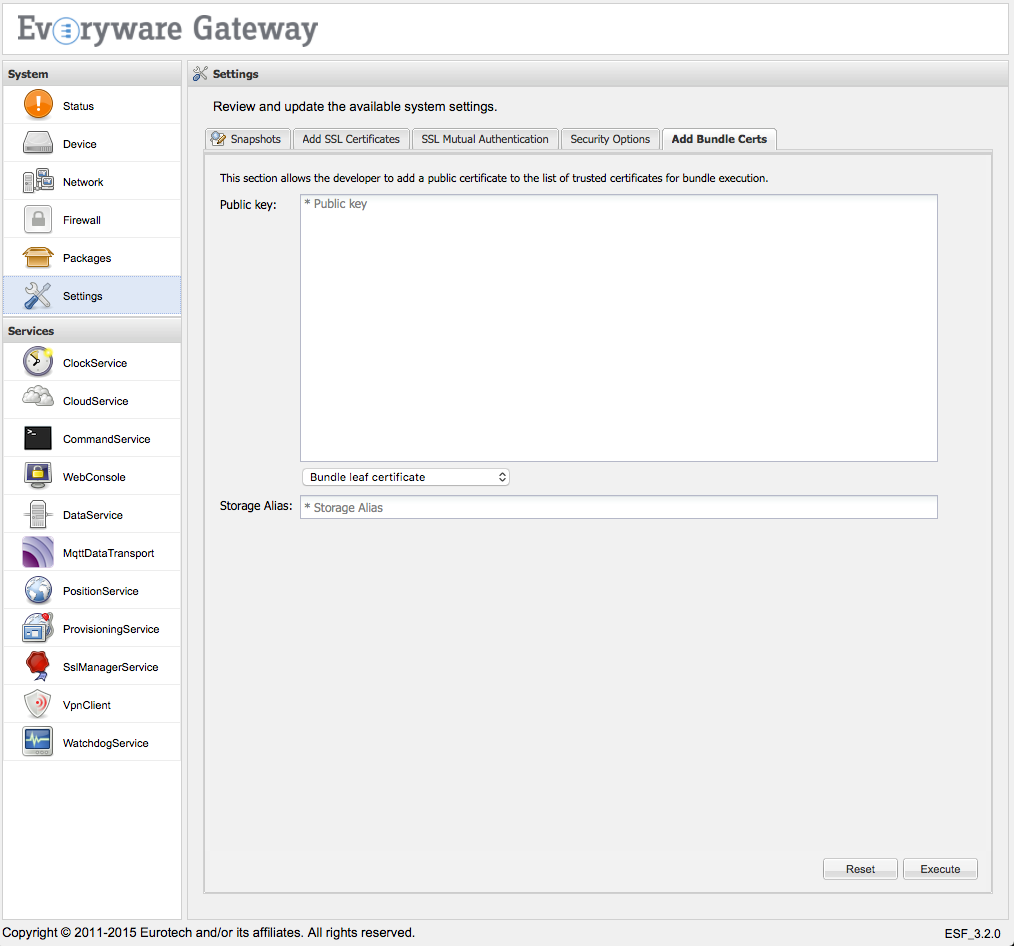
For security purposes, bundles should be signed in order for execution to be enabled in production mode.
Keys Generation
Bundle signing certificates can be created in the following ways:
-
Self-signing the public key
-
Signing the public key with the company's certificate chain
-
Creating a new public/private key pair and signing the public key by a trusted CA
Self-signed Keys
To create the pair of public/private keys that will be used to sign bundles, perform the steps that follow.
- Use tools such as keytool or openssl to generate a new pair of keys:
keytool -genkey -keystore KeystoreName.ks -alias CertAlias -storepass StorePassword -keypass CertPassword -dname "CN=www.companyname.com,O=Company Name,C=US"
Commas ( , ), quotation marks ( " ) and semicolon ( ; ) should not be used inside the DN. Otherwise, character escaping is needed to have the DN correctly parsed.
- Self sign the public key:
keytool -selfcert -keystore KeystoreName.ks -alias CertAlias -storepass StorePassword -keypass CertPassword -dname "CN=www.companyname.com,O=Company Name,C=US"- Export the public key:
keytool -export -v -keystore KeystoreName.ks -alias CertAlias -file CertName.cert -storepass StorePassword -keypass CertPassword- Import the public key into the ESF-protected keystore:
The exported certificate will be in der format. In order for the certificate to be imported into the protected ESF keystore from the Gateway Administration Console, it must be converted into pem format using the openssl command shown below.
openssl x509 -inform der -in CertName.cert -out CertName.pem
The security.policy file has to be consequently updated in order to allow the execution of bundles signed with this new certificate.
Following the previous example, the new rule to be applied is the following:
<esf:policy>
  <esf:access>ALLOW</esf:access>
  <esf:conditions>
    <esf:condition>
      <esf:name>
        BundleSignerCondition
      </esf:name>
      <esf:value>
        "CN=www.companyname.com,O=Company Name,C=US"
      </esf:value>
    </esf:condition>
  </esf:conditions>
  <esf:permissions>
    <esf:permission>
      <esf:name>java.security.AllPermission</esf:name>
      <esf:values>
        <esf:value>
          *
        </esf:value>
        <esf:value>
          *
        </esf:value>
      </esf:values>
    </esf:permission>
  </esf:permissions>
  <esf:name>
    All permissions to bundles signed with this certificate
  </esf:name>
</esf:policy>
Bundle Signing
Bundles can be signed in the following ways:
-
Using the command line
-
Using Eclipse
-
Using Maven during the build process
Command Line Signature
To sign bundles from the command line, use the jarsigner command:
jarsigner -keystore file:<keystore_name>.ks -storepass <keystore_password> -keypass <key_password> <bundle_to_sign>.jar <alias>To verify the signature, use the following command:
jarsigner -verify -keystore file:<public_key_keystore>.ks <bundle_to_sign>.jarBundle signature with Eclipse IDE
The Eclipse IDE provides bundle signing signature feature, abstracting jarsigner.
A simple guide on how to export bundle plugins and how to sign them is available here.
Updated 3 months ago
